| Manufacturer | AZ model |
|---|---|
| Product # | AZ4864 |
| Scale | 1/48 |
| Scale Mates model info | https://www.scalemates.com/kits/az-model-az4864-fairey-firefly-tt1--194860 |
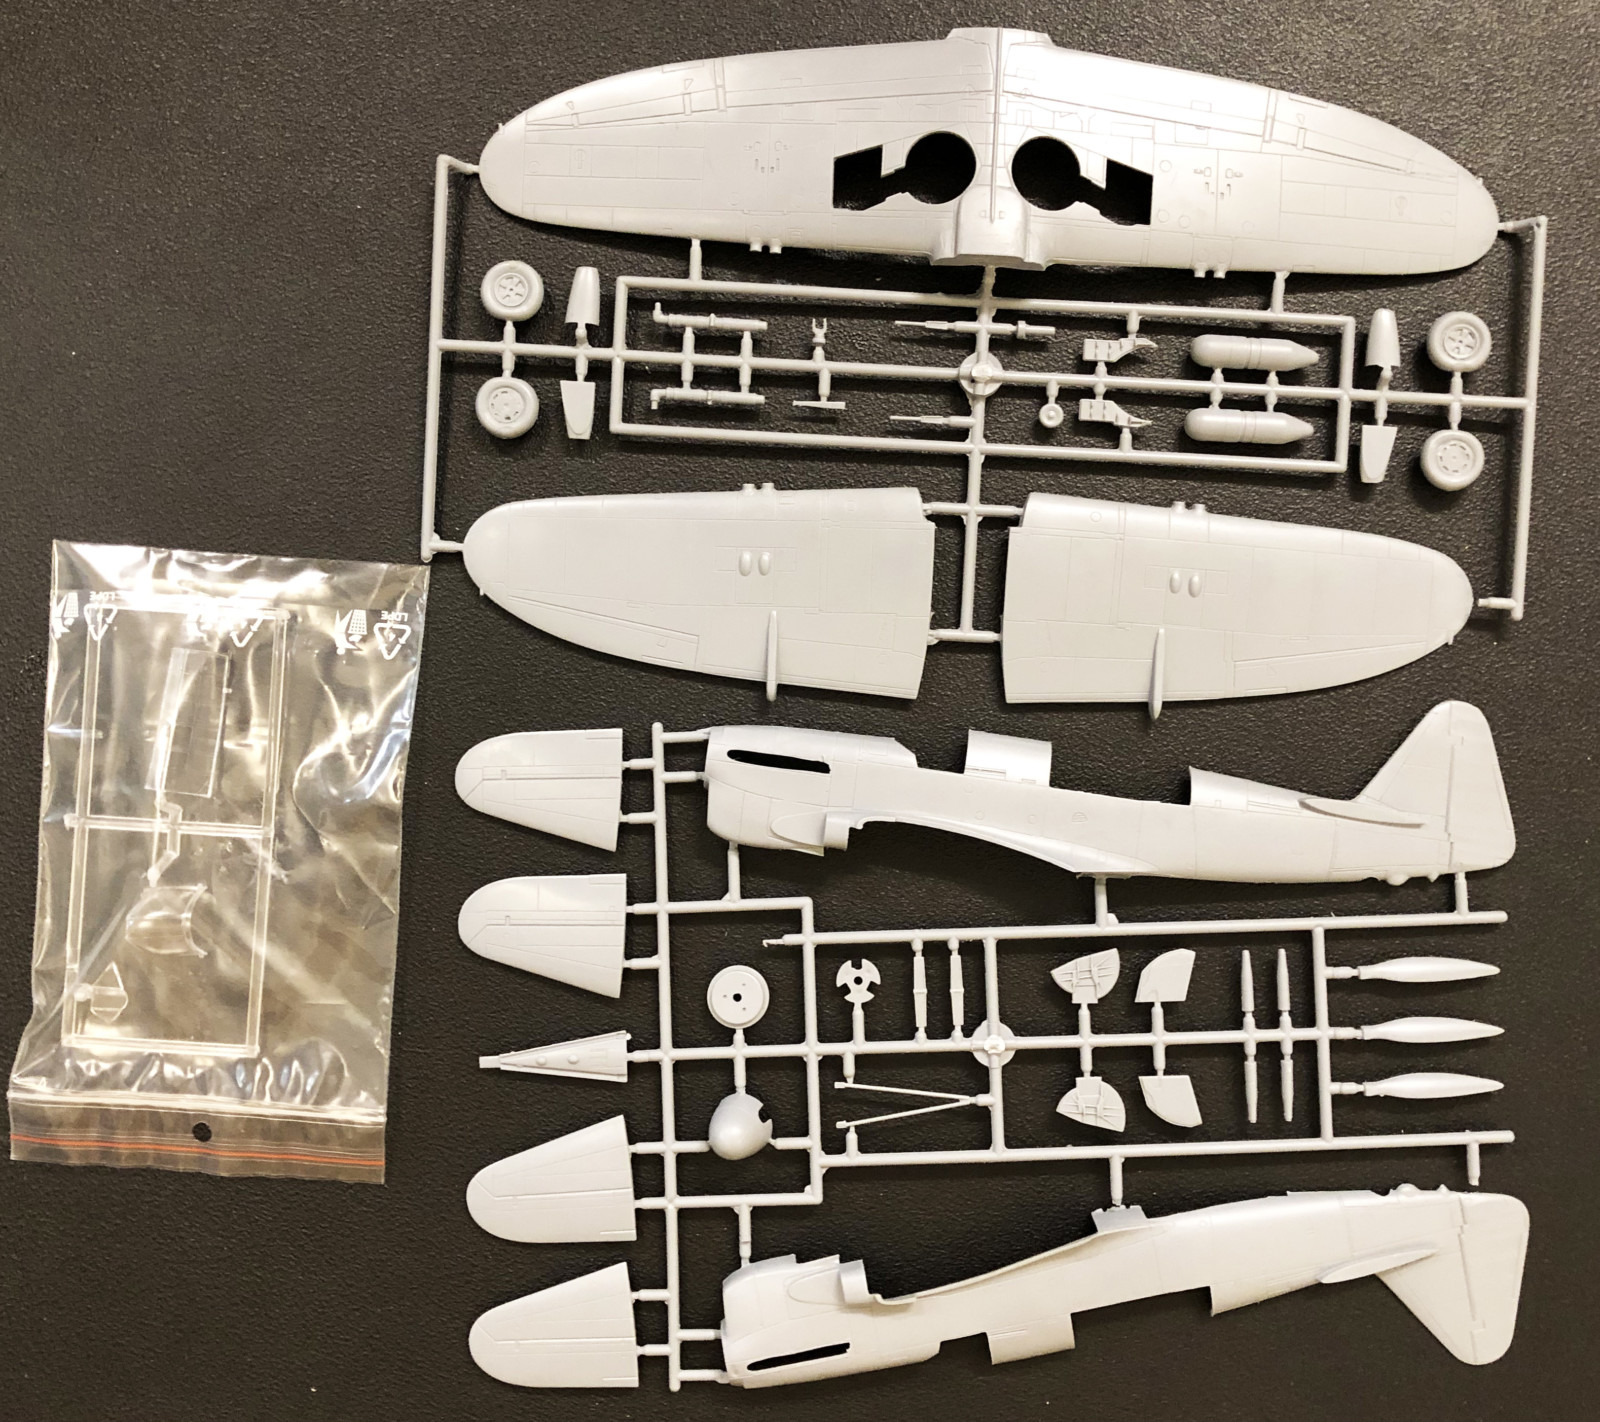
| Content in box |
|

This kit was first released in 2001 by Grand Phoenix and in 2007 it was re-released by AZ model with new parts. They have since released it four more times with new parts or decals. This is the latest release.
This kit is very varying in quality. The base kit is somewhat a hog of a kit. Even if the panel lines etc. is nicely depicted, some other aspects as fit and design choices are at times horrible. There are several protruding left overs from the moulding in clearly visible places that needs to be handled with care (see for example the outside of the landing gear doors depicted in the building gallery). Even if some parts fits well things like the joint at the wing root top is equally scary (see building gallery).
To compensate for this they have thrown in both resin and photo etch parts. These are fine and really save the kit in some aspects. I would not have liked it to be forced to use the original wheels in the kit. Not only were you supposed to glue together two halves but they were badly moulded too. The resin wheels was okey though.
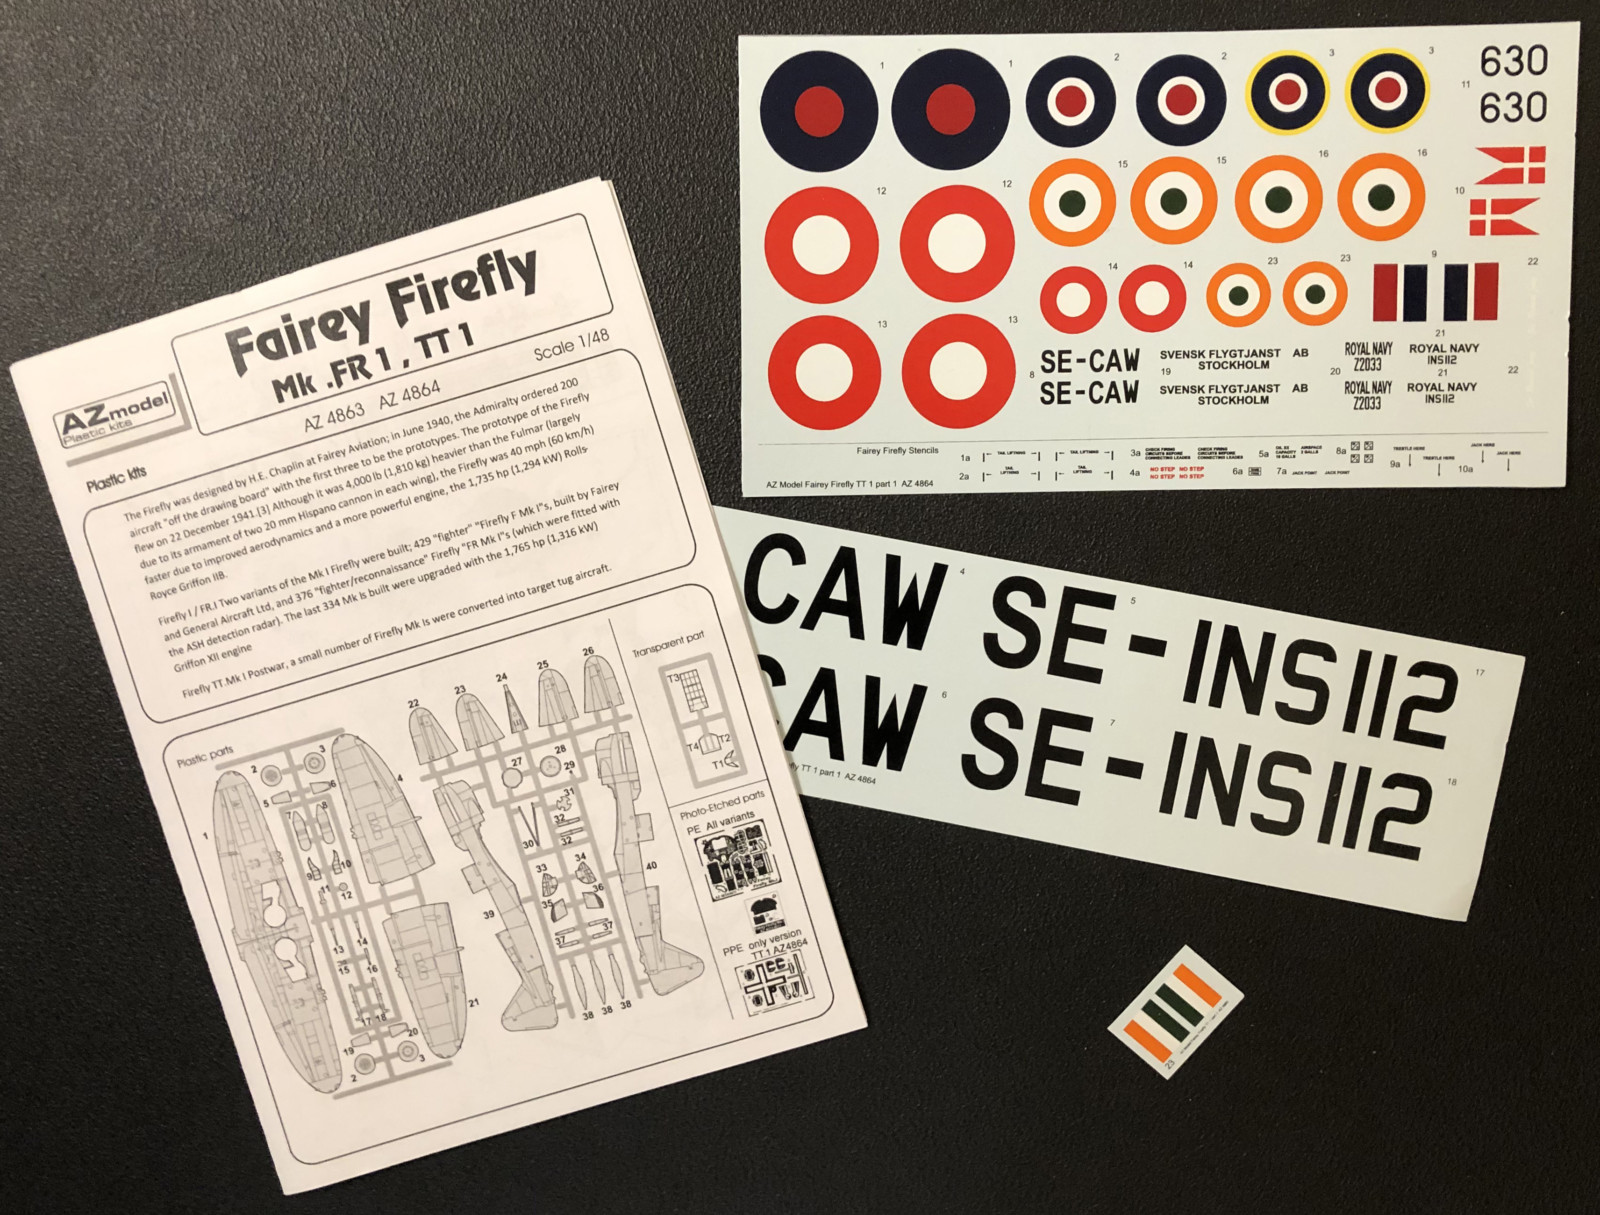
The decal sheet has decals for four different markings:
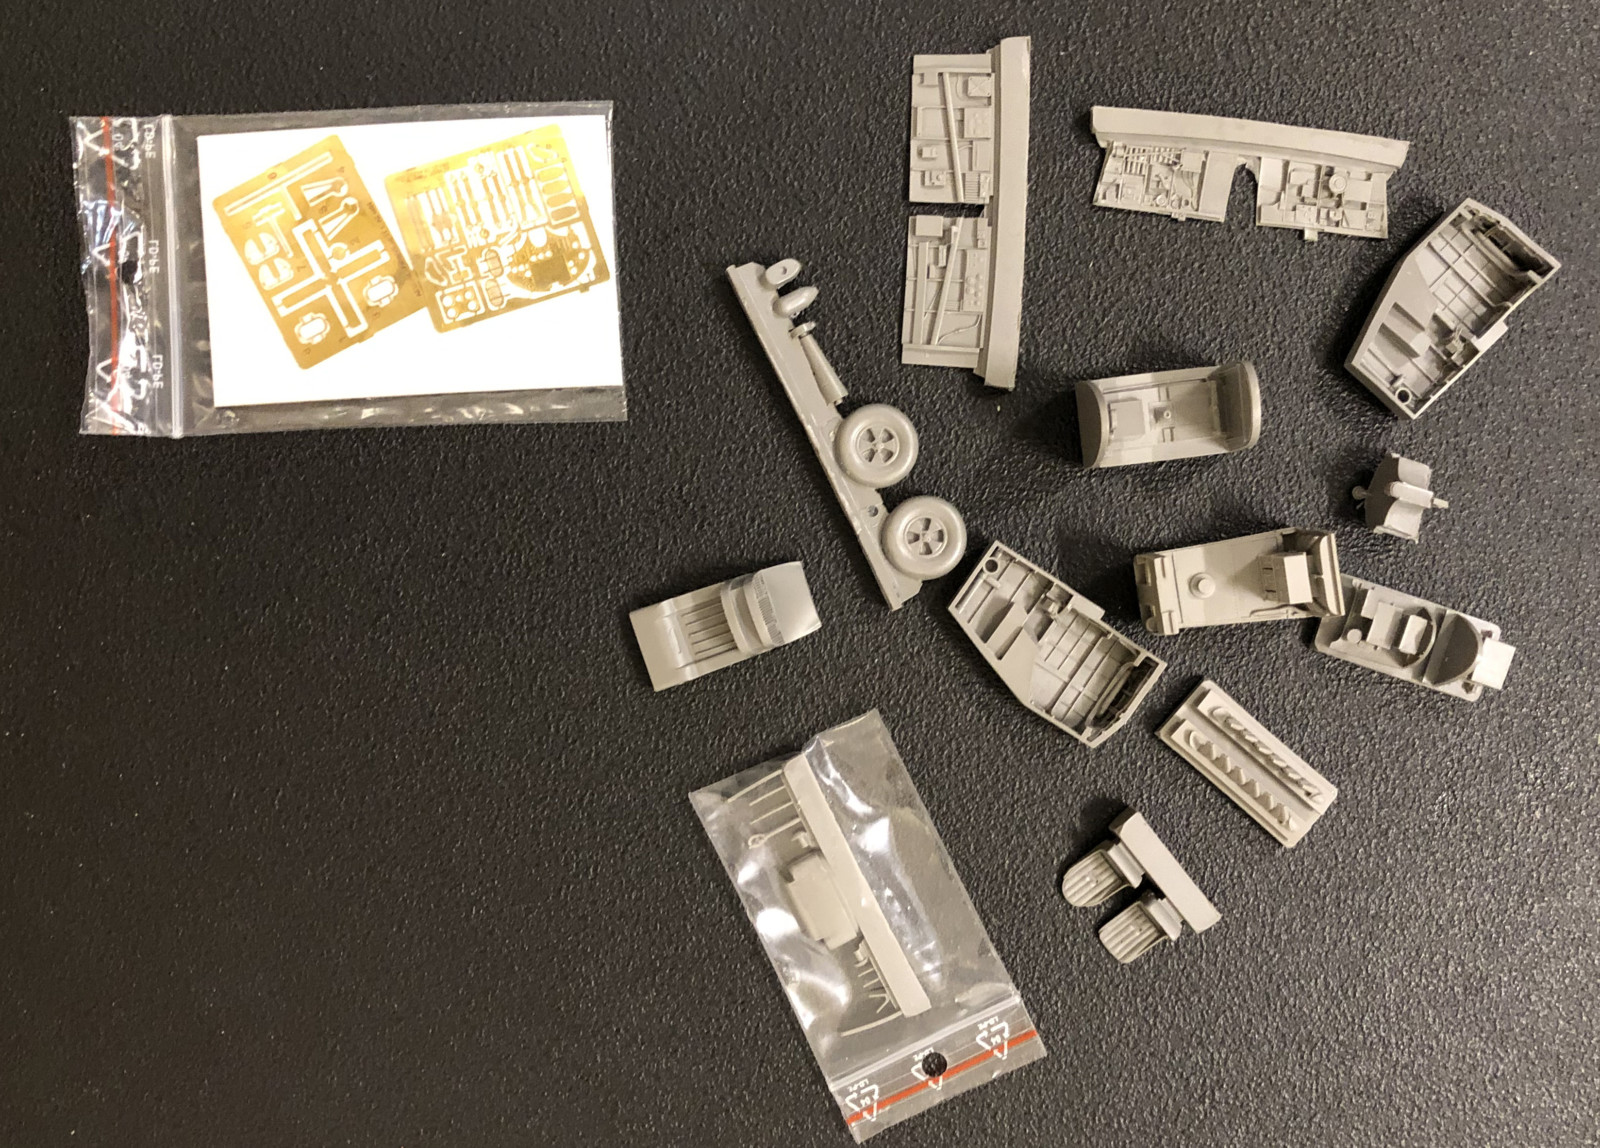

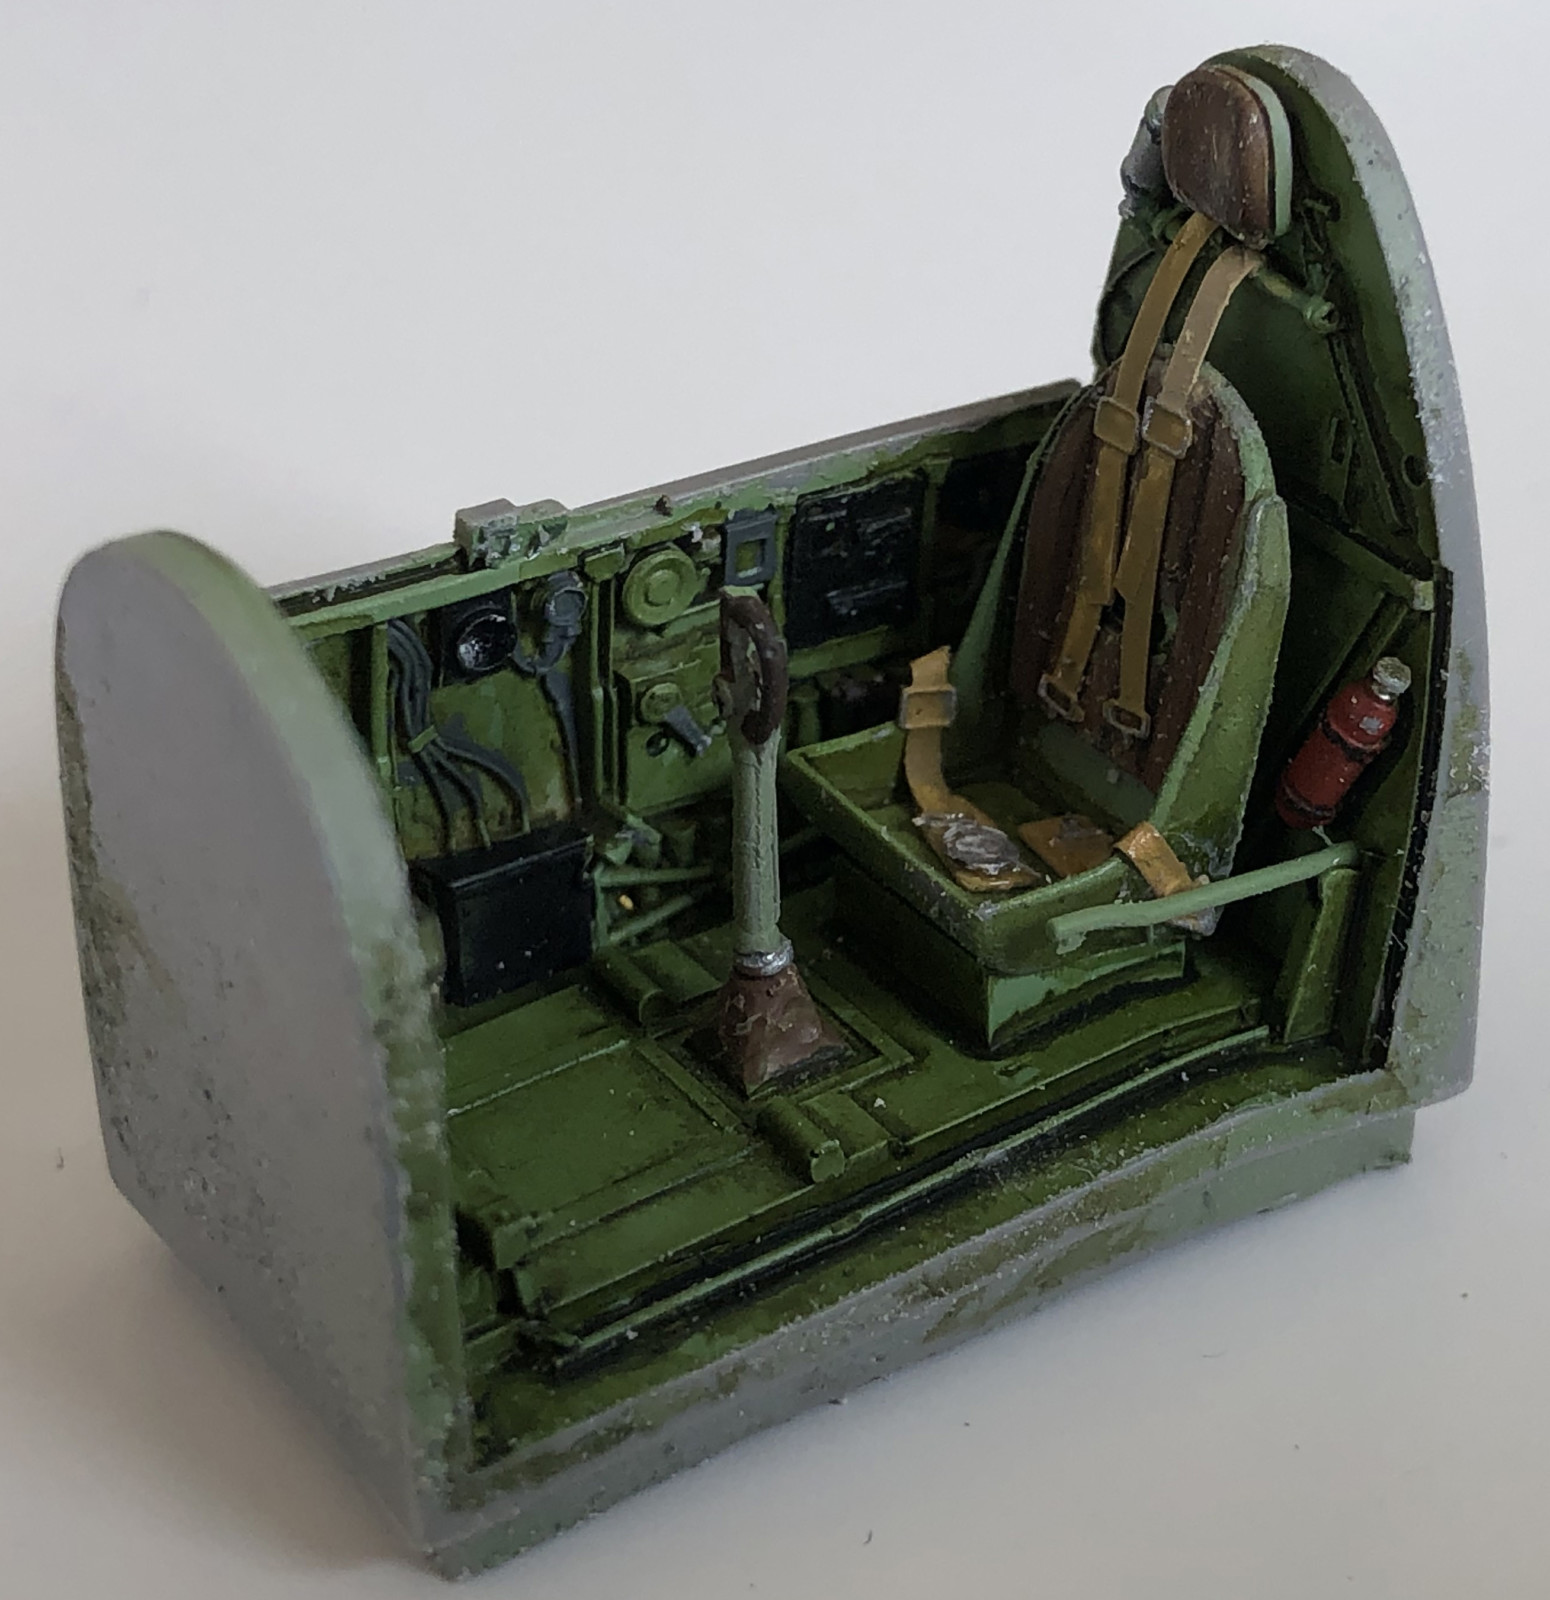
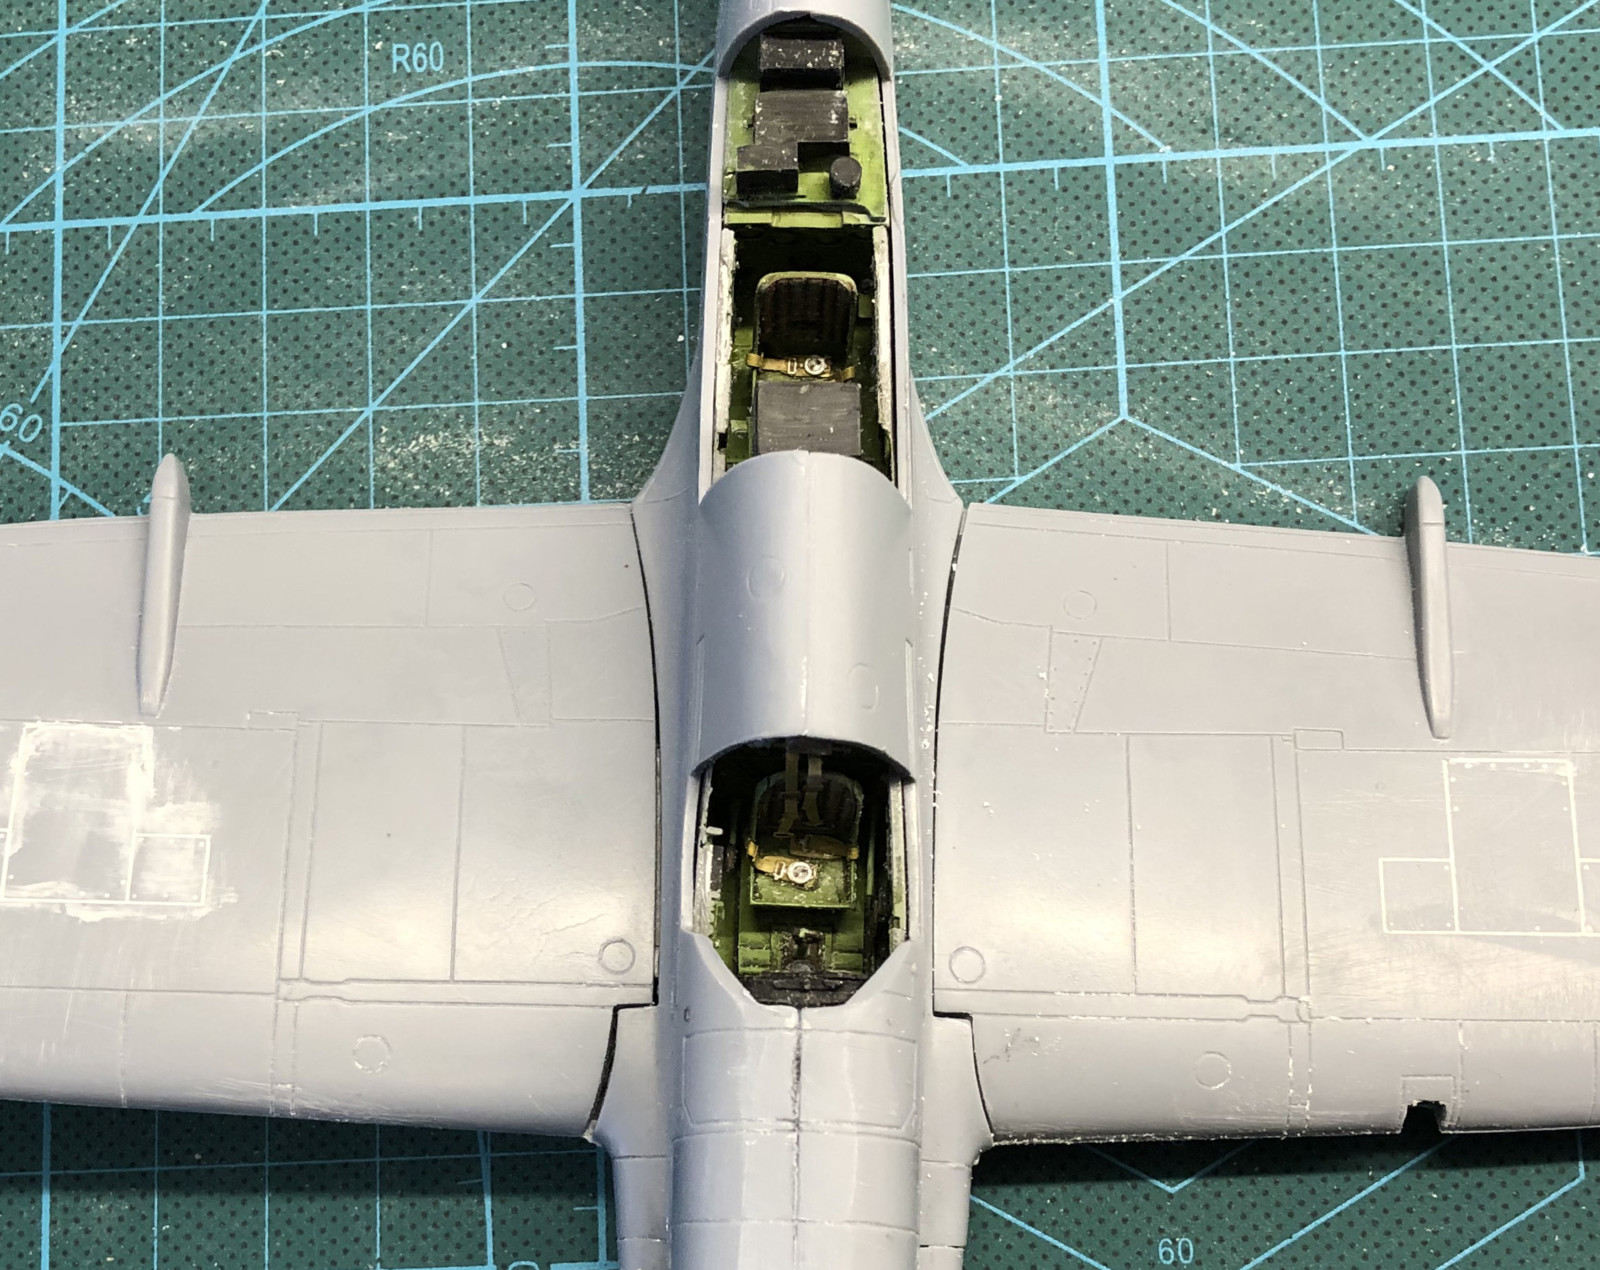
Kicking off with the resin parts for the two inside compartments. Here is where this kit excels with it's detailing. Some time can be spent on painting these and be sure to use a few more colours than indicated in the instructions. Some reference pictures should help. I tried to cheat in the beginning by not sawing/filing off the excess resin from the parts as they wouldn't be visible anyway. But I soon realized that to get the wheelhouse etc. into place this is necessary. So don't cheat.
The instructions are not very clear on exactly where the parts go so some dry fitting is really necessary. As is again some good reference pictures of the real thing. Putting the fuselage halves together looks challenging but when you realize that the plate with the arrester hook placing and the tail wheel can be after fitted it gets a bit easier.
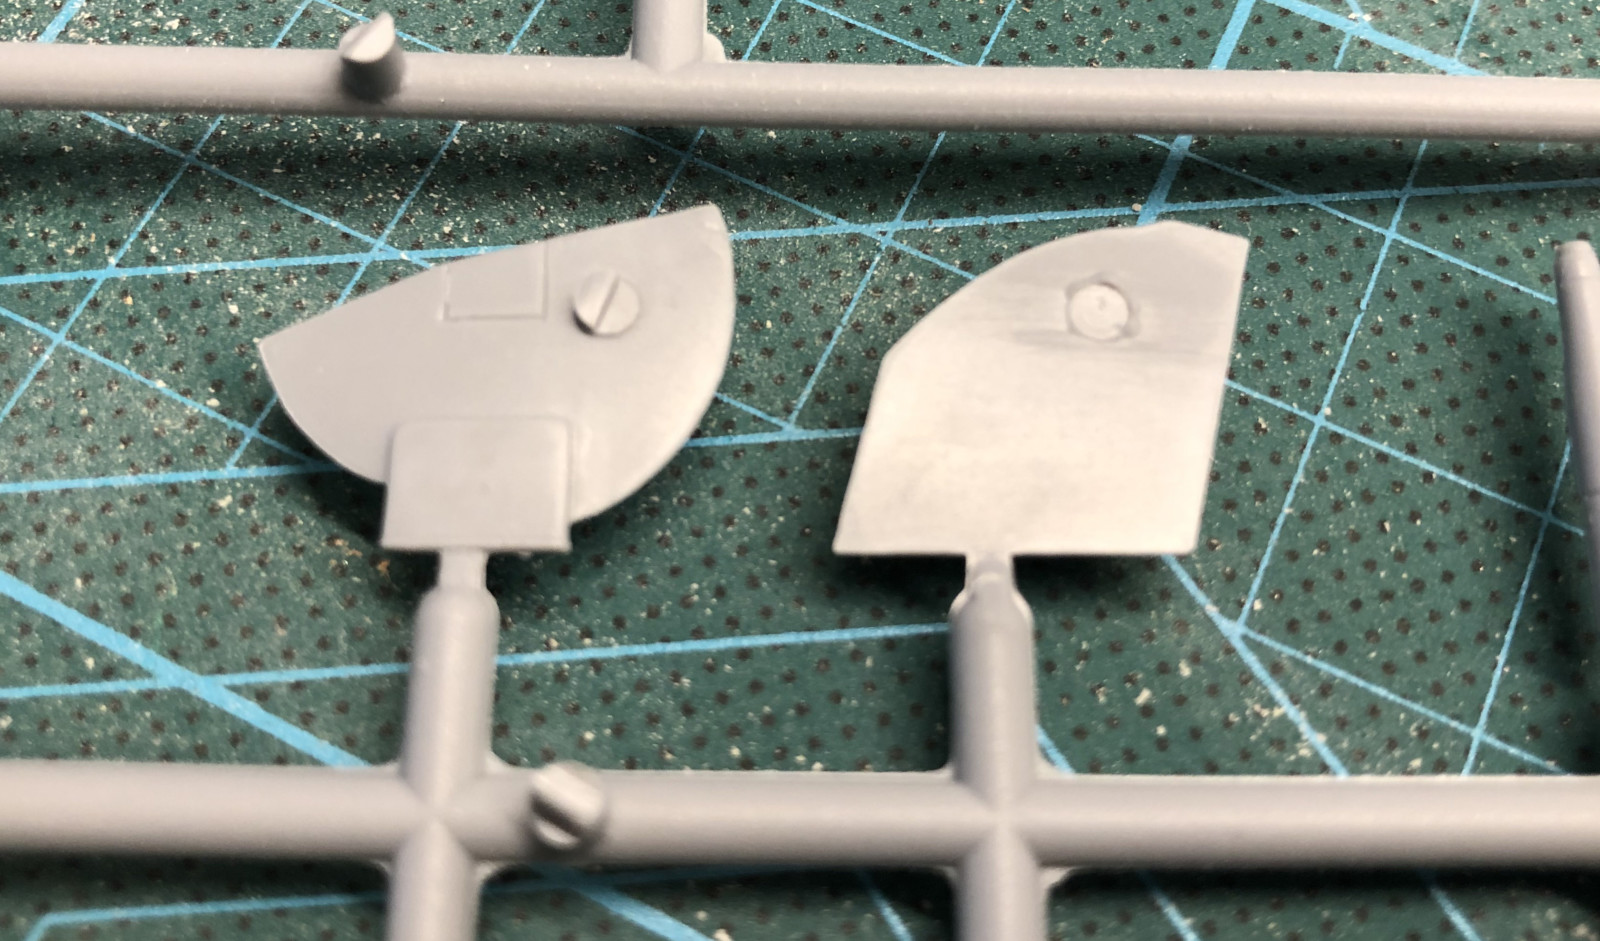
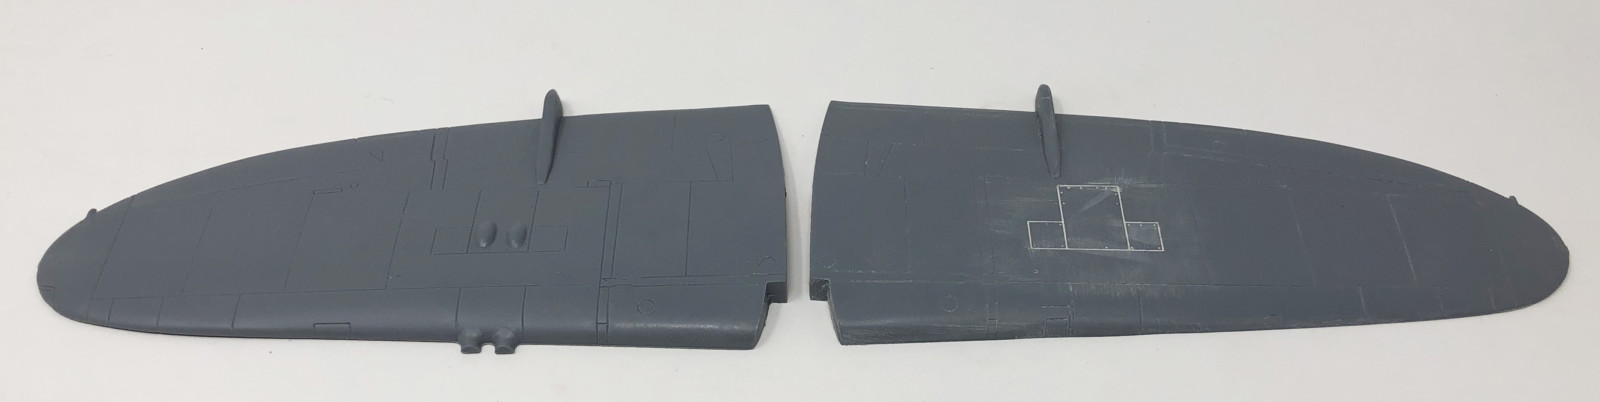
The next step is the one where you really have to pay attention! All four versions in this kits are target tugs (TT.1). This means they did not have any guns. The instructions have you simply not mounting the gun pipes. But this leaves the stubs on the wing edges as well as the blisters on the wings. If you want to do this the right way you should file these away. As well as filling the panel lines for the guns access hatches and the ejection holes for the empty cartridges on the underside. Not to indicate this in the instructions I find a bit sloppy. Another thing with the wings is that the landing light and the position lights on the wing tips are just indicated with panel lines and in solid plastic. I cut these away and replaced them building up new in transparent canopy glue.
Placing the wheel houses on the lower wing part can be a daunting task. However I tried I could not get them to fit. Not until I realized where the wheel doors went did I have the nerve to place them with a considerable gap on the outer edge of the opening. The guiding pegs on the inside was not to much help. Then, even though I put much attention to getting the wings together correctly there was large gaps in the wing root joints. This took a lot of filling and sanding to get right. On top of that there are no guiding pins or anything on the stabilizer tail wings. This is something you seldom find and for a reason.
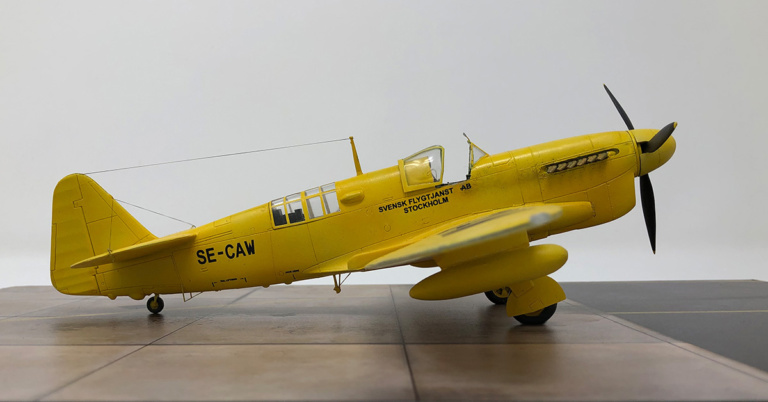
I did this kit to do the "Svensk Flygtjänst" version. As usual I'm using Vallejo's Model Air. A primer in white and some pre shading with 71.002 Medium Yellow then a thin layer of:
Giving this a glossy coat it was time for the decals. These are actually quite good. Very thin but manageable. No Micro Sol was needed as they settled nicely to the surface and panel lines. These planes were quite glossy so I just added some satin varnish where needed.
Mounting the landing gears went quite okey. The tail wheel though did not fit the very small strut but I got there eventually. Something missing in the kit was the extra fuel tanks that was commonly mounted. I found two (not exactly correct but still) in my stash of leftovers. The fine detailing as the target tug machinery is quite fiddly but with some magnifying glasses and patience I got there in the end.
This kit is a painted hog in my opinion but given time and patience you can get a reasonable result. The resin and PE parts is what saves the kit. It is also fun to build something as unusual as a target tug version.
The resin and PE parts that saves an otherwise quite bad kit
The plastic mould. Several errors that have to be rectified. Some of them could have been avoided by a better design.


