| Manufacturer | Tamiya |
|---|---|
| Product # | 61114 |
| Scale | 1/48 |
| Scale Mates model info | https://www.scalemates.com/kits/tamiya-61114-grumman-f-14a-tomcat--559650 |
| Content in box |
|
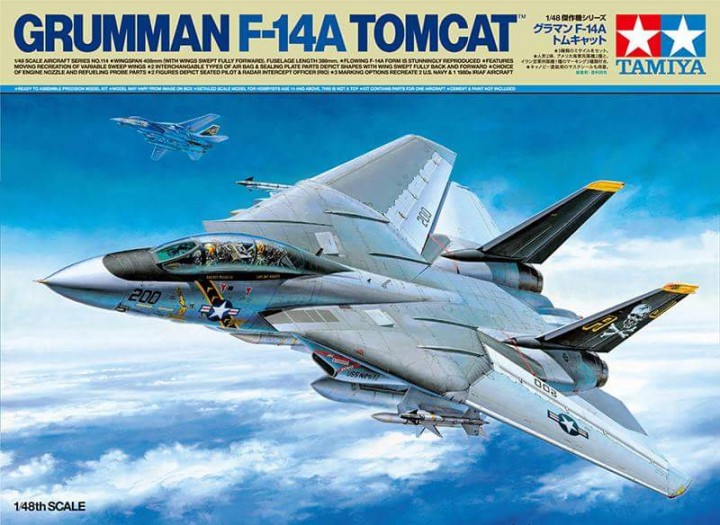
First released in 2016 this kit has been one of the flagships in Tamiya's product line. And no doubt, this is a good kit. It has been re-released in 2018 as a F-14D version, but the F-14A is still available along side the later release.
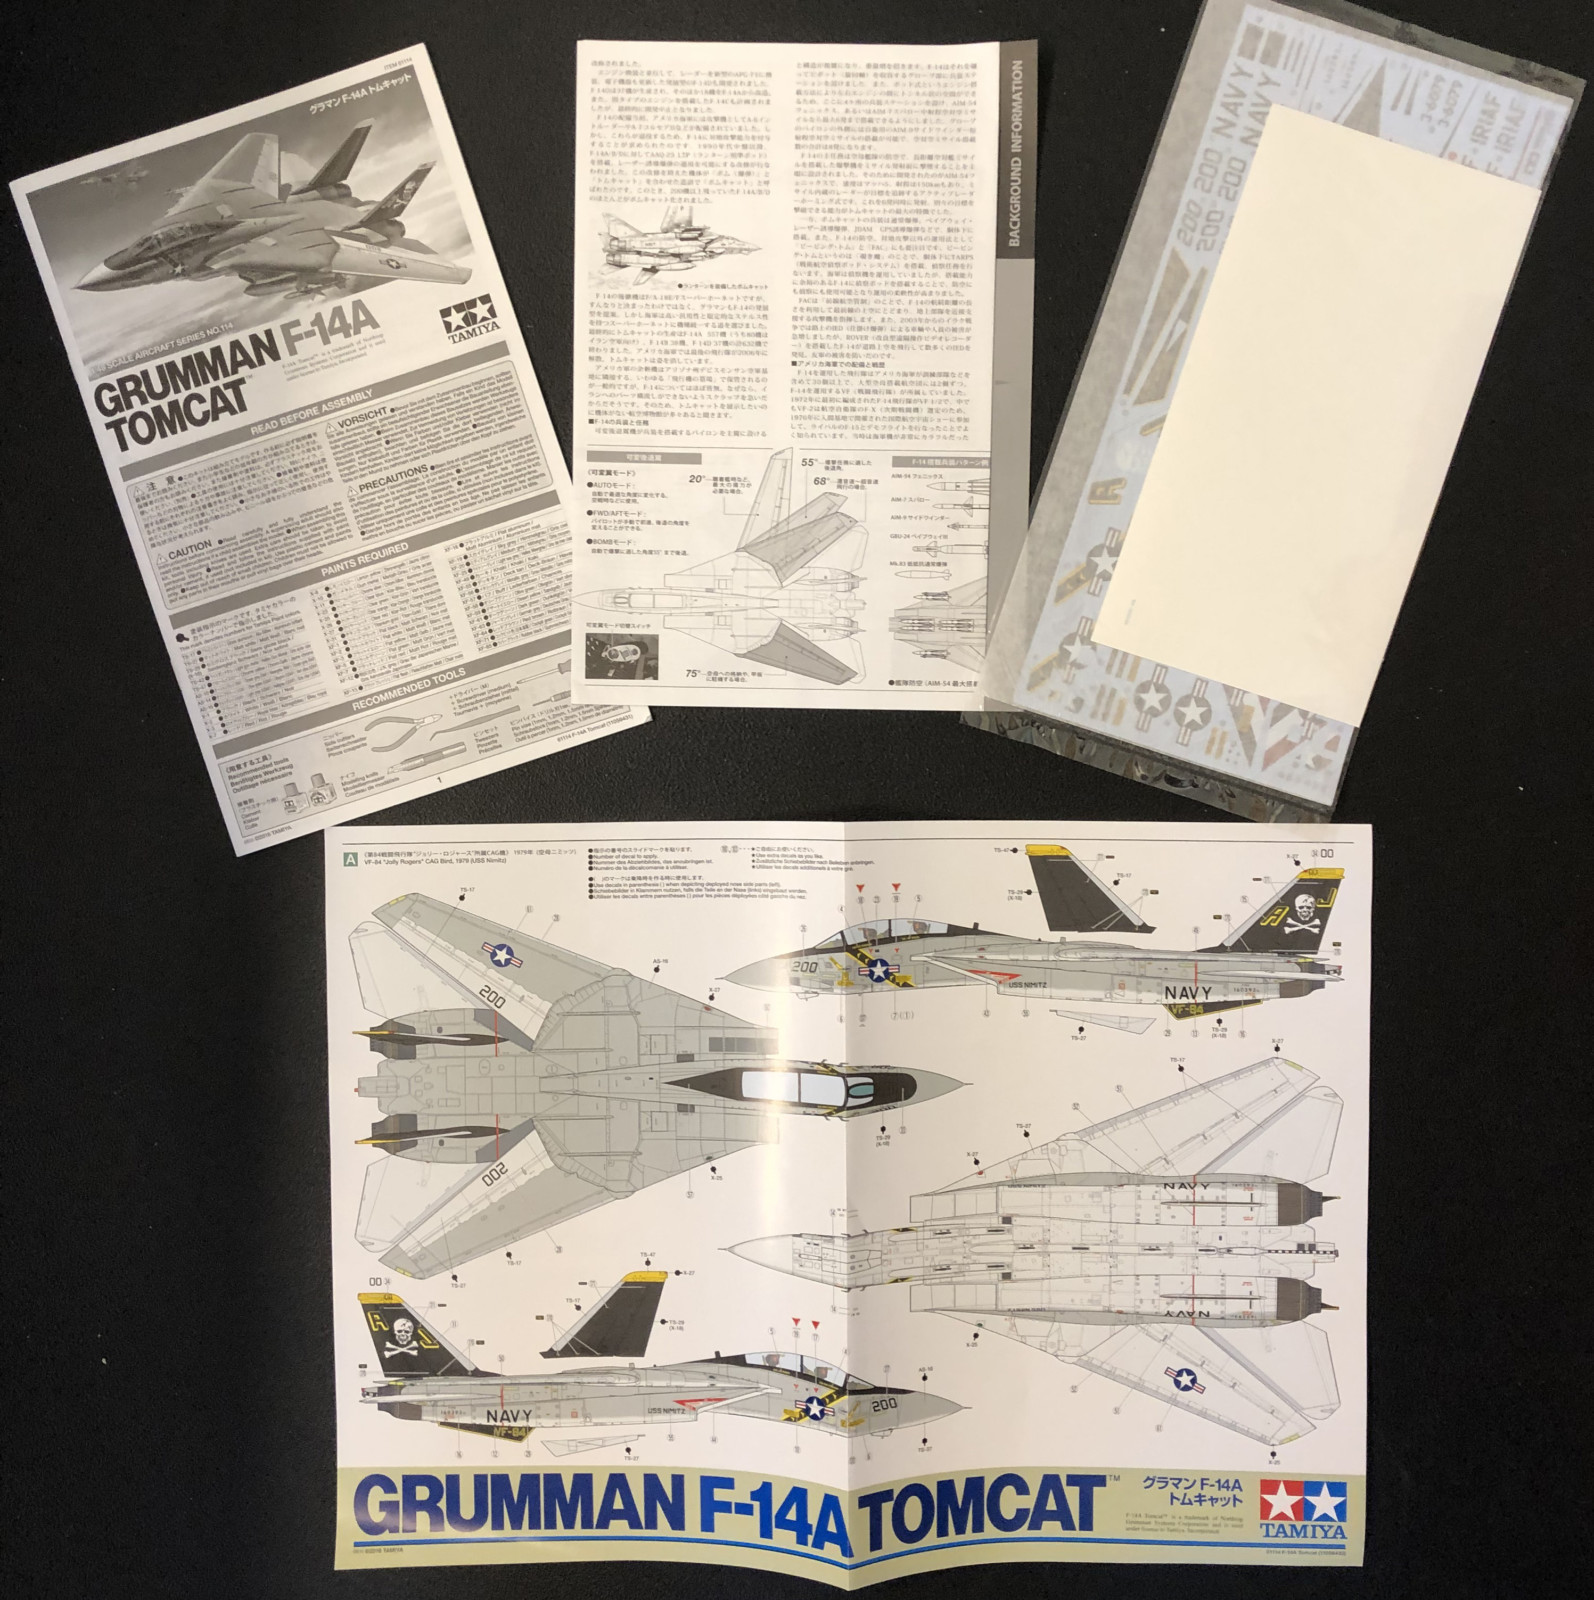
The box contains a leaflet with the history of the plane in Japanese and English including some useful information about how the wings angle was changed for different uses and how the ordnance was configured for different situations. The instructions is a 24 page booklet and it's very clear explaining the different configurations you can chose. And there are a lot. Everything from small detail differences between the three schemes available through ordnance configurations to if you want to have the kit flying or standing on the ground.
The parts are crisp and well moulded. Tamiya has made some effort to minimise the effect of the delicate attachment to the spruces so cutting the parts lose won't damage them. Also some thought have gone into designing the kit so you can paint it before attaching things that easily brakes when handling it. This includes the wings. They are movable in the finished kit and it would be very hard to paint them after they're mounted.
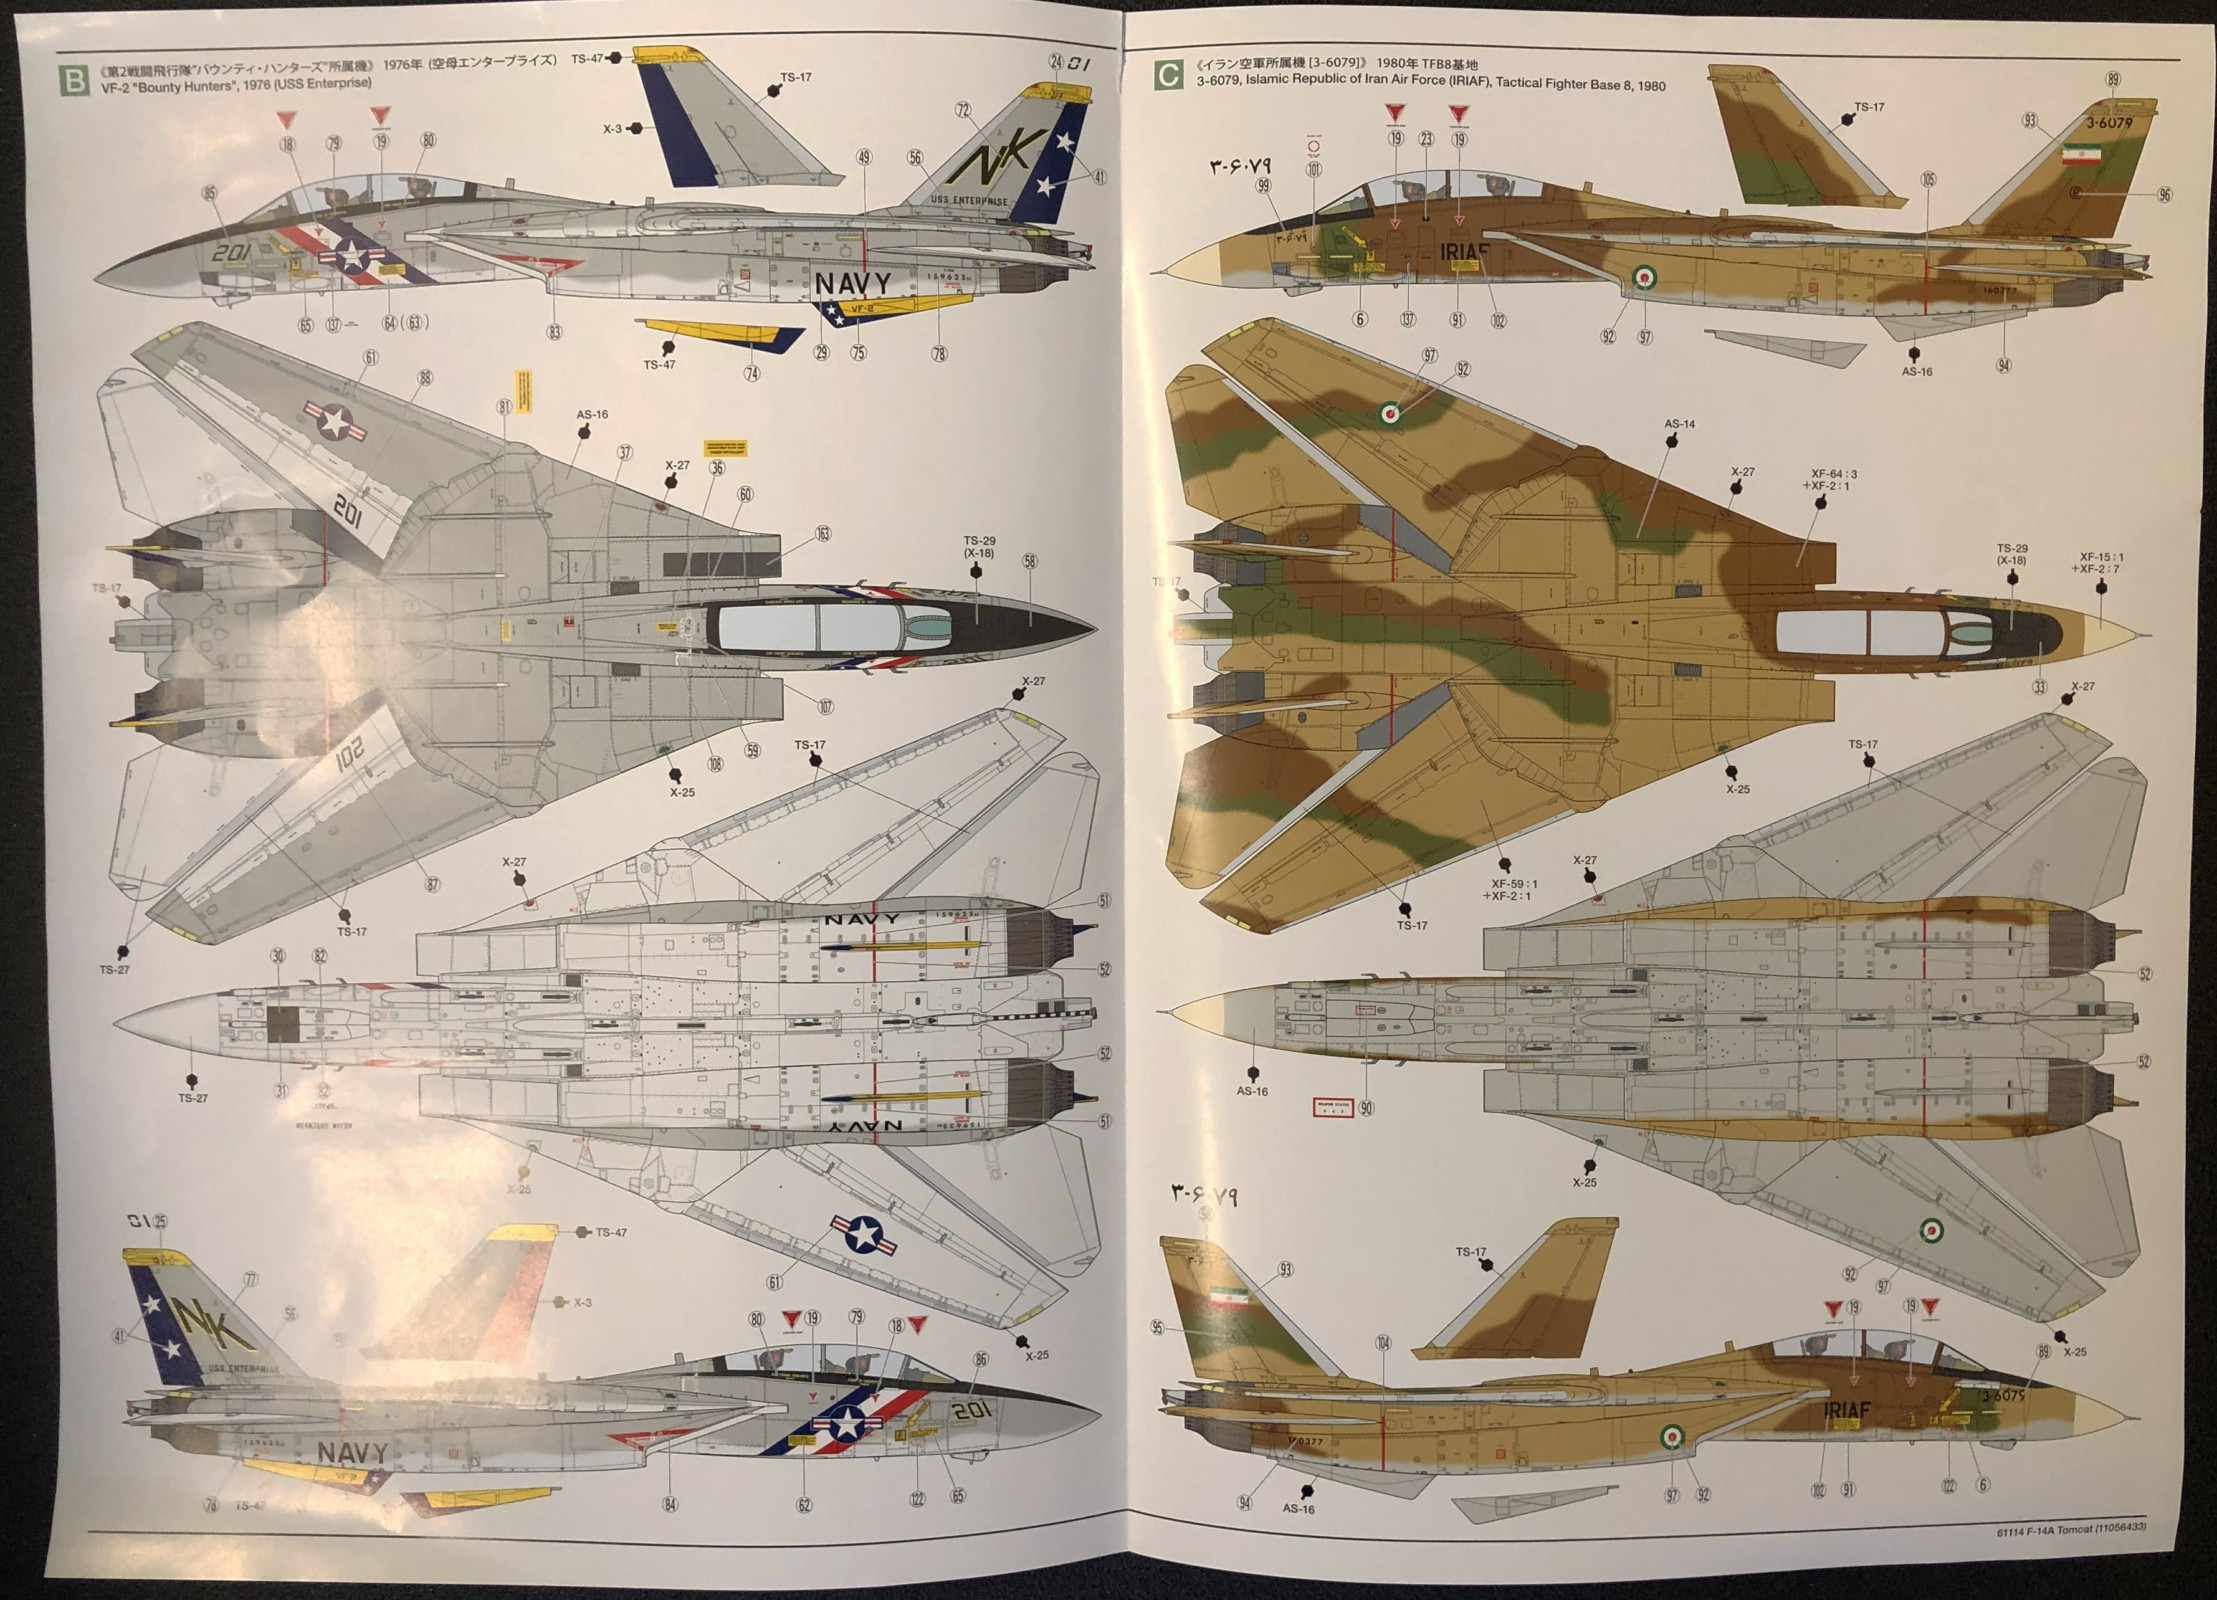
The decal sheet has decals for three different markings:


For this kit I opted to go all in on after market extras. So these are the detailing packs I bought:
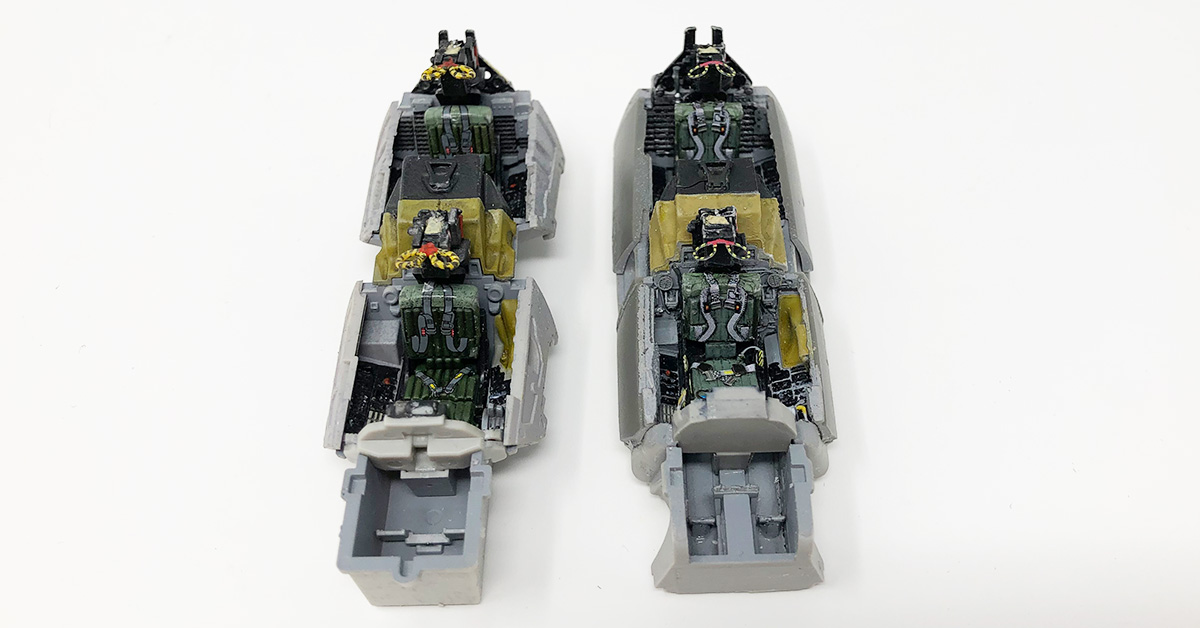
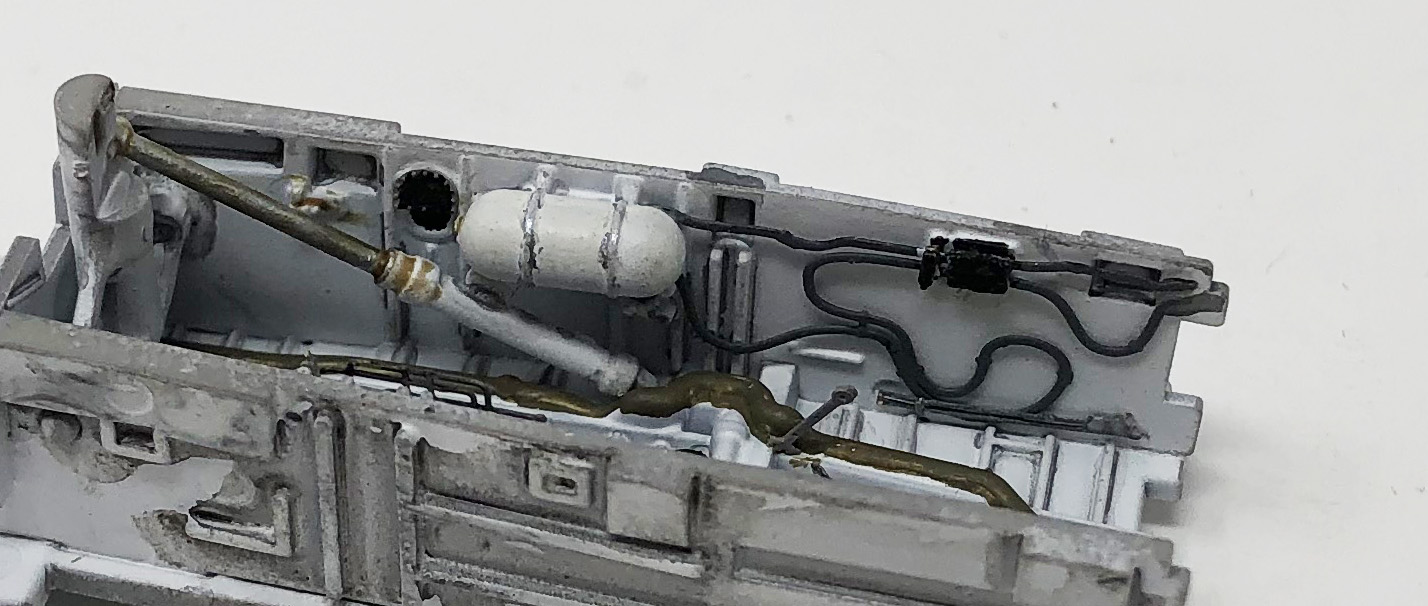
Some might argue that this is unnecessary for this kit and I can see their point. It is a well detailed kit as it is. But for the cockpit, specially, it gives a new level as you can see in the picture on the left. The left hand version is the kits original cockpit and the one on the right is Eduards detailing kit. I've built both as a comparison. Also as you can see in the front wheel well all the cables etc gives it a new dimension.
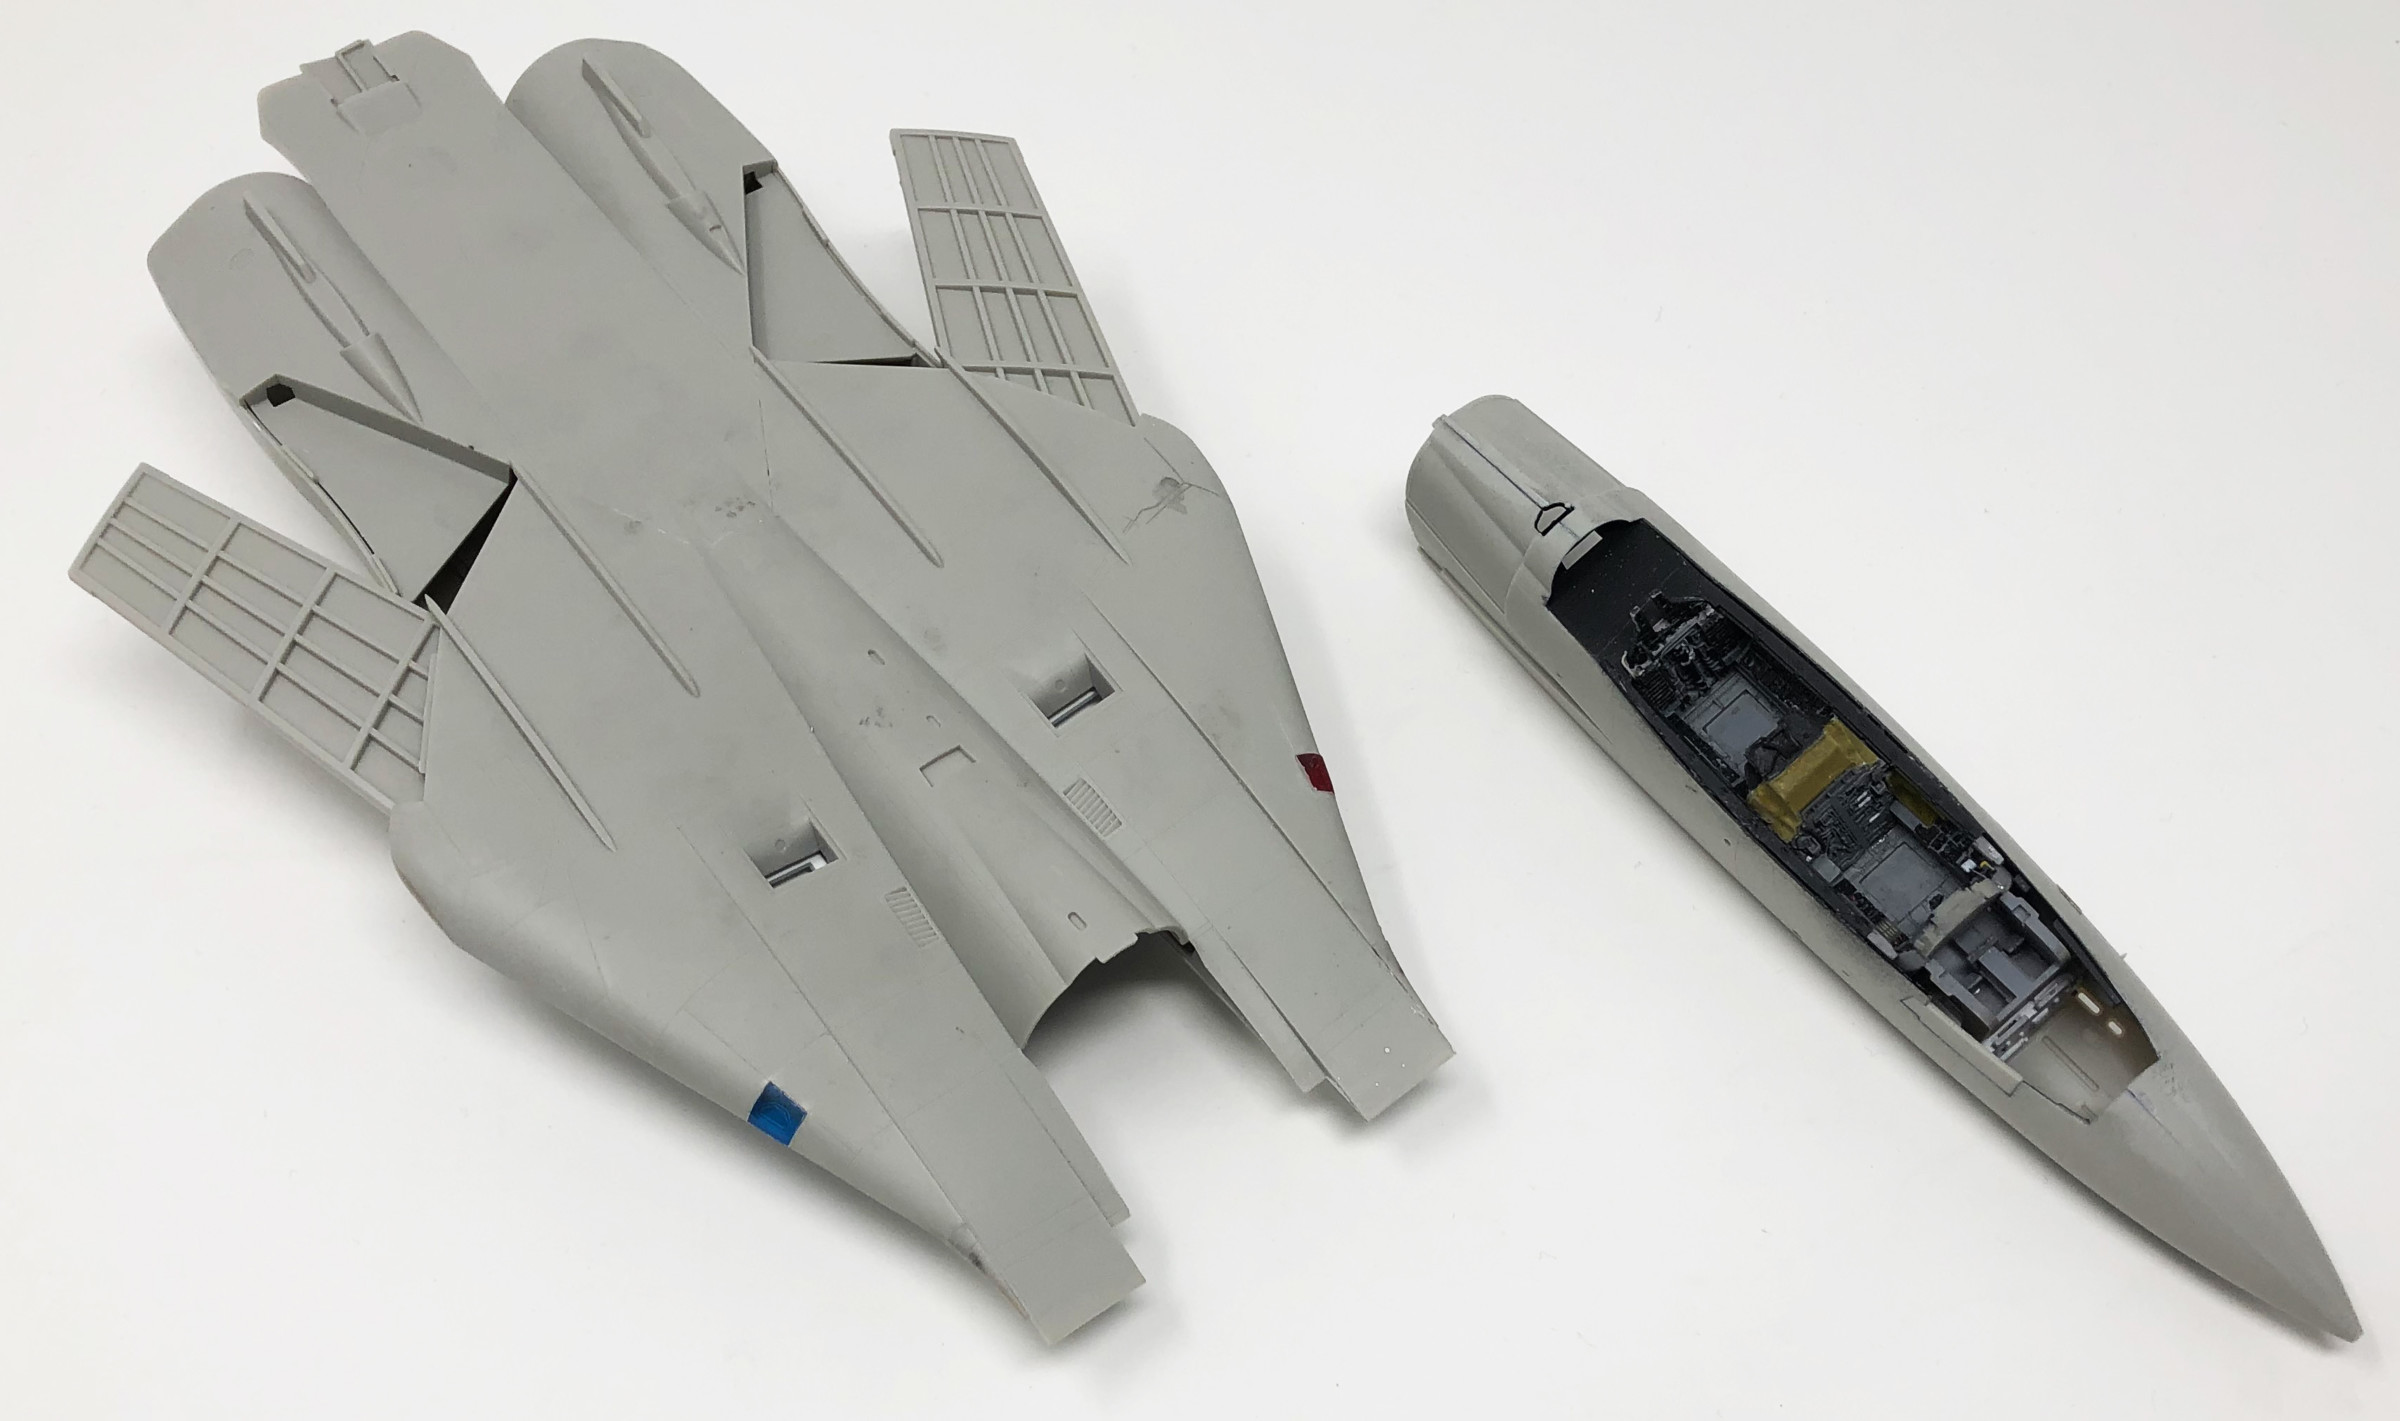
The cockpit is constructed as a well in the kit and there is, as stated, much detailing it the parts in the kit. Even if you don't use aftermarket stuff it looks really good. This is also true for the front wheel well that is the next steps in the instructions. All this goes in to a front part of the fuselage (visible in the fourth picture on the left).
The wings on this plane can be swept in our out. Tamiya has chosen to make them movable with a cogwheel construction in the main part of the fuselage. This is nice as you can adjust them depending on how you want to display the kit. This is where the metal screws come into play. They have provided exchangeable parts for the adjoining details on the fuselage. The only thing they messed here is to provide two sets of decals for these parts. The wings are then mounted on the swinging roots visible in picture three and four on the left. This is a good thing as you can paint and decal the wings before mounting them which would otherwise be a near to impossible task.
The air intakes and a plate underneath between them can be hard to get in place correctly. With some care it can be done but if you're not careful you'll end up with gaps that needs handling. The jet engines (or the end part of them) are reasonably well done. You're provided with one extended and one retracted nozzle which was not uncommon to see on the planes. It would have been nice if they'd included both extended and retracted for both engines though. The detailing kit I used contained thinner nozzles and also metal detailing inside the engine. These are not visible on the finished kit if you don't light a torch straight into the engines, so it's just for the hard core modeller.
As I use Vallejo's Model Air paints I had to do some comparisons etc. before I landed on the correct colours:
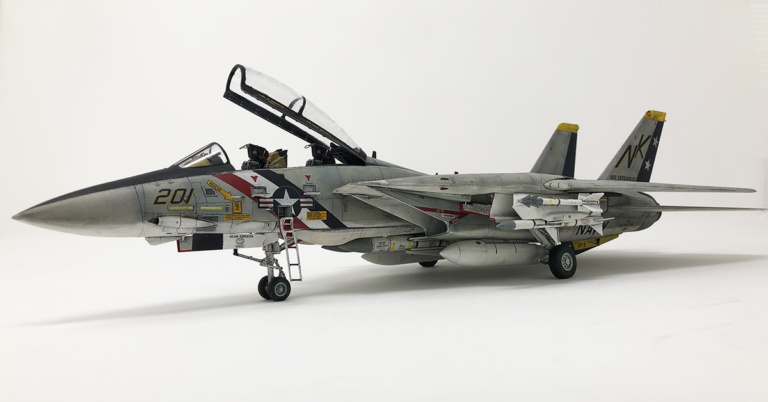
I did some pre-shading in grey on the underside and black over the top. A coat of gloss varnish and decal time. This is one of the more time consuming part of this build. There is a lot of them. Numerous "NO STEP" etc. everywhere including the ordnance. I opted to do the U.S.S. Enterprise plane "Bounty Hunters" as this reminded me of Airfix 1/72 kit I did as a youth. After this I gave the kit a coat of Flory Washes, grey for the underside and black on top. After they dried I carefully worked them over with a moist paper leaving a slightly dirty surface and accentuated panel lines. Finishing off with a coat of matt varnish.
After adding the landing gears it's time to mount the ordnance and Tamiya suggests three different set for three different roles, Multi mission, BARCAP mission and Deck launch intercept. I opted for the latter with three Sparrow, two Sidewinder and two Phoenix missiles. Finishing off with all small details like antennas and the ladder to the cockpit.
Well done kit by Tamiya. A really enjoyable build with a lot of different options.
Overall quality and detailing. Some smart design choices that makes the kit easier to handle.
No real issues here. Maybe the plate underneath the cockpit that can be hard to fit without gaps.


