
| Manufacturer | Italeri |
|---|---|
| Product # | 2757 |
| Scale | 1/48 |
| Scale Mates model info | https://www.scalemates.com/kits/996290-italeri-2757-ad-4w-skyraider |
| Content in box |
|

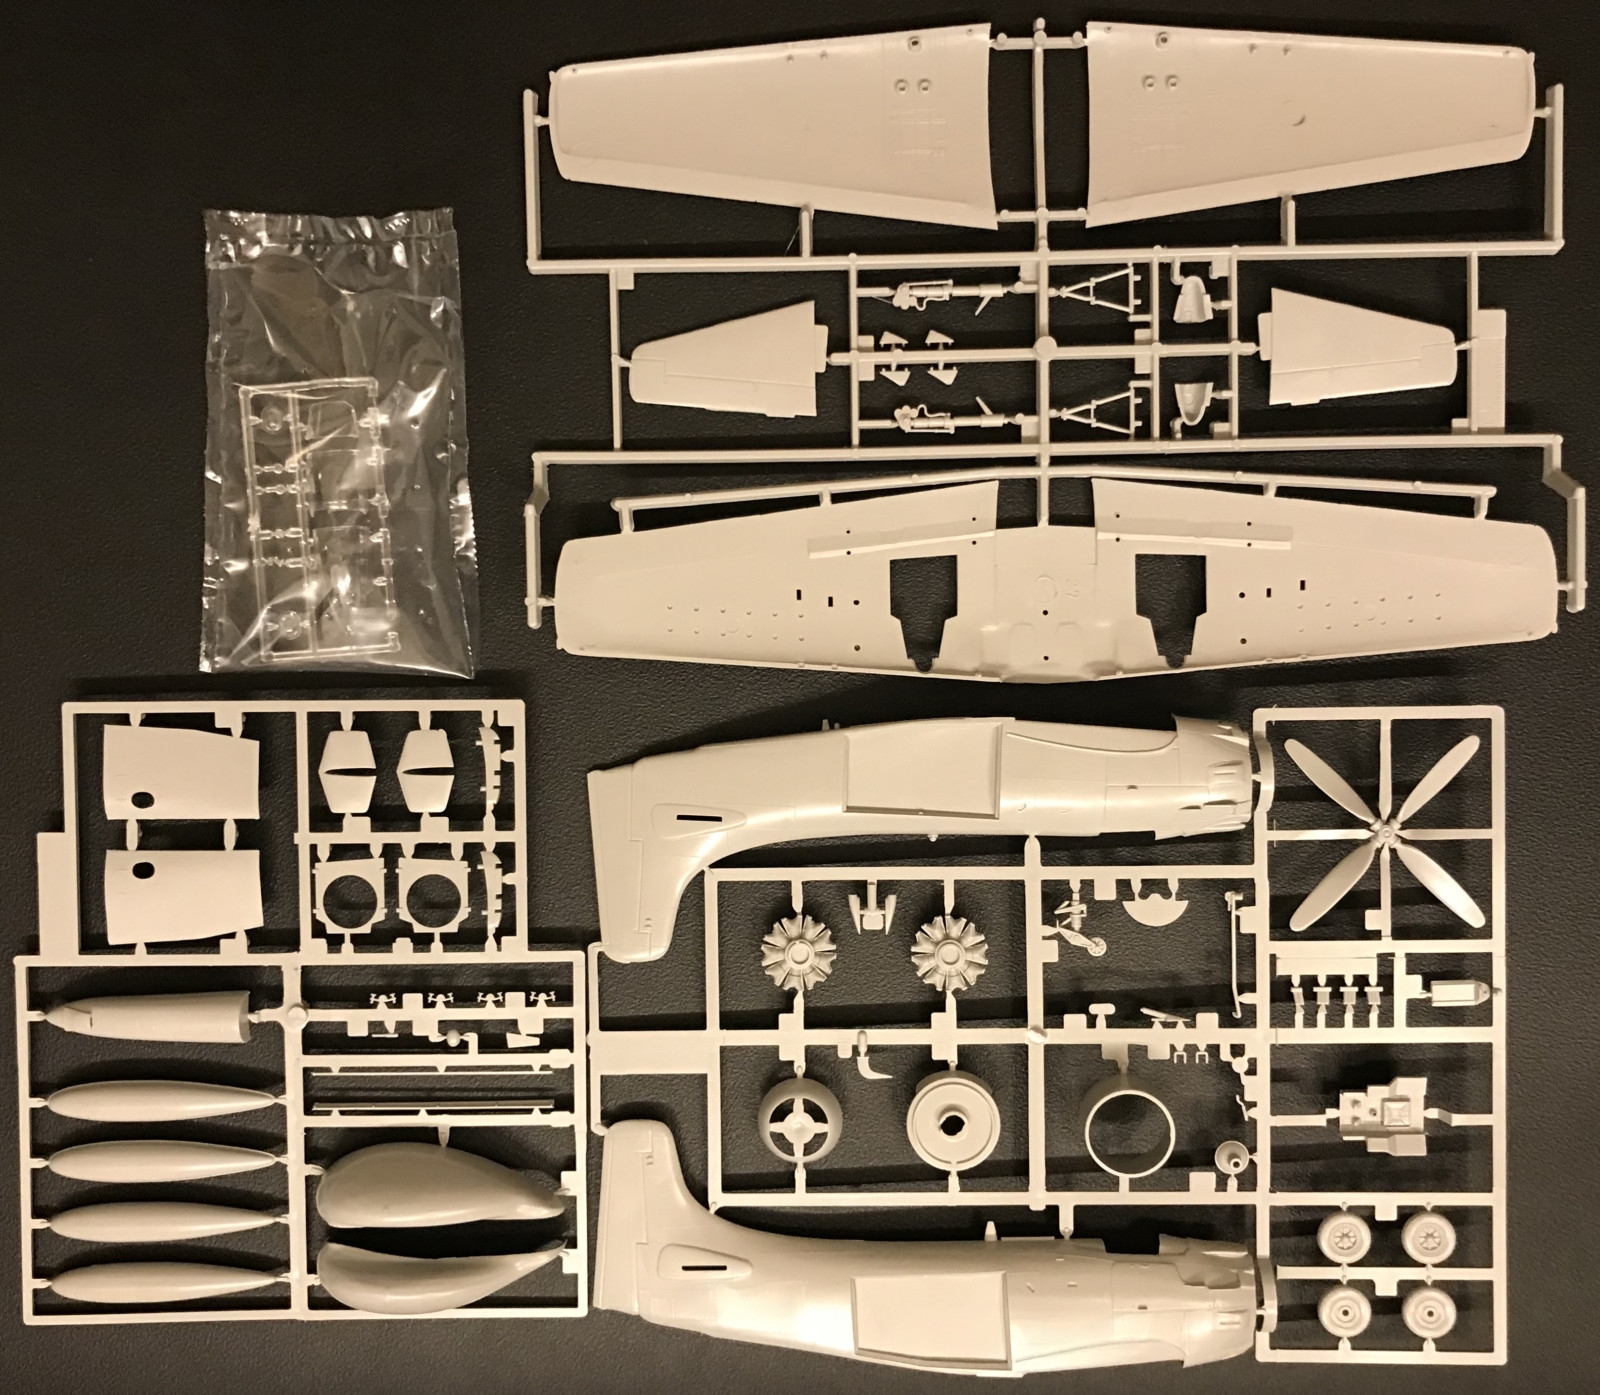
This kit is originally an ESCI kit re-released by Italeri with new decals. It was first released in 1979 and it's evident that it could do with a new tooling. The spruces are crude and attachments too. The kit is so old so it has raised panel lines, a horrible practice from way back. There is not much detailing and those there is are a bit thick and crude. It's also obvious that they planned different versions when they made it. For example there are a square part on each side of the fuselage where you place a panel that is not really a panel on the real plane. These panels are not a perfect fit either.
On the whole it's not a very good kit. On the other hand it's the only one of an AD-4W so if you don't like to do a great deal of converting of another Skyraider this will have to do.
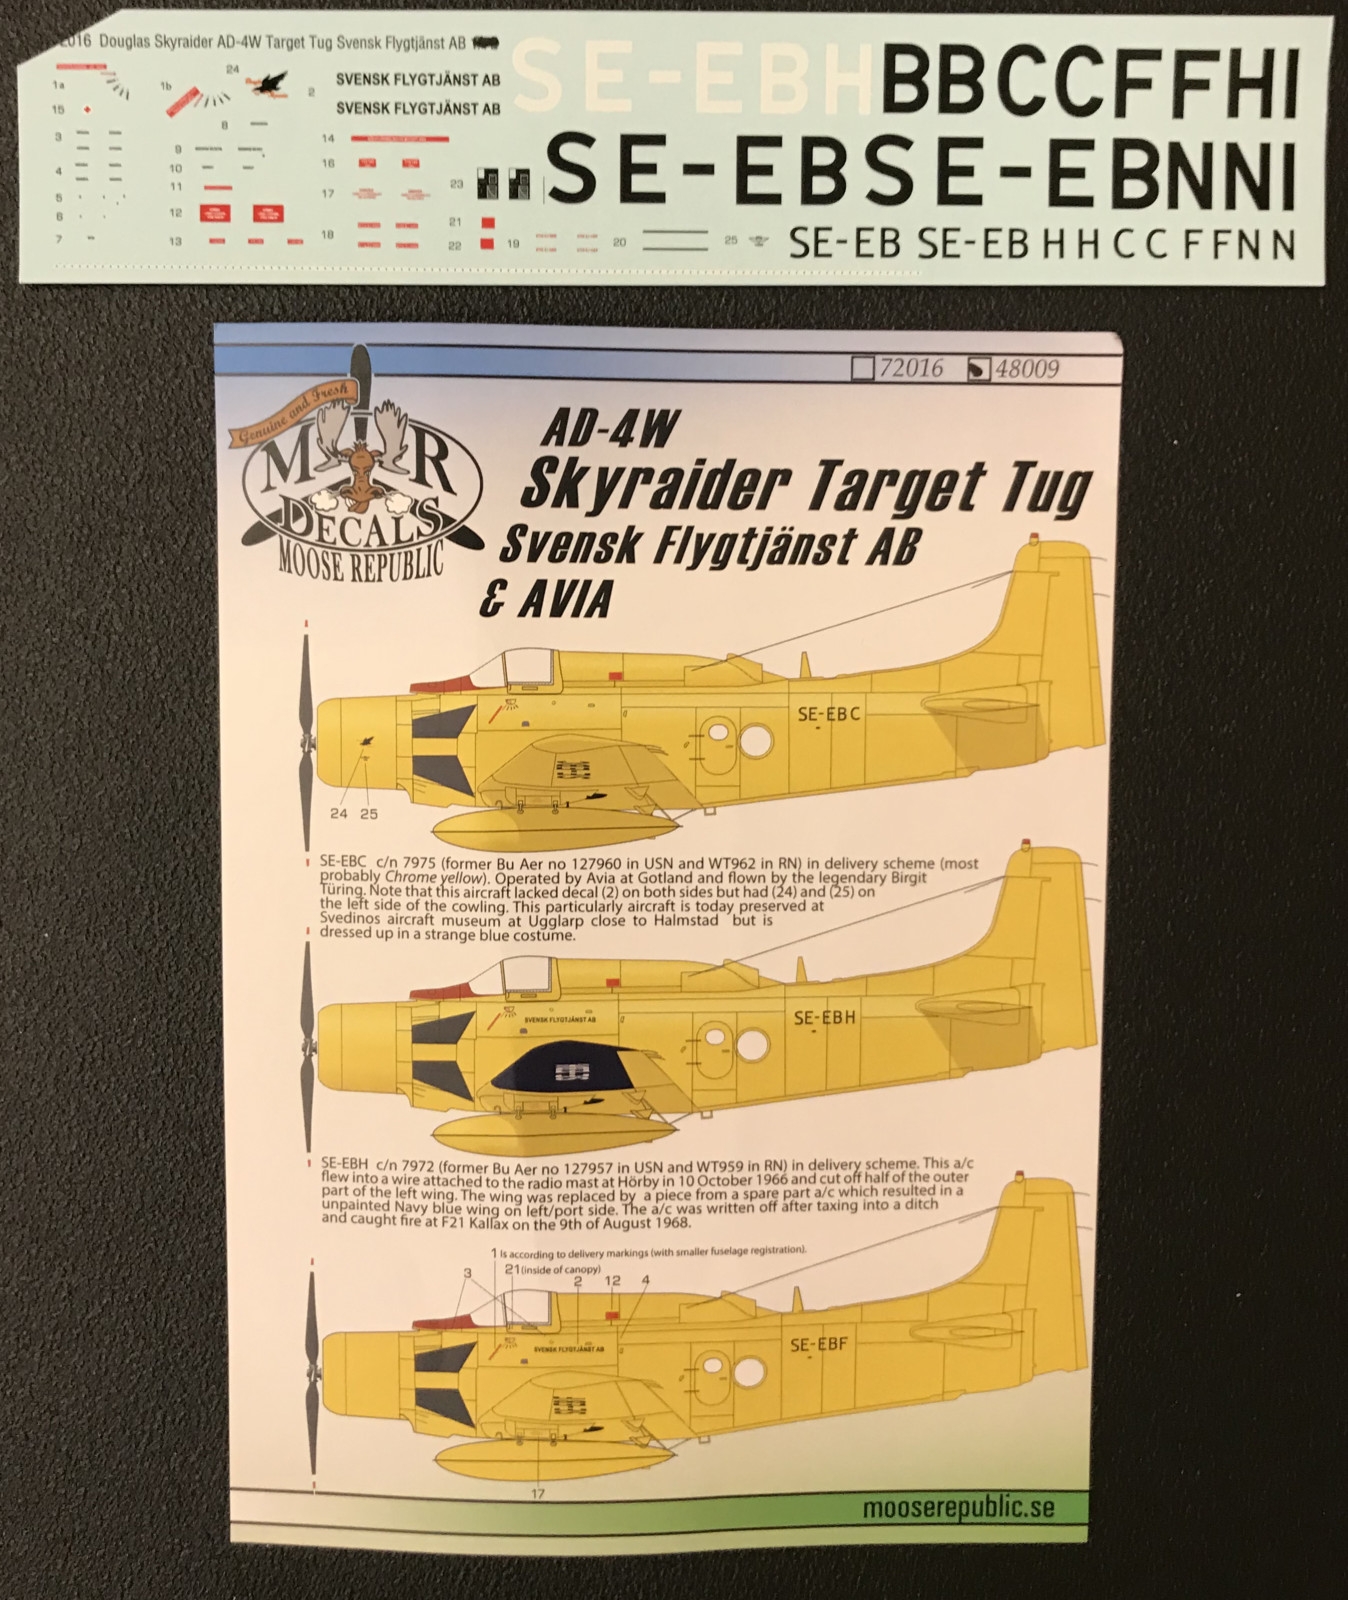
The decal sheet has two different markings.
To do the version I wanted however I added some after market decals:

You'll have to excuse me but this time there are no pictures from the build. I had it as a background project for almost a year and forgot to snap pictures of the build.
The cockpit is a fairly simple thing consisting of four parts. Still, there are instrument decals an also decals for the seat belts. There are after market resin kits for the cockpit but this time I couldn't be bothered. An other thing I didn't bother with was sanding down the raised panel lines. I later regretted this but then it was too late. A thing I did instead was to add two window domes (one on each side). I found two drop formed domes in my left over stash and filed the down to the right size and shape. As there's no interior in the back of the plane I just painted the the fuselage depressions black before I installed the two separate side panels where the domes luckily was placed.
These side panels did not fit well and it was really hard to get them in place without one end stuck out or in. I tried to fill and sand but finally I gave up and stuck with the result. The engine is actually quite good in three parts and not the one dimensional version that was common when this kit entered the market. The wings are a three piece story. A shame. It would have been nice to build the folded (this is a carrier based plane after all). There's an after market product for this too. By the exhausts there's some funnels on the individual I was making that are not in the kit. I made these out of metal sheets.
I thought the painting would be simple this time, all yellow. However some daemon possessed me and I pre-shaded the kit along the panel lines. With a yellow paint that is not the brightest of ideas. But instead of redoing the thing I kept on adding layers until it looked good. I lost count of the number of layers I applied. In the end I used a mix of Vallejo's Model Air 71.002 Yellow and 71.102 Yellow Lazur.
Unfortunately the after market decals did not include the letters I needed to build the individual I wanted to build (the one that now stands at Arlanda flygmuseum, Sweden). Fortunately I had blank decal sheets, a scanner, an editing program and a good laser printer so I solved that.
Making the black fields they had painted after the exhausts on the original I noticed that the protruding panels above them are placed wrong. Had I done the kit properly I would have cut these away and replaced them with metal sheet versions in the right place. Not so this time. The landing gears are OK. The brackets for the extra tanks needs to be carefully filed down in the middle to have the tanks fit. There is also only two brackets per tank in the kit (as on the real plane) but the instructions shows three. Last thing I dis was to add the target tug attachment under the fuselage.
This was not a fun kit but with some weathering and decals it looks OK in the end.
This is an old kit and it shows. Instead of re-issuing it Italeri would have done better with a new tooling.
It's a Douglas AD-4W Skyraider, the only one in scale 1/48.
Raised panel lines, scarce on detailing and the fit.


