| Manufacturer | Hasegawa |
|---|---|
| Product # | 09169 (JT109) |
| Scale | 1/48 |
| Scale Mates model info | https://www.scalemates.com/kits/121070-hasegawa-09169-douglas-sbd-3-dauntless |
| Content in box |
|

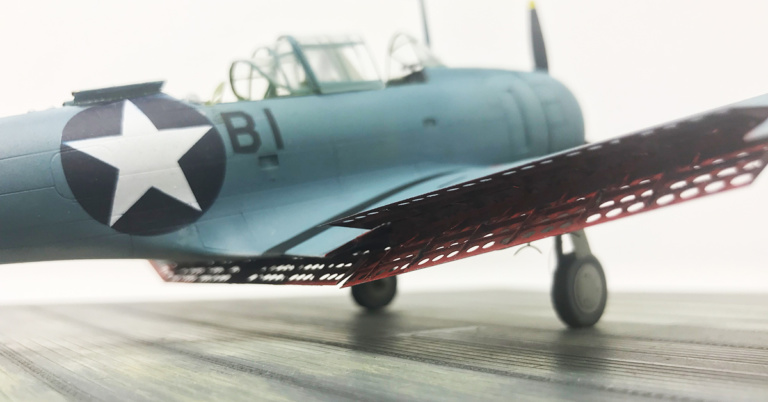
This kit has been released in several versions from Hasegawa. This release though addresses a serious problem with the previous ones, the air brakes. On the original plane the air brakes are perforated but the original kit represents this with shallow depressions leaving witch only makes them look solid. This kit however supply photo etched air brakes (perforated) that replaces the kits air brakes which you are required to saw off. This greatly enhance the kit but it also raise the difficulty bar considerately.
Otherwise it's a decent representation of the SBD-3. The detailing is OK and the moulds are done well. The parts also fit well and filling and sanding required is at a minimum.
The decal sheet has two different markings.
The dates are when the originals were photographed but they are how they looked as at June 4 1942 at the Battle Of Midway.
At an early stage I decided to put an extra effort into this kit as it is the last in a series about the Battle Of Midway I'm doing. So the first thing I did was to buy Eduards etched metal parts SBD-3 1/48 Cat.No.: 49237 wit loads of microscopic metal parts. This had me spend as much time on the cockpit as I normally do to finish an entire kit. This also meant cutting away much or the original cockpit details. This greatly improved the internal cockpit but to be honest the original parts are not that bad. In a normal case I would have settled for them.
The engine is depicted all right in the kit. One nice detail is that the end of the exhausts pipes are separate and put in place once the engine cowl is in place. Fuselage fits together well, the small that inevitable appears are quite easy to handle. But the wings fit to the fuselage is horrible. Here some work is really needed.
I primed the kit and pre-shaded panel lines etc. and then it was time for the standard U.S. Navy colours of 1942 so I used the following colours from Vallejo’s Model Air series:
I used paint masks for the national insignias, mostly because there are structural holes in the wings that no decals could handle in a nice way. This was also necessary as the decals in the kit was so old so the just disintegrated. Luckily the letters I needed mostly stayed together.
Now, this kit is a reissue of an older kit, as stated above, and the way they've remedied the aisling wing brakes is for you to saw them off with a small supplied saw. Then you build new brakes with 63 metal parts. Pew! A bit of a repetitive work and this also took almost as long time as a normal kit would take. Fitting the brakes to the wings also turned out to be a challenge. I found the back plates that should be glued to the wings were a bit broad. It was really tricky to get them in place and still get it to look right.
Finishing off the last detailing had to be done carefully because all extra stuff made the kit fragile. I don't know how many times I needed to reattach the rear seat guns. Considering all the challenges I think it came out okay any way.
This is a decent kit of the Dauntless. The kit is a bit challenging when it comes to the air brakes with tiny metal parts that needs some meticulous job. It's not for the beginner but the result looks good.
Fit is good and the photo etched air brakes looks really good when done.
Again the air brakes can be challenging and the kits looks silly with the original "air brakes".
