| Manufacturer | Tamiya |
|---|---|
| Scale | 1/48 |
| Manufacturers page | http://www.tamiya.com/english/products/61034wildcat/index.htm |
| Content in box | Instruction sheet, plastic kit and decals for four different individuals |
The Grumman F4F Wildcat, or Martlet as they where called by the British, saw action for the first time on Christmas Day 1940 when a land based Martlet shot down a German Junkers Ju88. The British used the Marltet extensively as their main aircraft carrier fighter before they had the Seafire available. The Wildcat was the only carrier based fighter the U.S. had available in the beginning of the war. It had replaced the inferior Buffalo but it was still outperformed by the agile Japanese Zero. Fortunately the Wildcat was a lot sturdier than the Zero. That fact combined with a tactic developed by Commander 'Jimmy' Thach called the Thach Weave still enabled the Wildcat to shoot down more Zeros than the other way around.
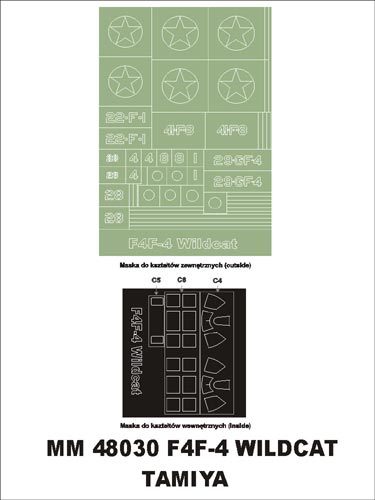
The kit from Tamiya in scale 1/48 is a fine representative of this sturdy plane. The kit is delivered on two spruces plus one with the clear parts. The included decals allows the choice of four different individuals. Three from the U.S. Navy, from the USS Independence, the USS Ranger and the USS Santee respectively, and one from the U.S. Marine Corps based at Guadalcanal. Unfortunately neither of these fitted my purpose, namely to build planes from the Battle Of Midway. For this ordered some after market decals:
This does not fit the bill either but my plan was to plunder this and combine them with some other decals to get a machine that actually participated in the Battle Of Midway. Also the cockpit hood has a lot of panes so I decided to add this to the stack too:
Should the decals fail I still had the masks to do it the hard way.
 |
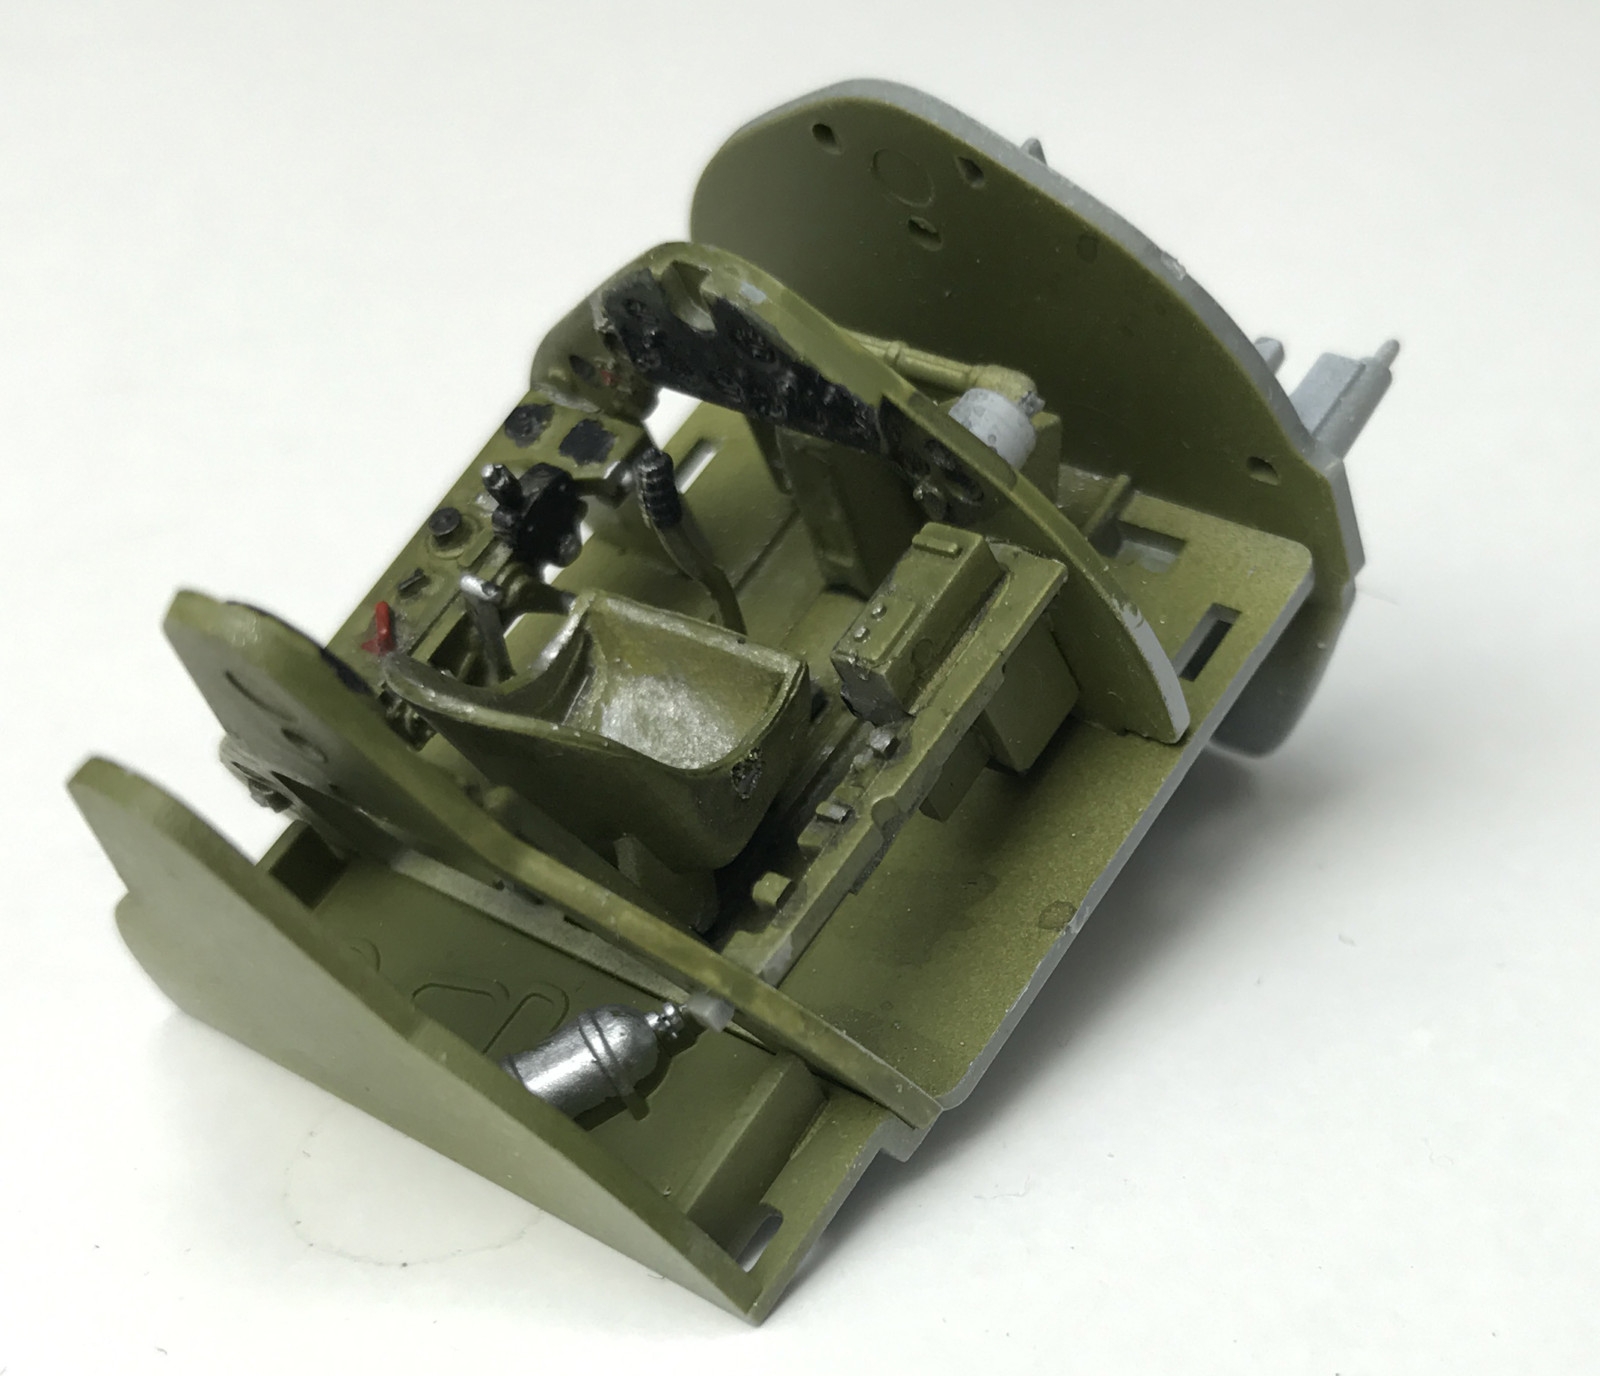
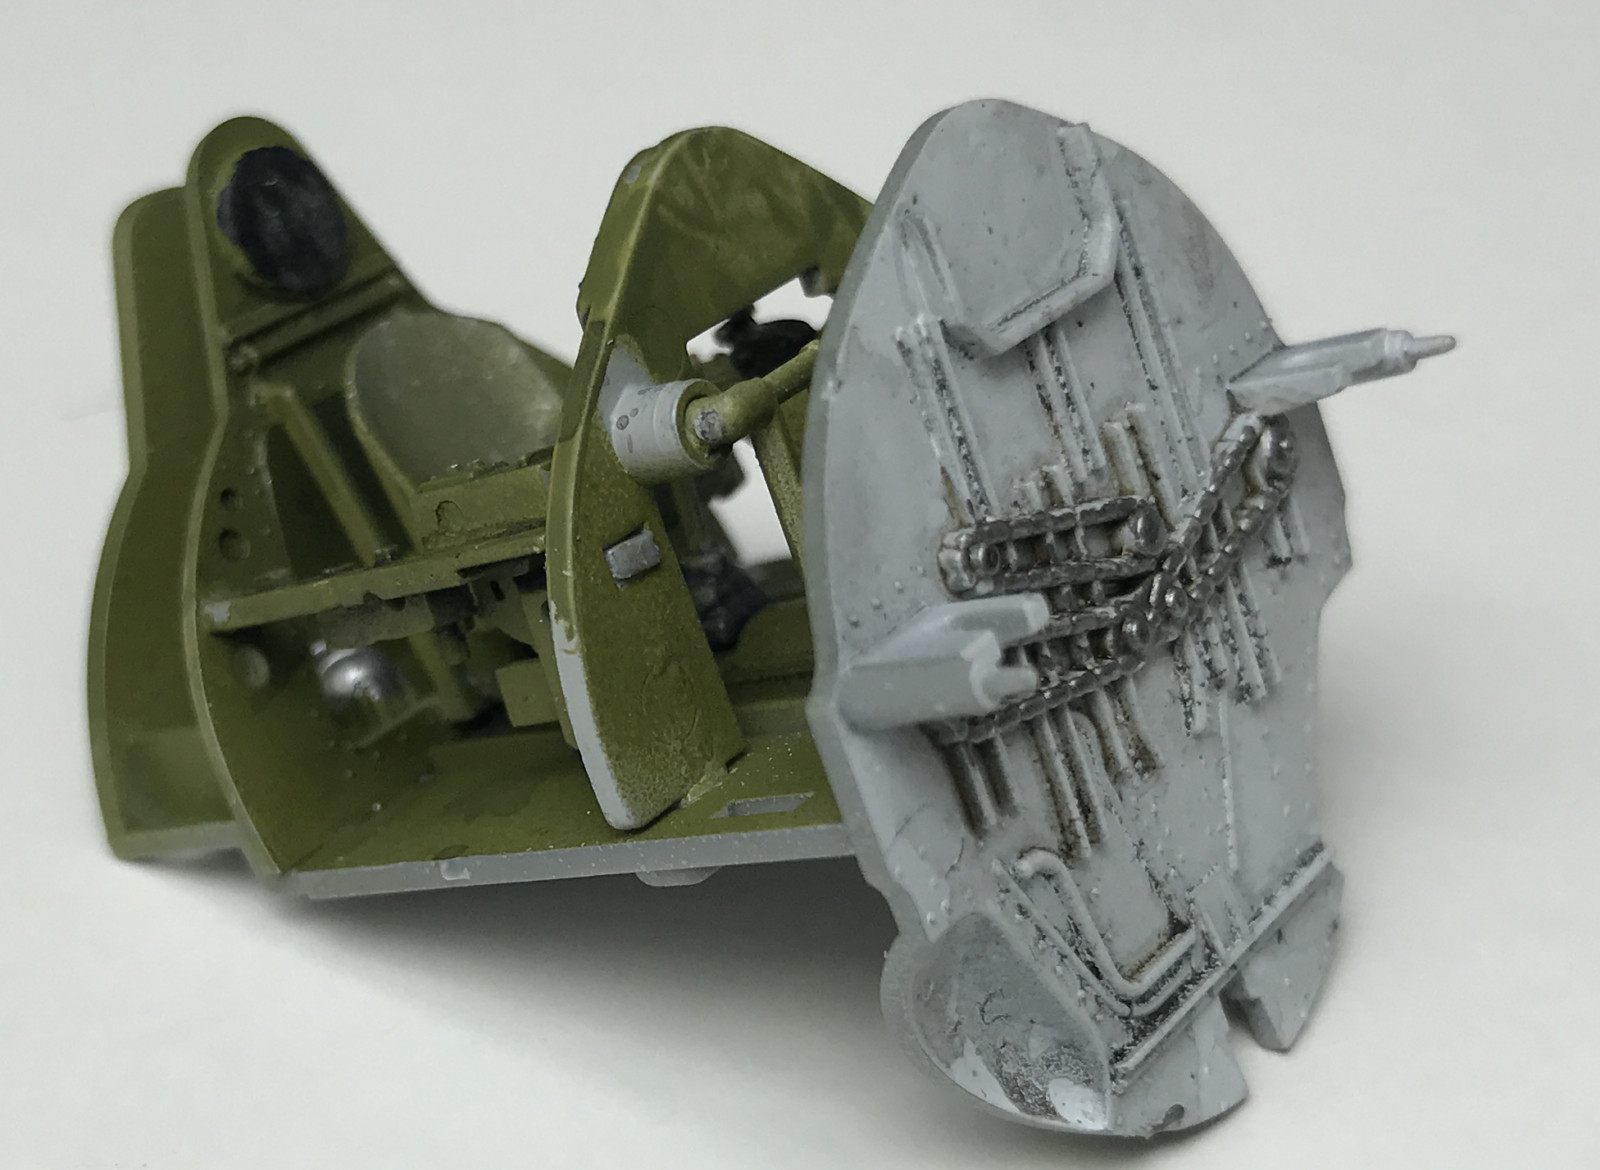
This is the first kit I've made that actually starts off with gluing the two fuselage halves together. And then follow up with the tailplane and tail rudder. It's when this is done that you start with the cockpit (at least if you follow the instructions). A refreshing break from the monotony. The cockpit detailing is reasonable. It's the first time in a while that the kit didn't include any decals for the instrument panel. Of course there are after market instrument panels to be bought, pre painted et al, but since I'm doing a series of planes in a short timespan this it would ruin me to buy this so I made do with what there was. Carefully dot the instruments with gloss varnish to make them stand out a bit and it looks reasonably good.
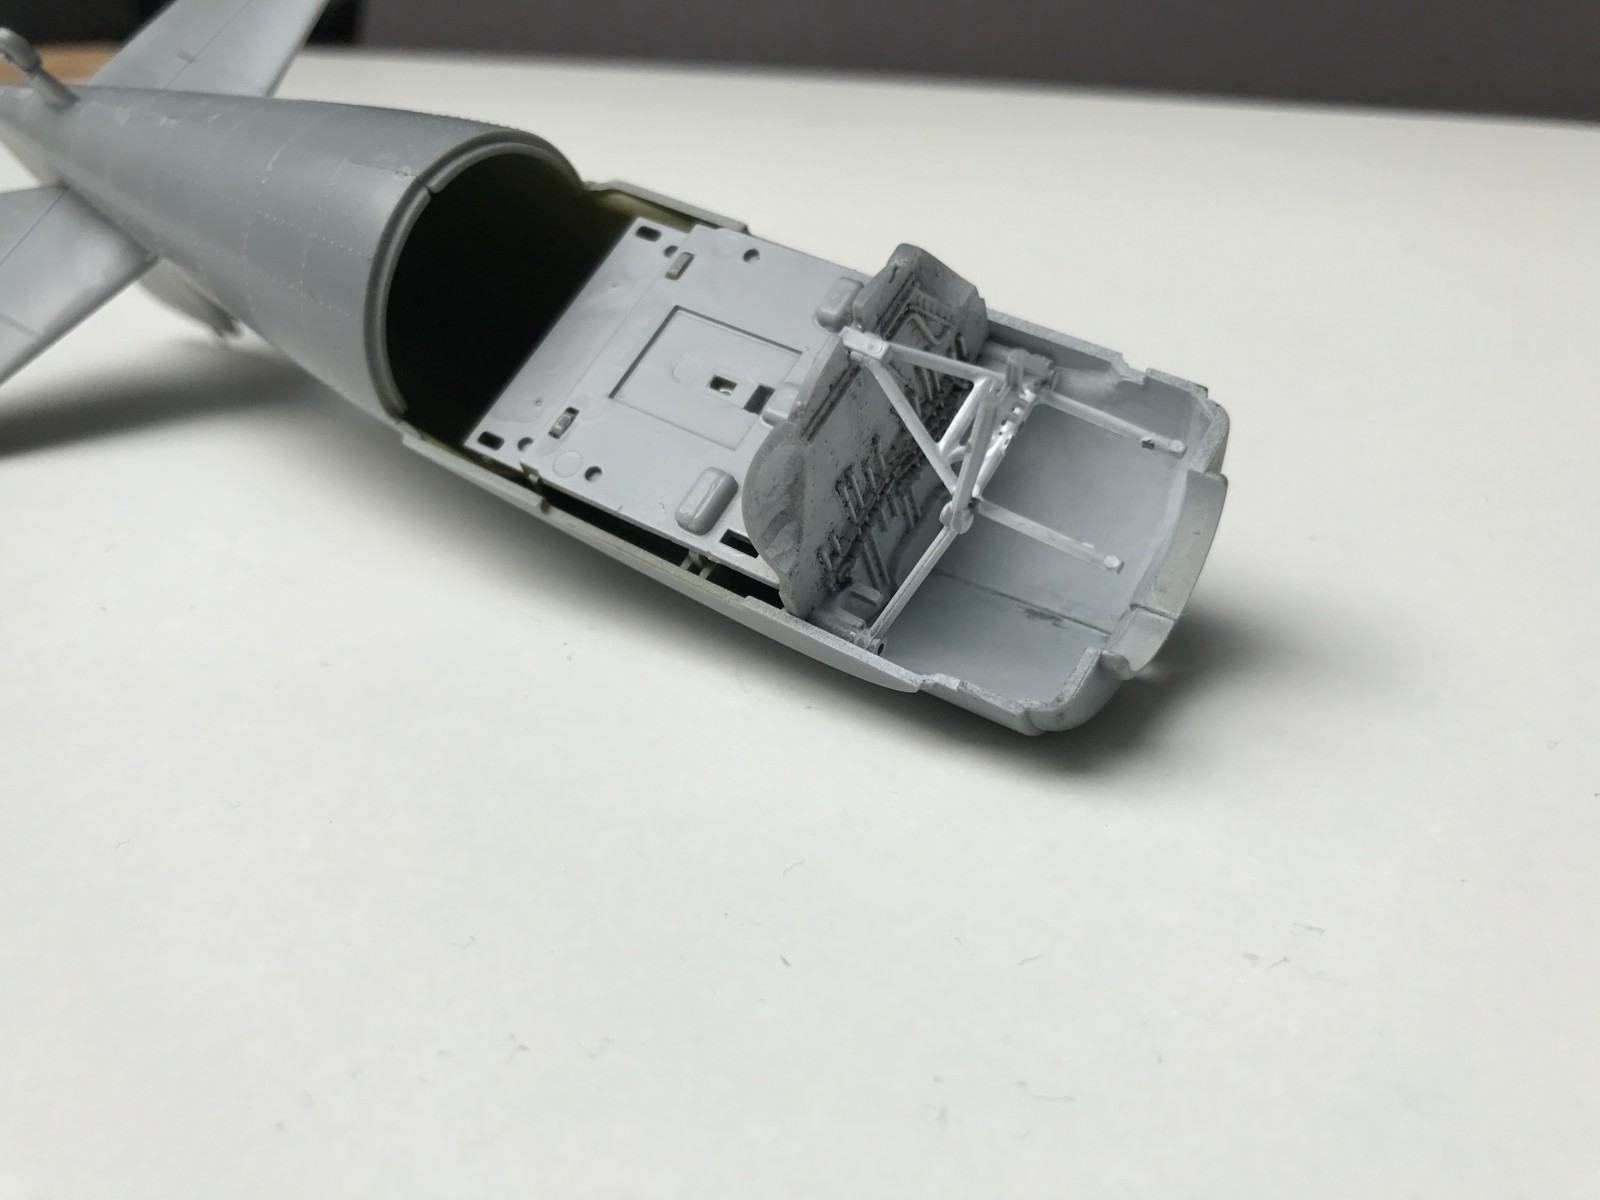
The interior in front of the cockpit, behind the engine, is an free space fully visible through the landing gear holes. This space is occupied with struts for the engine and landing gear. You do these before you mount the cockpit into the fuselage.
 |
 |
 |
 |
Getting the kit ready for paint is then a fairly quick affair. The wings fit OK and if you're careful an thorough you get away with a minimum of filling and sanding. Here I was also thankful for buying the paint mask for the hood as having to do this manually with masking tape and a knife would have been a pain. Doing the early Pacific colour scheme is quite easy, it's on colour below and one on top. I've bought the Vallejo Model Air set 'US NAVY & USMC Colors WWII 1940-1945' (ref. 71.157) which comes with a very comprehensible leaflet. So I used the following colours:
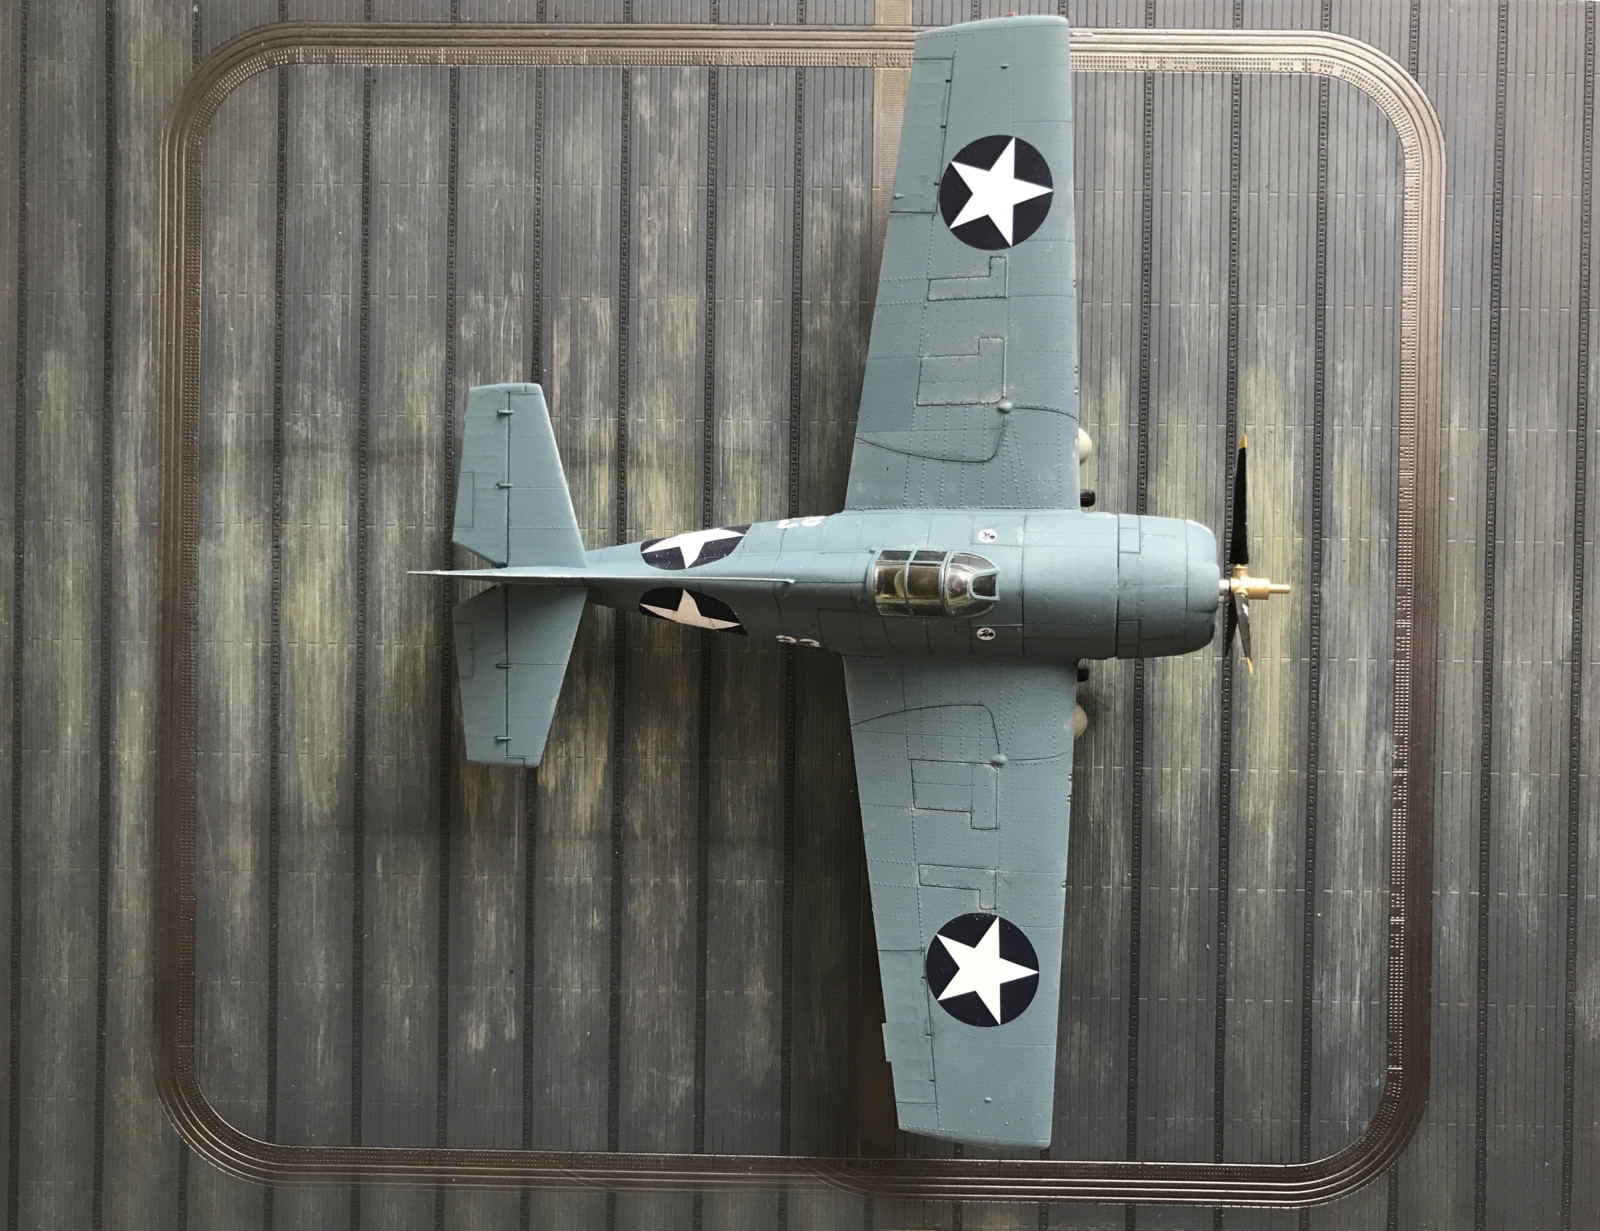
After a layer of gloss varnish it's then decals time. Now enters one of this kits bad sides. The rivets on the fuselage is greatly exaggerated which becomes a real problem when applying the decals. In hindsight I wish that I'd attacked these with a file and sand paper but it was a bit late now. With some MicroSol I managed to get the decals do adhere to the sides but not without a lot of puncture marks on the national insignias. I also had some puzzle work to do with the numbers. As mentioned I wanted to do a Midway version which wasn't available. I wanted a white '23' and luckily I got a white '28' so a knife and fiddling that was solved.
 |
 |
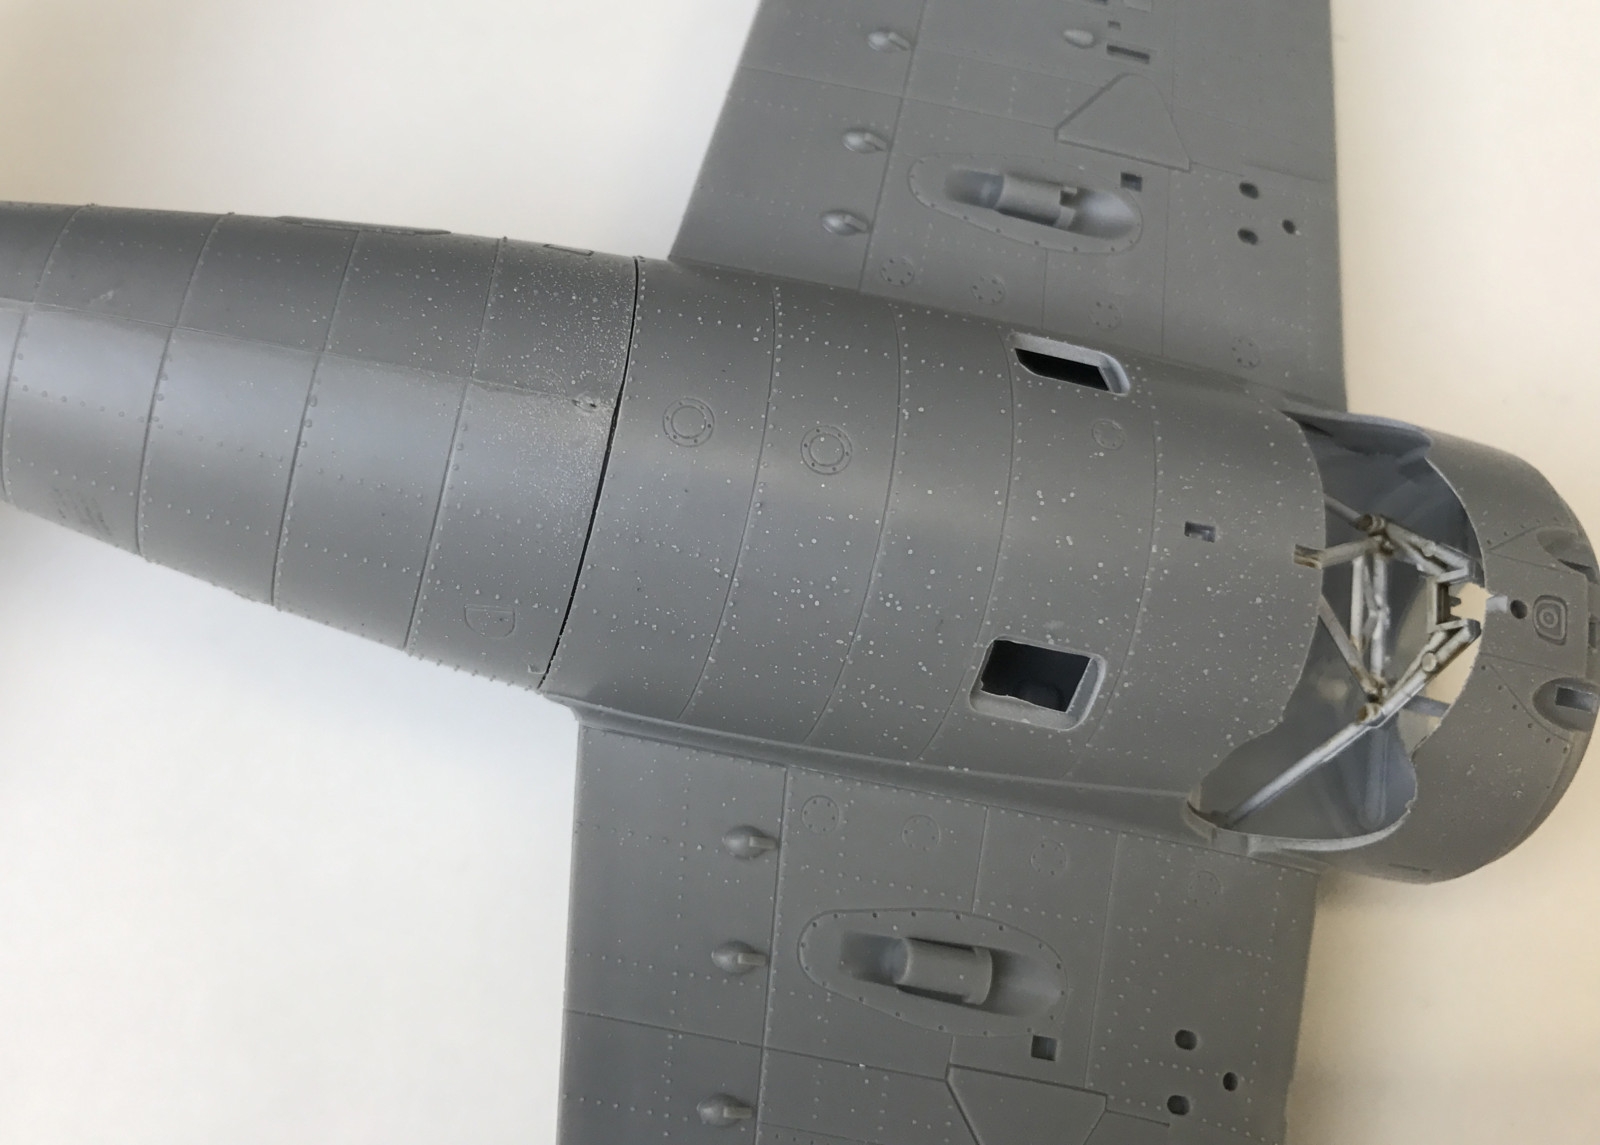 |
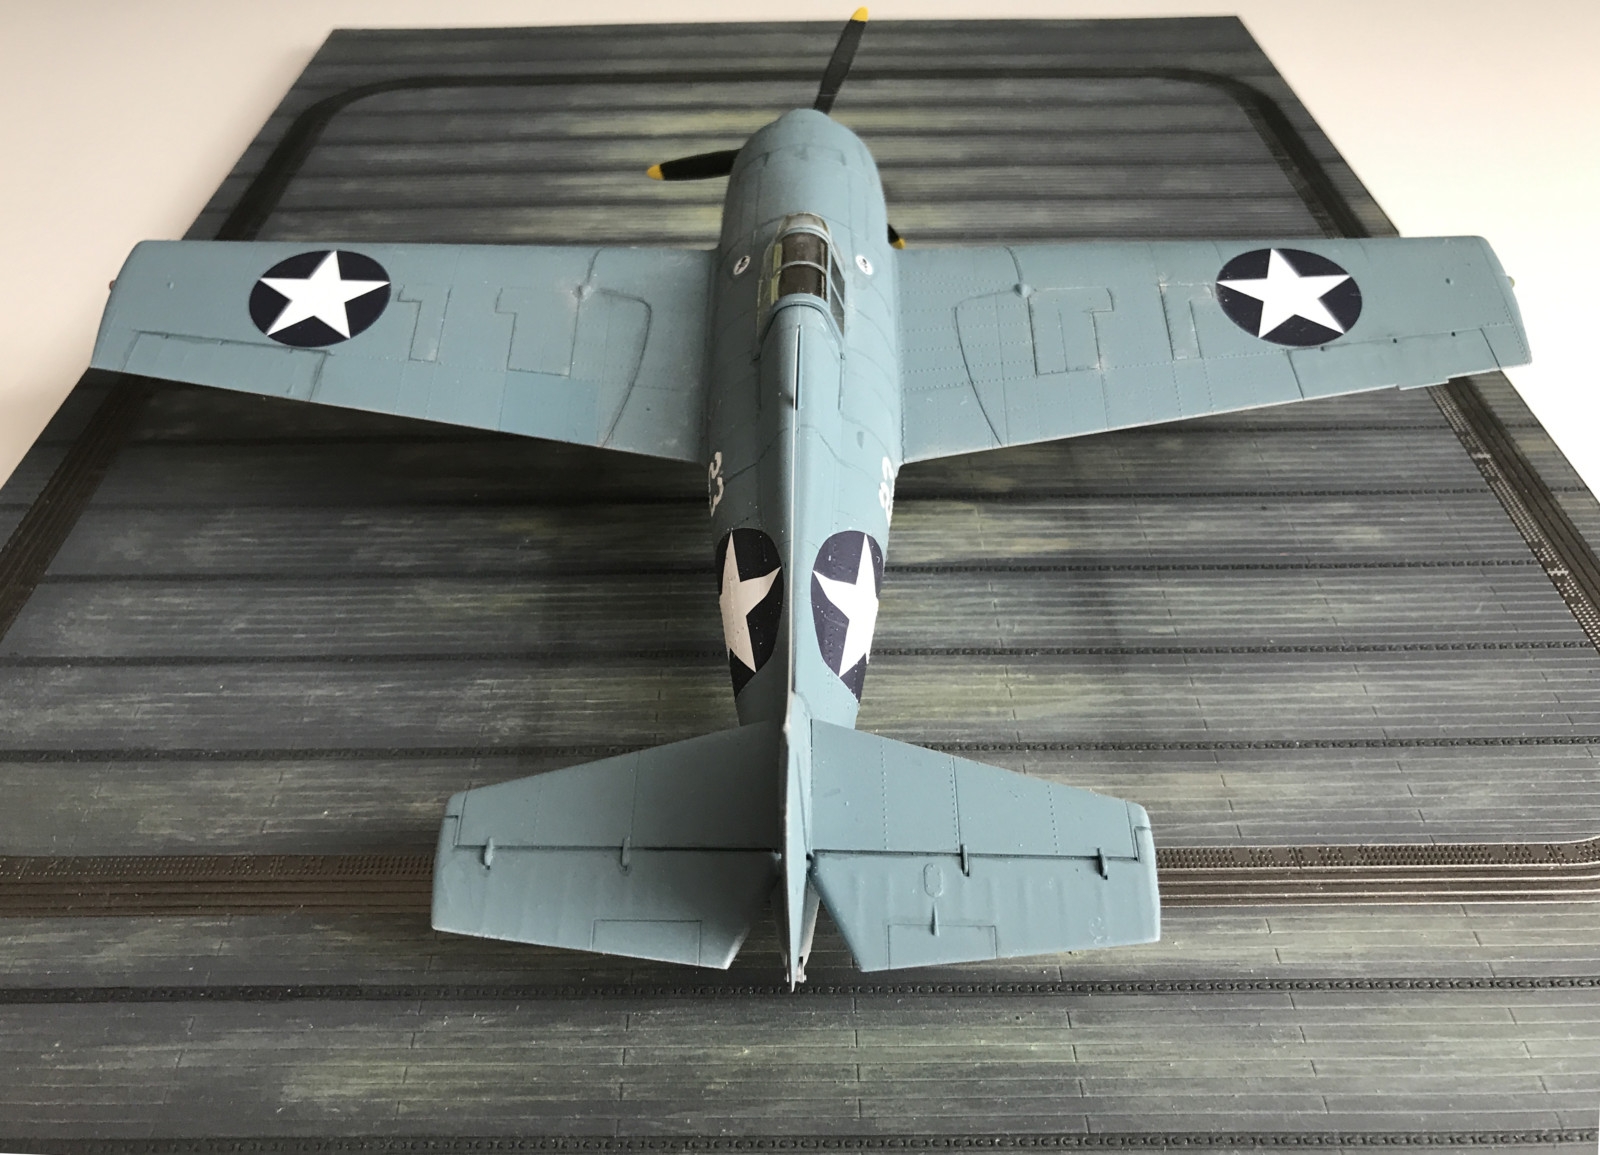
The last parts, the under carriage, the drop tanks and other details went OK. I feared fitting the landing gear as it looked like it was going to be a bit fiddly due to the construction but it wasn't as complicated as it looked. A bit disappointed when I was going to fit the cockpit hood though. Wanted it open but it wouldn't fit over the fuselage. It fits very well in the closed position but in the open it doesn't reach down on either side. A shame as the instructions says that it's an option.
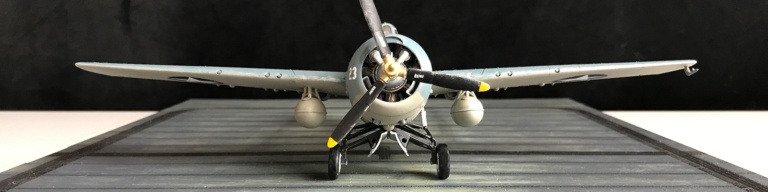
Some light weathering an I proclaim the kit done. Here's the result:
 |
 |
 |
 |
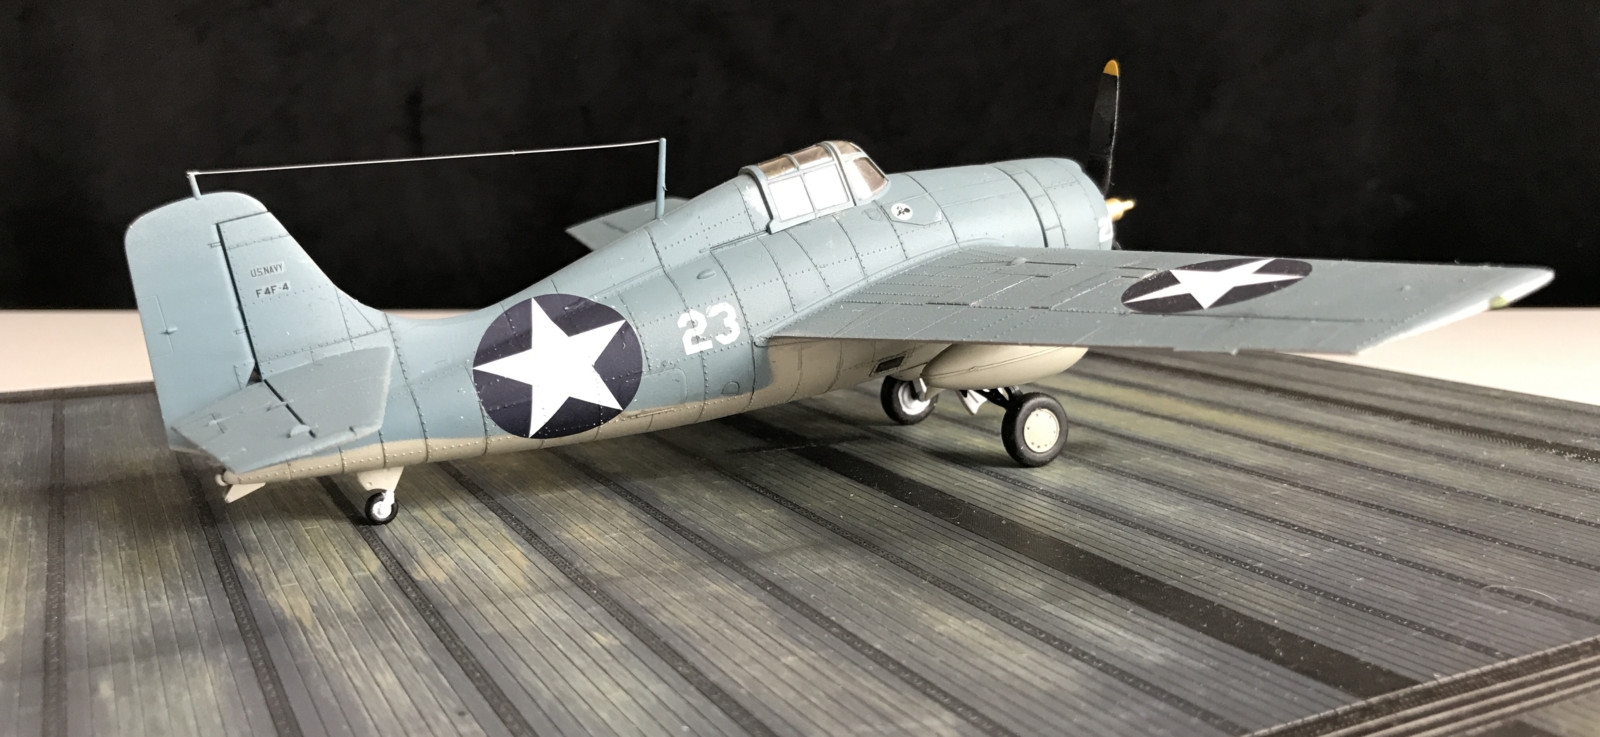 |
Tamiya's Grumman F4F-4 Wildcat is what I'd consider a standard kit. It's a bit fun to build as the construction of the plane as such is a bit different. It's not the most advanced of kits and things like fixed rudders (except for the tail fins) is a sign that the kit has some years to it.
| Difficulty* | 2 |
|---|---|
| The good | An over all good kit that fits together good. The interior is a bit different and fun to build. |
| The bad | The rivets on the fuselage is very exaggerated and needs to be filed down. The cockpit hood does not fit in an open position. |
*) On a scale 1-5 where 1 is easy and 5 is really hard.