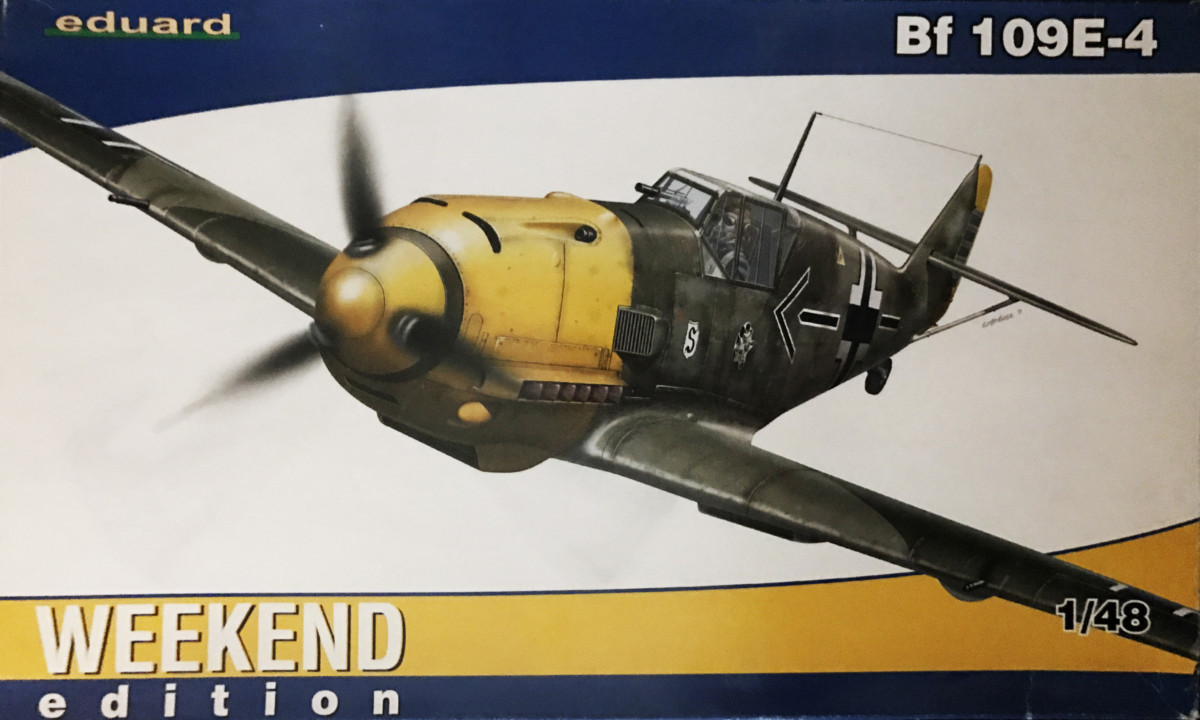
| Manufacturer | Eduard |
|---|---|
| Scale | 1/48 |
| Manufacturers page | https://www.eduard.com/store/Eduard/Bf-109E-4-1-48-1-3.html?cur=1&listtype=search&searchparam=bf%20109 |
| Content in box | Instruction sheet, plastic kitand decals for one different individuals |
Eduards Weekend Editions are single purpose, no thrills, edition. That means they only include decals for one individual and no extras as resin parts or photo etched details as in for example their Profipacks. Still this is a good kit. For once I built it straight out of the box with no after market parts. The box contains the parts for the Bf 109E-4, instructions and decals (and a lot of air). It is quite plain that you have the possibility to build other versions with the kit. But instructions and decals is only for this one version.
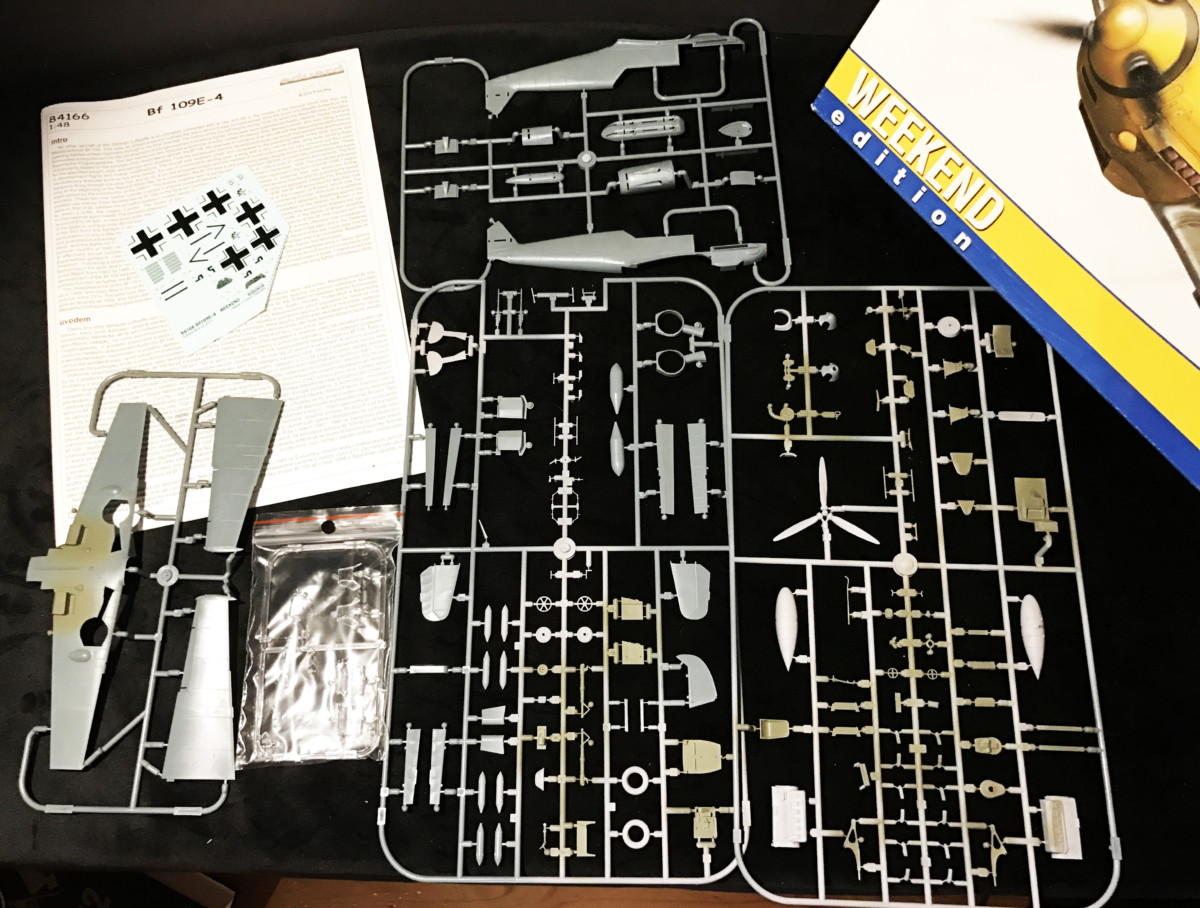
The parts are well moulded with fine details and no exaggerated panel lines. You can notice that some thought have gone into the attachment to the spruces to enable you to detach them with minimal marks on the parts themselves.
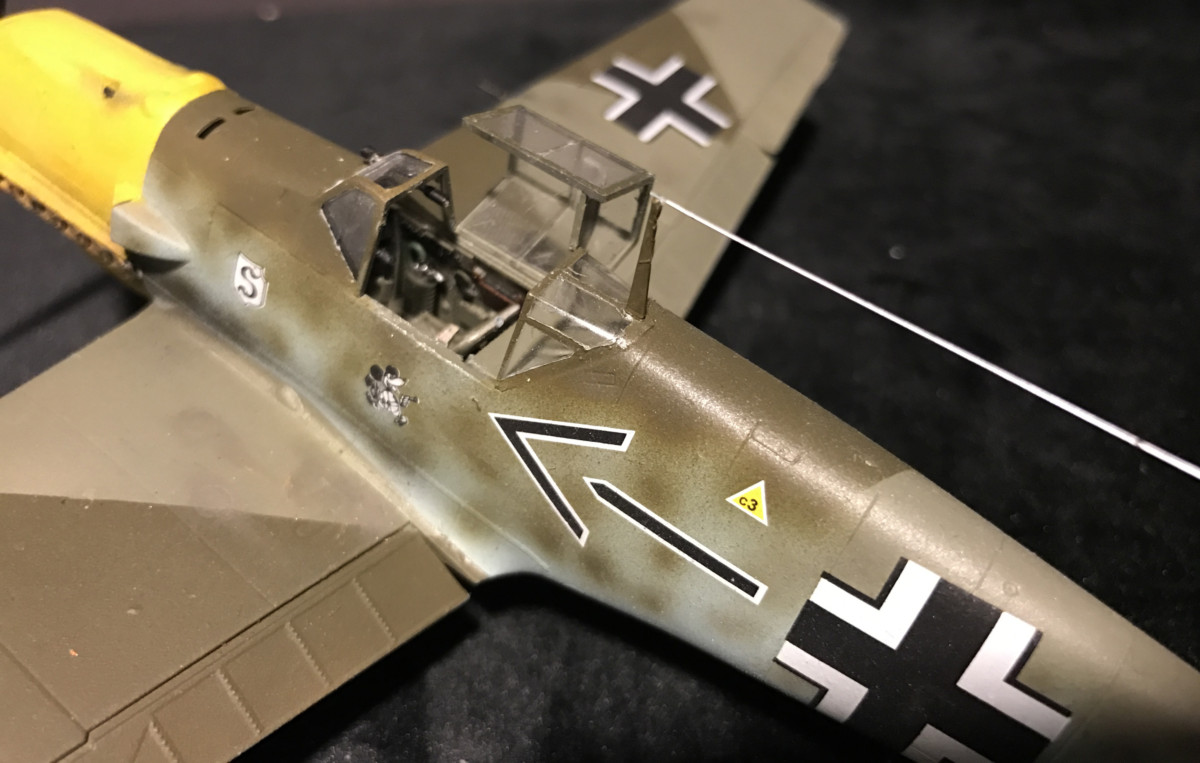
The cockpit is fairly detailed and looks quite good even without after market detailing. You can chose to either use a relief instrument board and paint it yourself or use a flat one with instrument decals. I find that the later is good enough. Specially as the instrument panel is placed a bit into the cock pit and hardly visible in the finished kit.
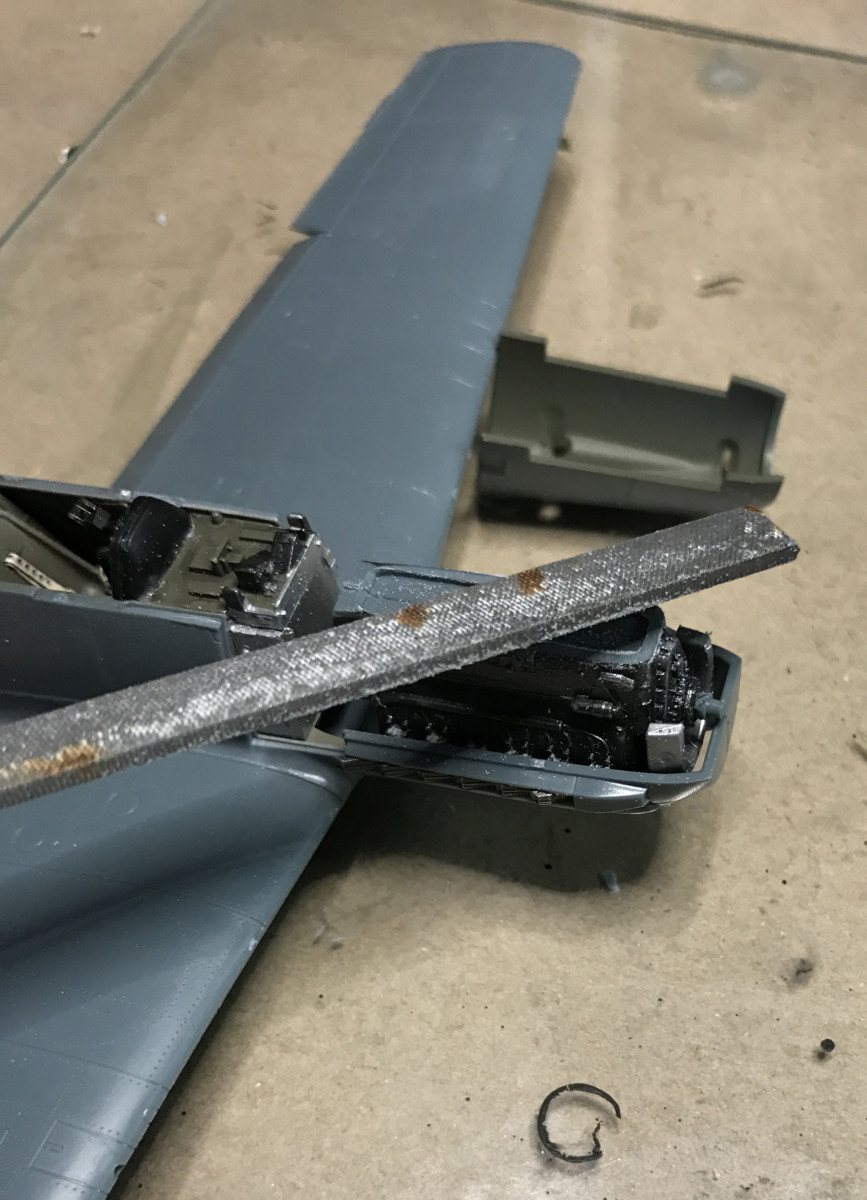
You can also choose to build this kit with an open engine hood or not. I chose not to. Not because the engine is not finely detailed and realistic but because in nine cases out of ten it was closed (as in all the pictures of the real plane). An interesting note is that, in order for you to be able to build the plane with a closed hood, you have to file away the top part of the engine and cut away some of the ammo boxes to fit the cover. I have a hard time imagining that they did this on a real plane. It makes you wonder about the scale of the engine.
 |
 |
The fit is reasonable but you better have some rubber bands ready when you close the fuselage and again when you put on the engine cowl.
Painting this bird is best done with an airbrush as the camouflage on the sides of the fuselage is done with airbrush dots on the real plane. I used Valejo's Model Air colours
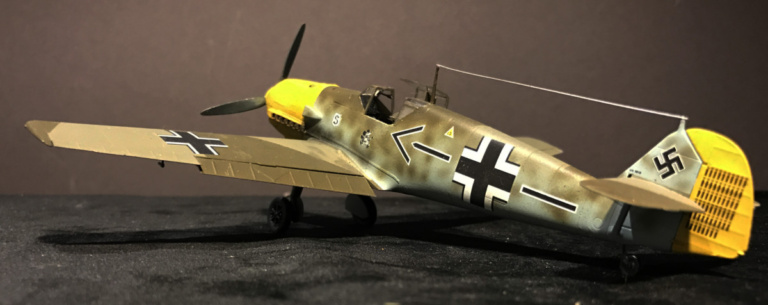
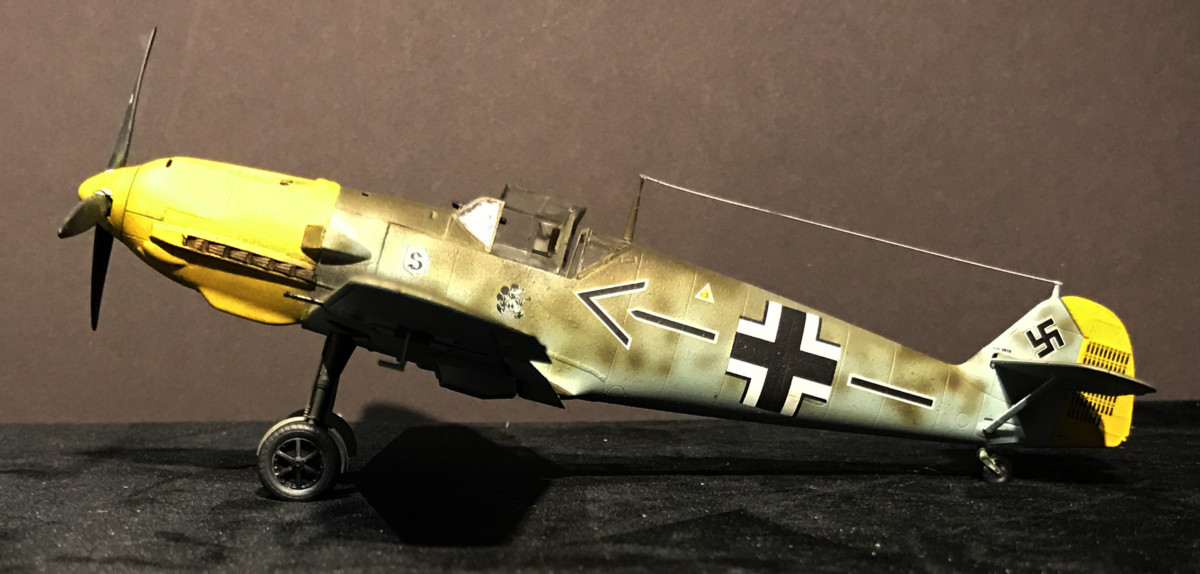
The individual plane for which there is included decals is that of the famous German flying ace Adolf Galland. The decals are excellent and clings to the surface perfectly. Hardly any Micro Sol is needed to have them conform to the panel lines. A detail you can notice if you bought this in Europe is that the swastikas comes in two versions. One with intact swastikas in one corner of the sheet. The other where the swastikas comes in two parts to be assembled when applying them. The ones in the corner is obviously cut away before shipping the kit to the US where they seems to believe that simply not printing whole swastikas prevents a second holocaust.
After giving putting on the colours and signs I mounted the landing gears and the fine details as antennas and wing guns.
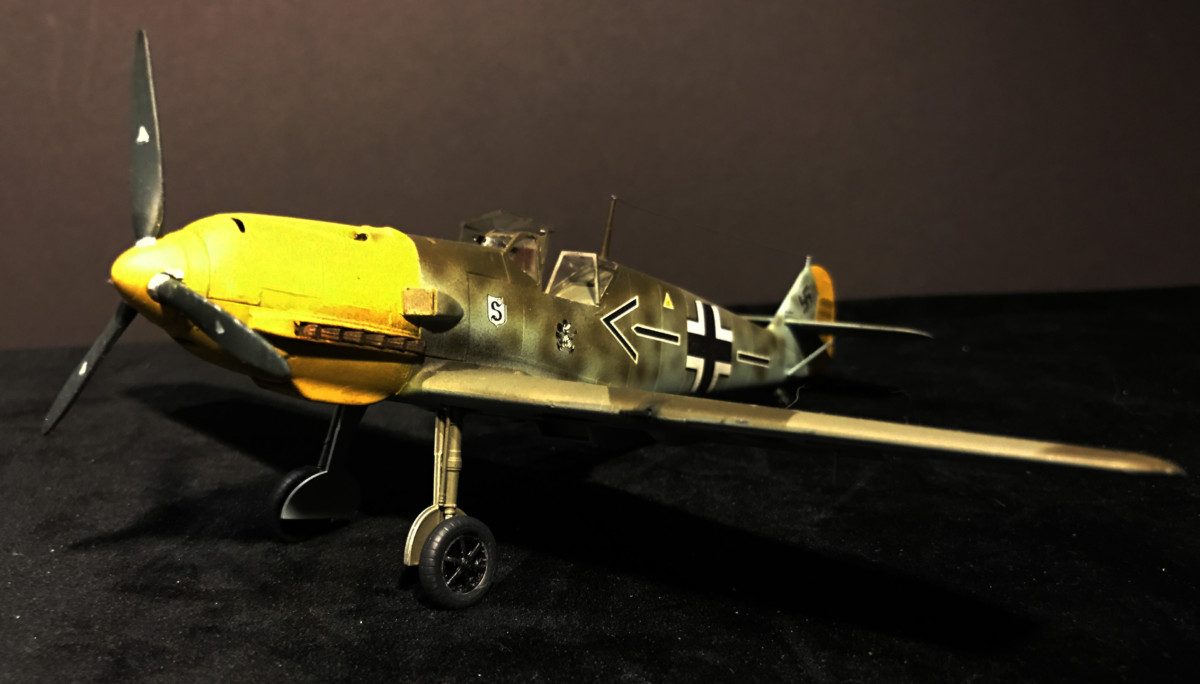
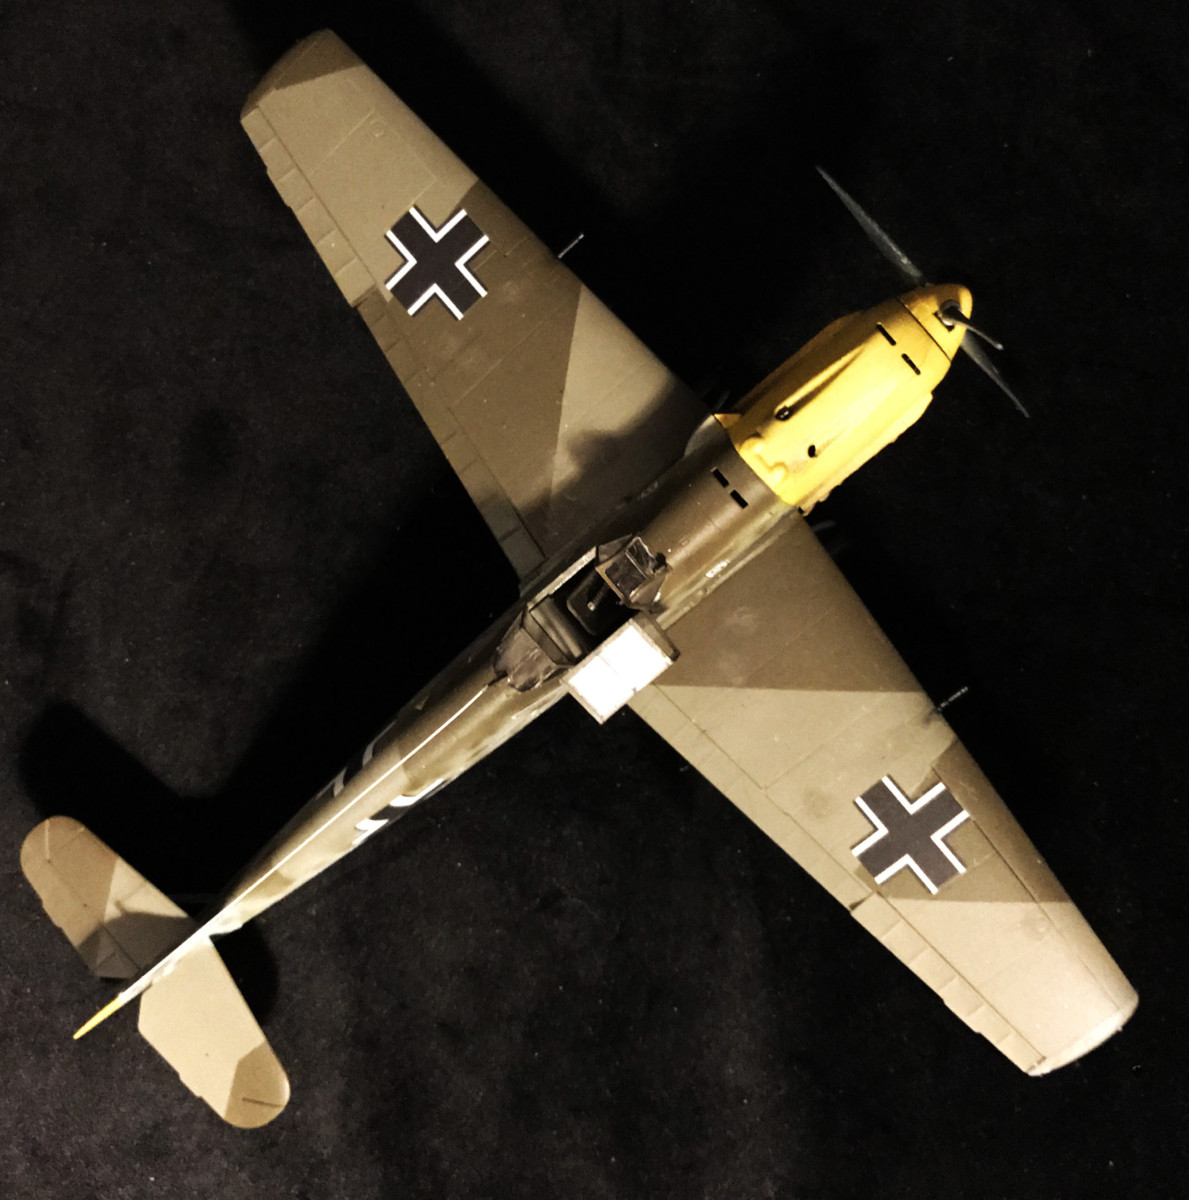
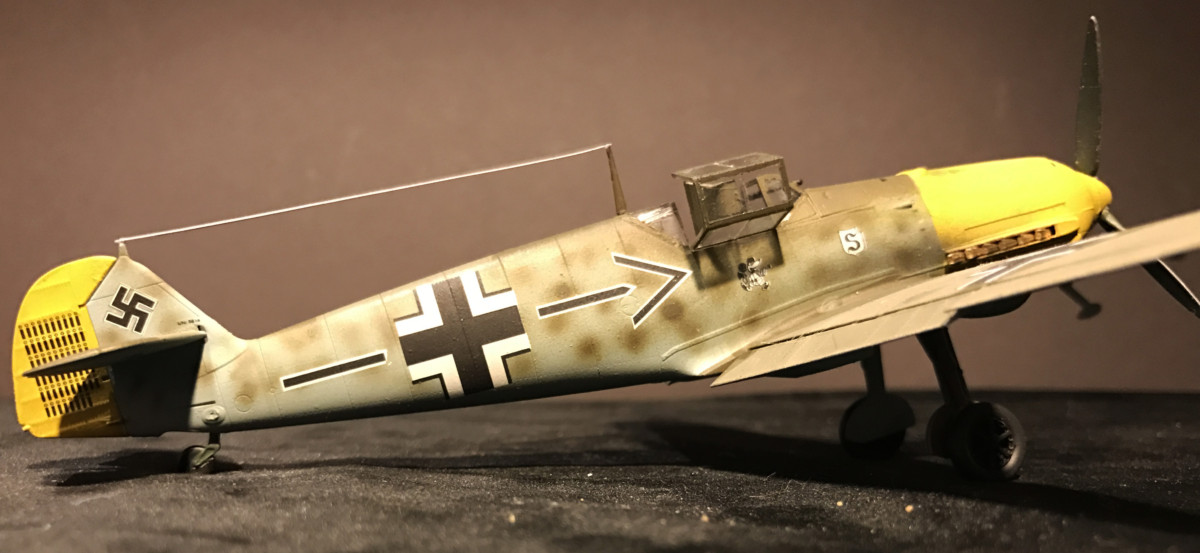
Here is the end result:
 |
 |
 |
 |
 |
For being a run of the mill Weekend Edition this is good value for the money. Detailing is good for a 1:48 kit and the end result is gratifying.
| Difficulty* | 3 |
|---|---|
| The good | Good quality kit with options to build with removed engine cowl, |
| The bad | Getting the engine cowl closed can be a challenge as it's several parts that has to fit. |
*) On a scale 1-5 where 1 is easy and 5 is really hard.