
| Manufacturer | Tamiya |
|---|---|
| Scale | 1/48 |
| Manufacturers page | http://www.hasegawausa.com/product-pages/hsgs7436.html |
| Content in box | Instruction sheet, plastic kit and decals for two different individuals. |
The Mitsubishi A6M nick named Zero by the allies was the mainstay Japanese fighter during WWII. It fought all through the war in different version all to the end. At the beginning of the war it outclassed most of the allied fighters, specially in the Asia theatre. Later on it got a tougher fight for more modern adversaries. I bought this as part of a project to build the main planes from the Battle Of Midway which was 75 years ago when I'm writing this. This kit, an A6M2b is the right version from early on in the conflict between Japan and the U.S. Alas it's the wrong markings for a carrier based plane from the Midway but some after market decals easily fixes this. Luckily enough the kit includes the extra fuel tank that I need though.
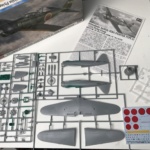
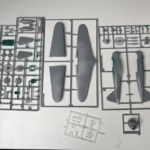
This kit from Hasegawa is a decent kit of the Zero. Notably better than Tamiya's A6M2 that I did some time ago. The Tamiya version has a few years more to the mileage and is cheaper to buy. Hasegawa's is notably better though. The kit is quite simple, it seems like it's in the nature of the Zero. The box contain three spruces plus one with the glass parts, the instruction sheet and the decals.
 |
 |
Cutting down on the extras this summer as my goal is to do at least eight kits and the extras would hurt my wallet to much. But as stated above I wanted to do a Midway version so some extra decals was needed. Now this is a challenge as the Battle Of Midway is not as popular as the Pearl Harbour so I had to do with:
Now this is a Pearl Harbour set but as the Midway was fought just six months later with the same carriers I thought that I'd sort it out. Unfortunately to verify whether the planes was still with them then turned out to be not that simple. Most cameras with photos of the Japanese planes at Midway went down together with the Japanese carriers so. A lot of web surfing turned up a few but not the ones on the sheet. Fortunately the decal sheet included in another kit, that of the Nakajima B5N2 Kate from Hasegawa came to the rescue.
I also saw the challenge in doing the cockpit hood as there's a lot of panes so I ordered:
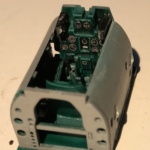
Yet again the kits sets out with the cockpit. It's built into a tub which will fit into the fuselage. There is decals for the instruments on the instrument panel, a lot better than one decal for the entire panel. The outlines of the instruments on the panel are raised so you have a choice of either file them down or use some decal solution like MicroSol to have them conform to the contours. I chosen the latter which came out OK. I missed seatbelts for the seat in this kit, not even decals. Usually I buy some after market ones but not this time. It didn't help that there wasn't any available. I didn't want to spend time making any either.
 |
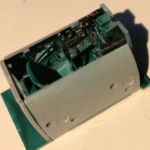 |
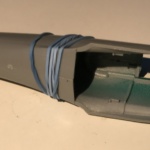
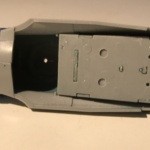
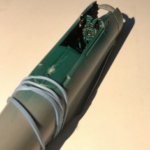
From the cockpit it's straight onto the fuselage. The main part comes as per standard in two halves. The fit is quite good but I recommend that you wait to add the cockpit until the two halves are cemented together properly. The instructions says otherwise but it's fully possible to insert it later and makes it easier for the joints in the fuselage to harden tight together. The wings leaves some small joints that need to be filled but nothing too serious.
 |
 |
 |
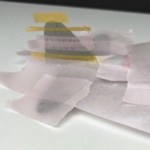
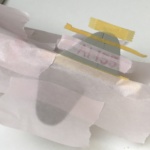
Now, time to put some colour on. First, masking the hood. Now this is when the paint mask for the hood really pays off. Doing the Zero's hood with ordinary tape and a knife is not easy (I know as I did this on the Tamiya's Zero some time ago). I want to do the kit with the hood open so I only glue the front and aft parts before painting. The cockpit I fill with tissue paper.
The paint scheme on the early Zeroes is super duper easy. Just one colour except for the engine cowl and if that falls off because you didn't glue it on properly then it's even easier. 😉 The over all colour is:
This colour is also available in Vallejo's Model Air set 'Imperial Japanese Navy (IJN) Colors' (ref. 71.169) which is a handy set if you're building more than one of the Japanese planes. This set also includes another version of the grey, 71.311 IJN Ash Grey, which reflects the same colour but in a shade it became after some use. The afore mentioned engine cowl is black. Or to tell the truth blue-black metallic as I later learned but for this kit I stuck with black.
 |
 |
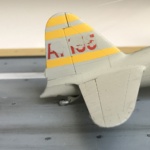 |
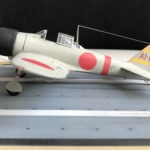
Now the decals. I had to do some puzzling as I mentioned above but finally managed to do a plane that I know was in the Battle Of Midway. The only thing I didn't find was the correct yellow stripes on the tail fin so I decided to mask and paint these instead. This is when disaster struck. When I removed the masking on the right side the letters and number decals came off. Despite some layers of protective matt varnish. At this time I don't have a solution for this (I used up the applicable decals) so I just have to display the left side.
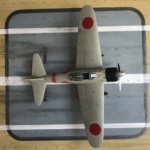
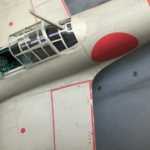
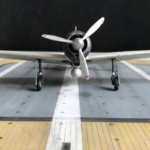
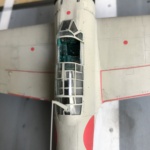
Remains to add the landing gear, propeller and small details. This is a quite straight forward affair and no special problems. The finished kit looks good and marginally better than Tamiya's counterpart. Here's the result:
 |
 |
 |
 |
 |
Hasegawa's A6M2b 'Zero' is quite a simple kit. Straight forward and no thrills. The panel lines looks good an are not to exaggerated. The kit as such is better than Tamiya's Zero. It feels like it have to do with the age difference. Things like that the rudders is fixed and not separate parts are things that weighs down a bit on the over all impression.
| Difficulty* | 1 |
|---|---|
| The good | An over all very good kit that fits together well and is OK detailed. |
| The bad | Could have been more parts, like separate rudders etc. |
*) On a scale 1-5 where 1 is easy and 5 is really hard.
