| Manufacturer | Tamiya |
|---|---|
| Product # | 61110 |
| Scale | 1/48 |
| Scale Mates model info | https://www.scalemates.com/kits/tamiya-61110-mitsubishi-g4m1-model-11--133957 |
| Content in box |
|
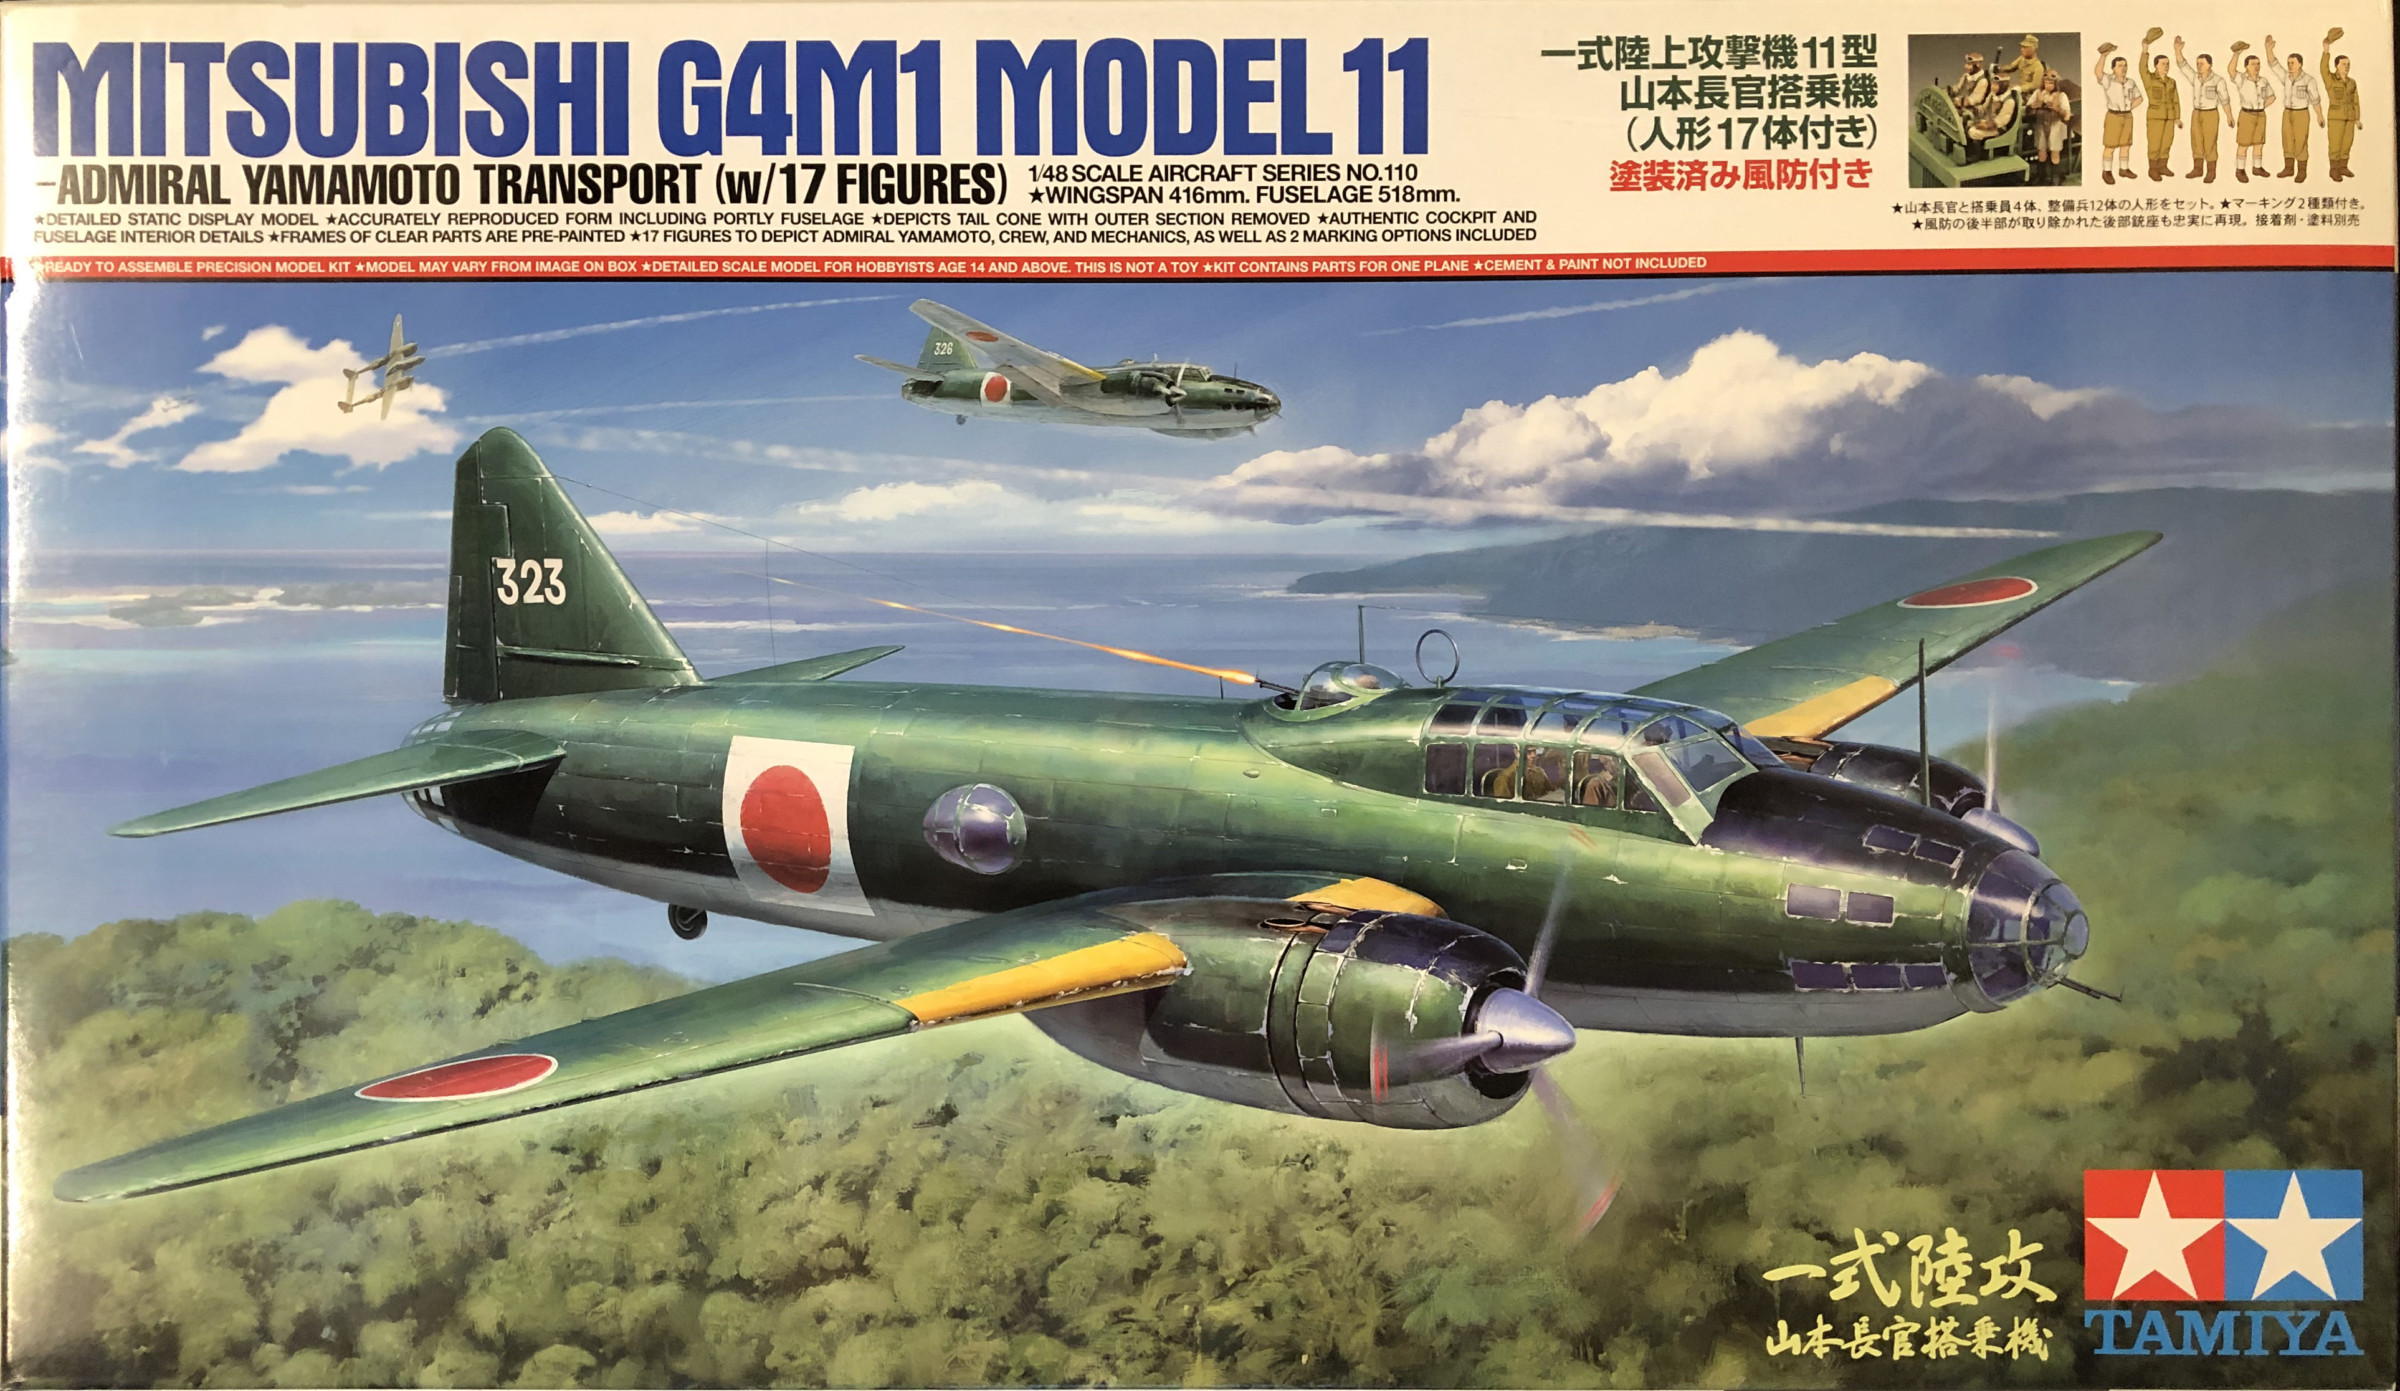
This kit was first released in 1996 and a new version (this one) was released in 2011 with new parts and decals.
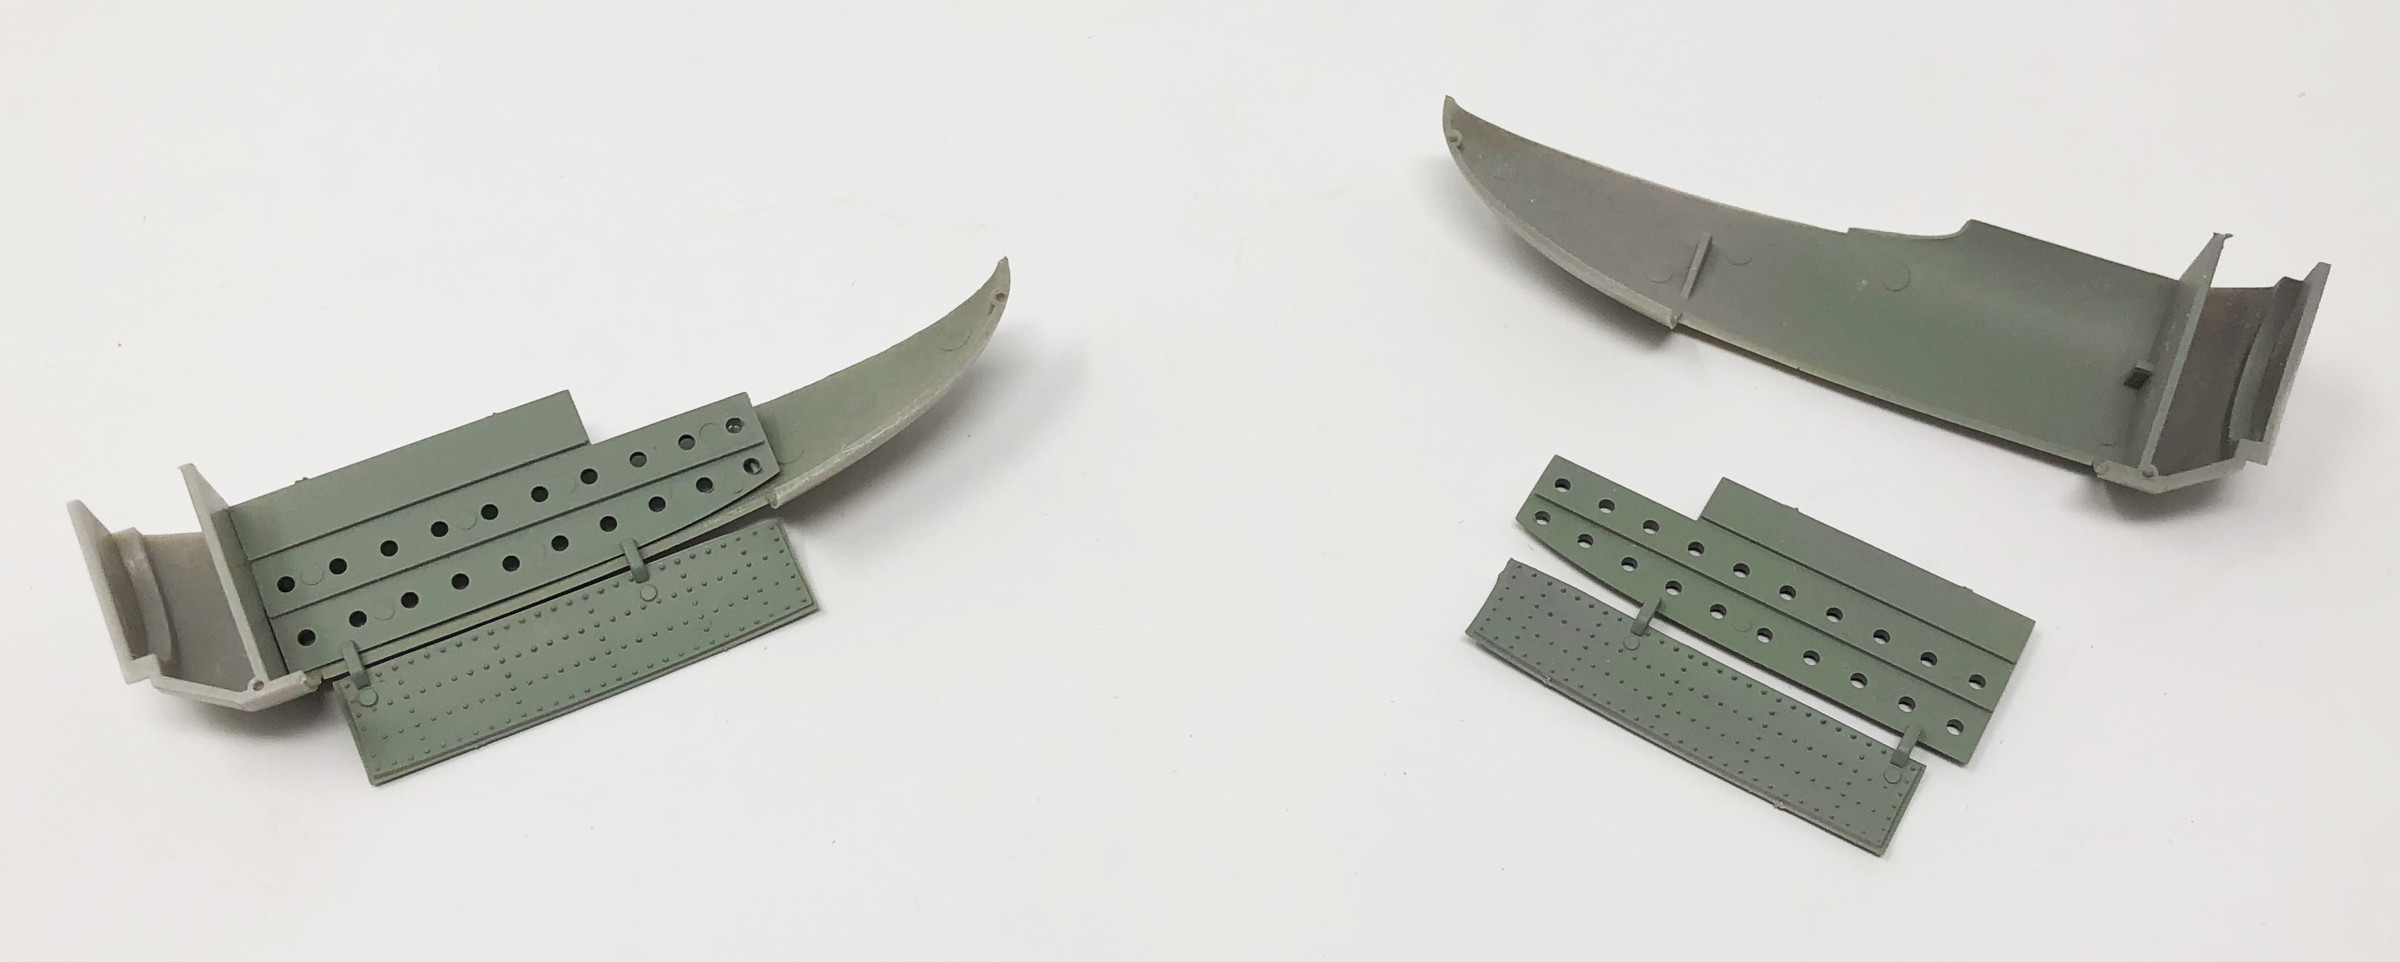
This is a well moulded kit with reasonable detailing. The parts come together well and Tamiya has done a few good solutions when they engineered the parts. The extra securing pins when you fit the wings to the fuselage for example is very helpful when you mount them. Also having the landing gear doors fixed to the interior walls of the wheel wells is a stroke of genius. No troublesome doors that will keep falling off.
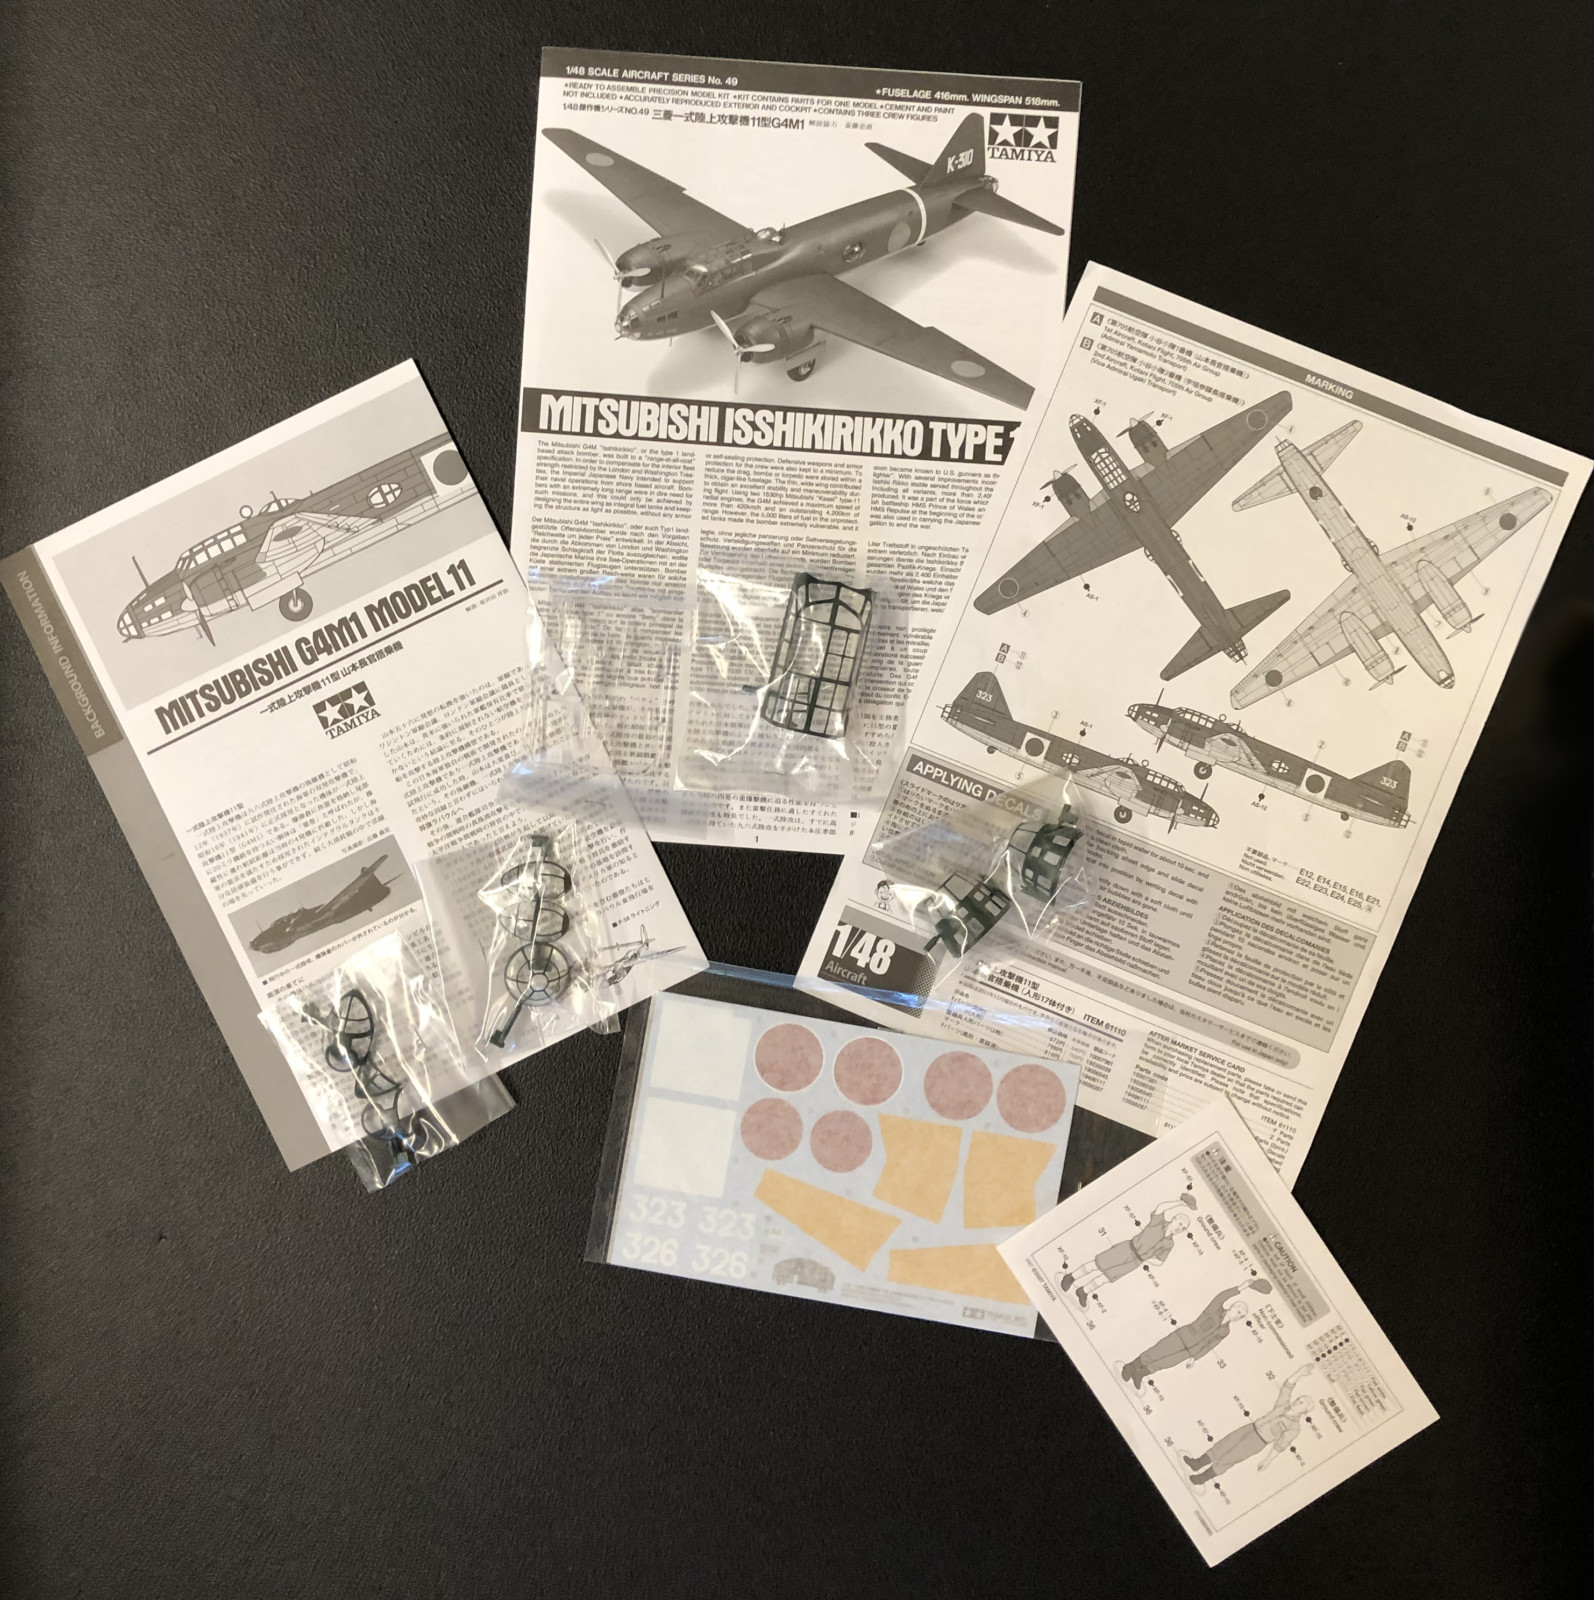
The box also comes with alternative, pre-painted, clear parts. This saves you the trouble of masking and painting them. The instructions are clear with some clarifying text. There is an extra sheet that clearly explains how the Yamamoto version differs from the original kit (the one released in 1996). Also included is a sheet which in different languages tell the story of the Yamamoto killing.
The decal sheet has decals for three different markings:


The cockpit has a reasonable detailing considering it is quite visible after the fuselage is closed. Of course you can always detail it more but I settled for only adding some seat belts to the chairs. The kit contains several figures to place in the machine including Admiral Yamamoto. I never place any figures in my machines but it's nice for those that want to. They even supply twelve figures to stand out side the plane to wave it off. The Japanese are sure a friendly bunch as most Tamiya kits include people waving off their planes.
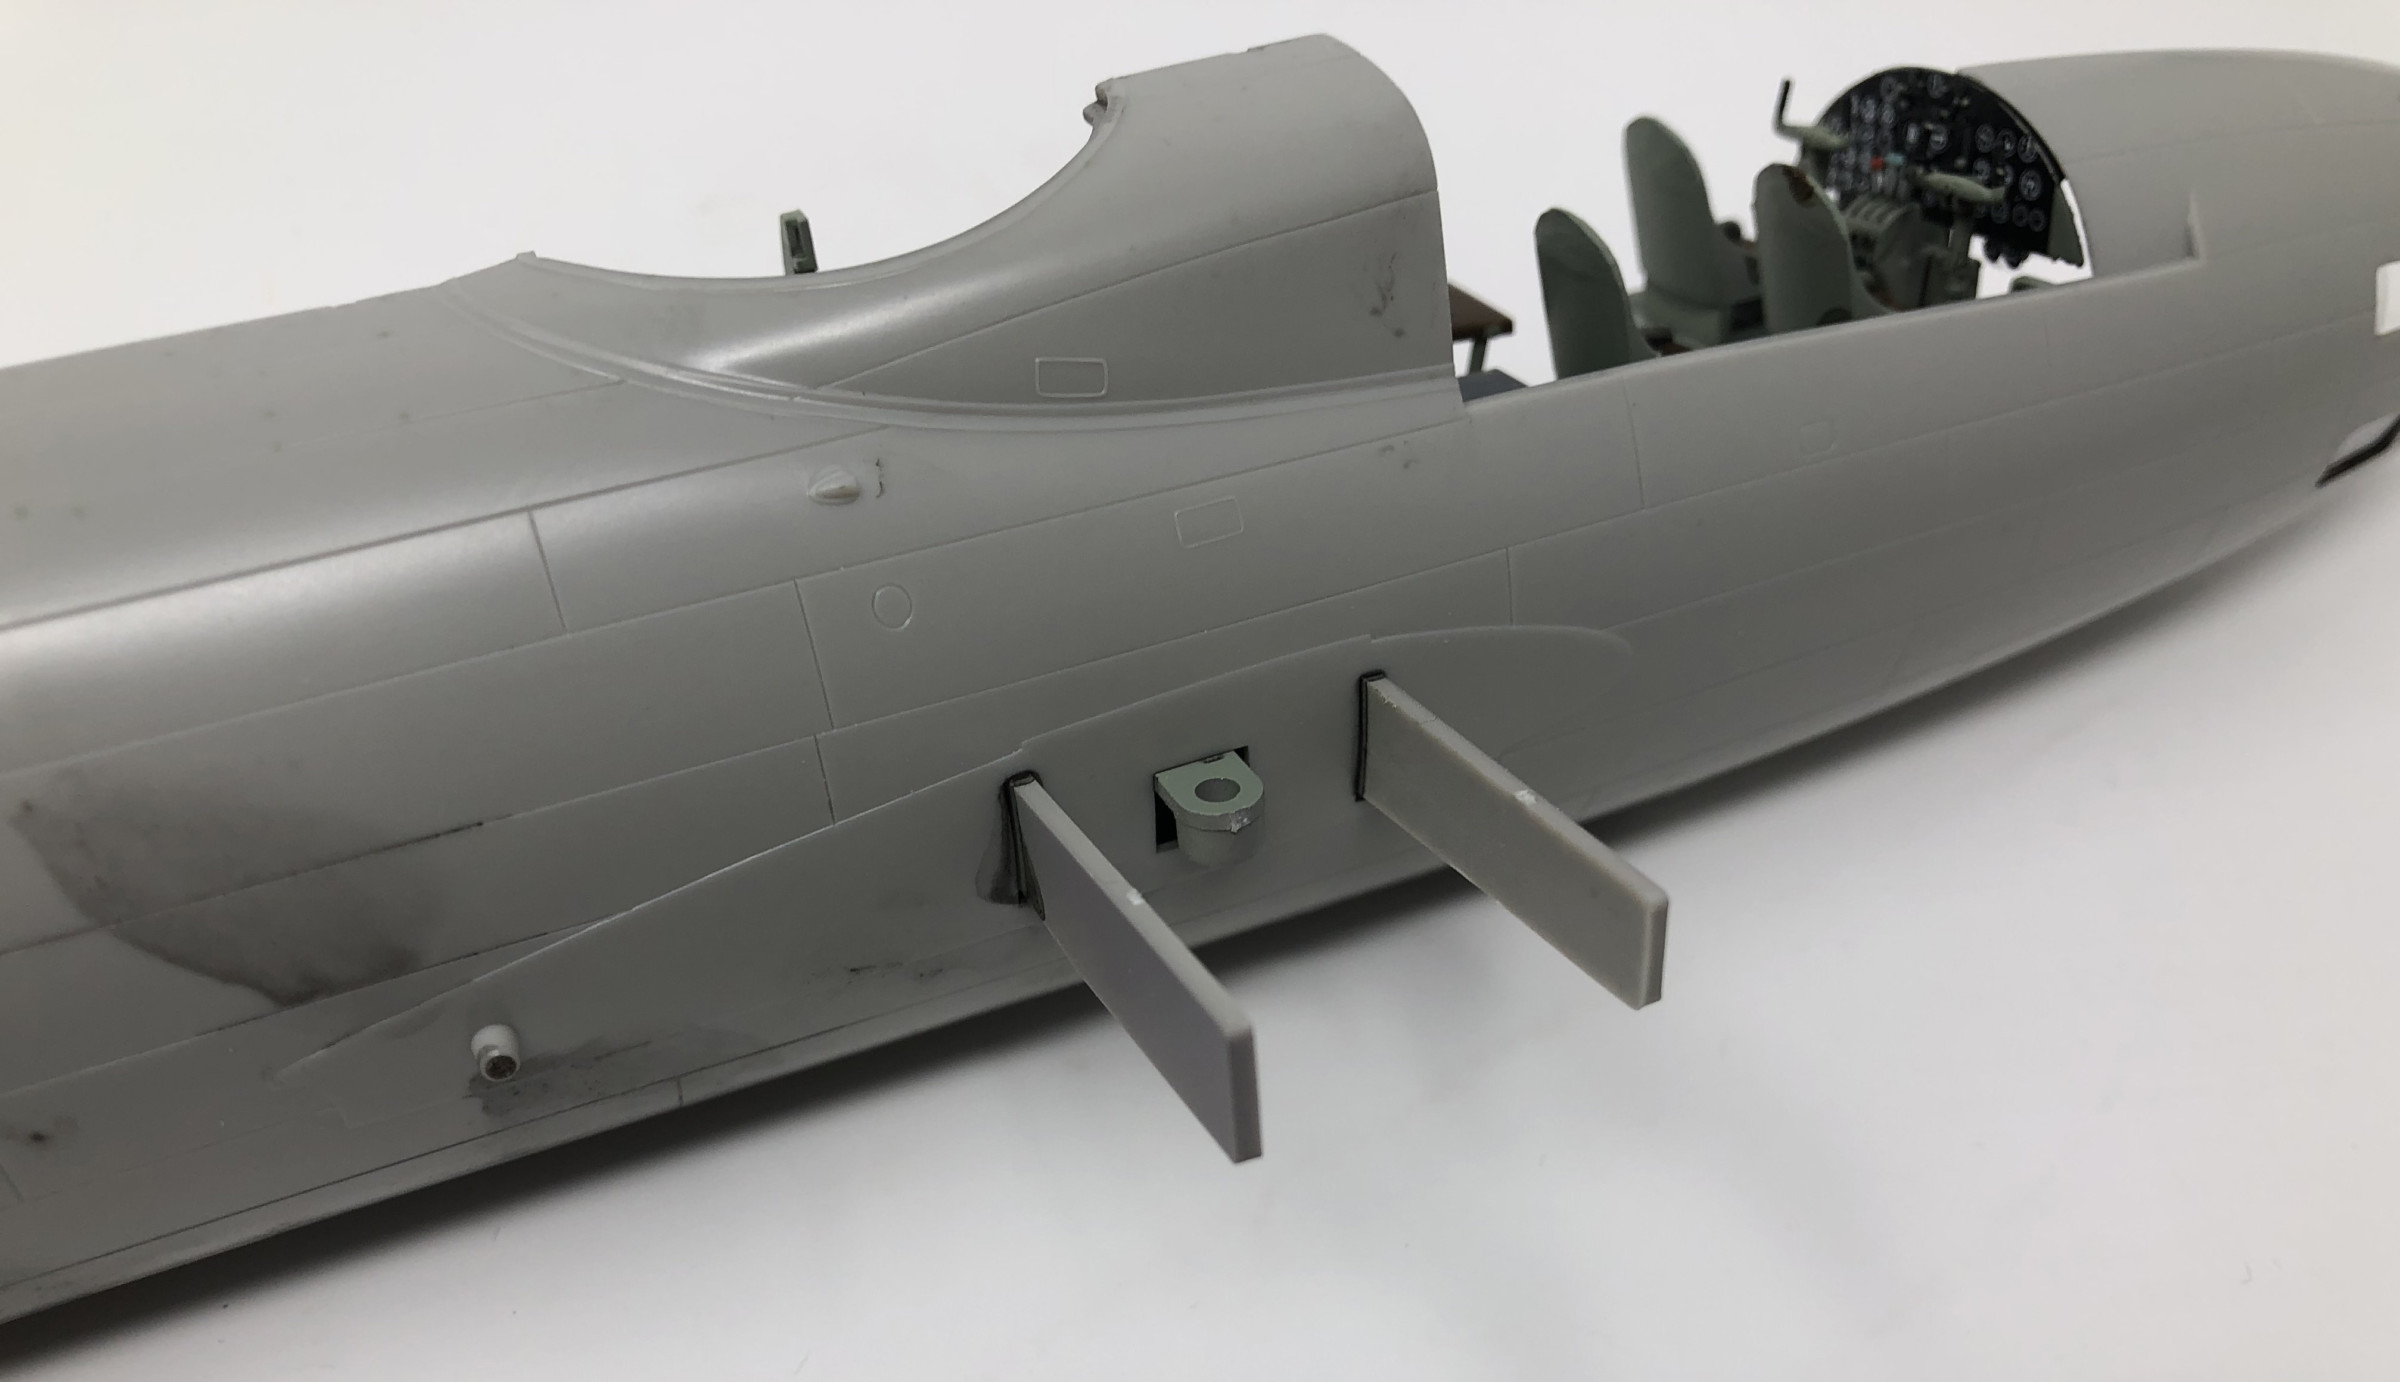
Getting the fuselage together around the interior went as a breeze. The interior also include two wing spars sticking out to keep the wings in place. Putting the motor gondolas together is a pleasure. The inner walls are cast in one piece with the landing gear doors (see picture to the left). This is the best solution for the tricky doors I've seen so far! Beside the wing spars there is also a loop ring protruding from the fuselage into which you stick a pin when attaching the wings, locking them into place. Also a very ingenues idea. The landing gears them selves are also mounted after you've done the motor gondolas which enables you to paint the model first.
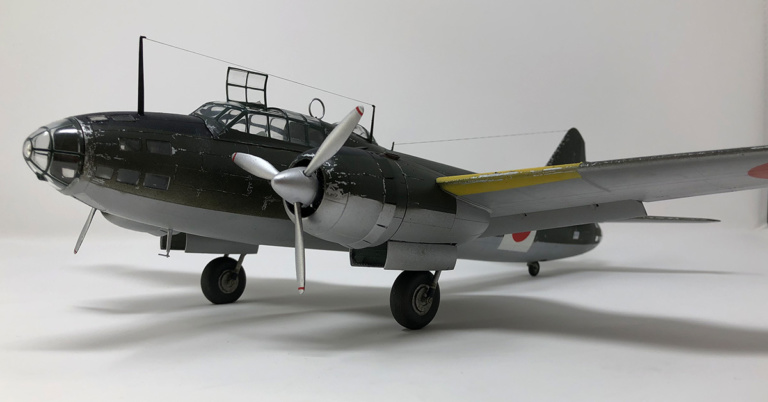
The Japanese usually did not prime their aircraft before giving the the final paint coat. This often resulted in the paint pealing off in places. I thought I'd try to do this effect using a method I had not tried before. After giving the kit an over all black primer coat I painted the whole structure in an aluminium coat. After this I air brushed Vallejo's 76.550 Chipping Medium over the kit. As usual I'm using Vallejo's Model Air and I tried to find the best Japanese colours:
I also decided to mask and paint the national insignia's as they are quite easy to do in the Japanese case. After that I used a brush to wet the painted areas with water in strategic places and then used a tooth pick to chip away flakes of paint to uncover the metal surface underneath. I'm quite pleased with the result. Adding a gloss coat of varnish to protect the work and to apply the few decals beside the national insignia's and then finish off with a coat of matt varnish to get the right surface.
Adding the details as landing gear, propellers, antennas etc. and then a few finishing touches and the kit was done.
It's the better of the two P-38 kits available in this scale. Clear instructions, well moulded parts and good fitting parts.
Parts are well done and it comes together nicely.
The instrument panel cover that isn't really there on the real plane and an erroneous identification number on the tail.


