
| Manufacturer | Tarangus |
|---|---|
| Product # | TA4805 |
| Scale | 1/48 |
| Scale Mates model info | https://www.scalemates.com/kits/tarangus-ta4805-sk61-sa-bulldog--999102 |
| Content in box |
|

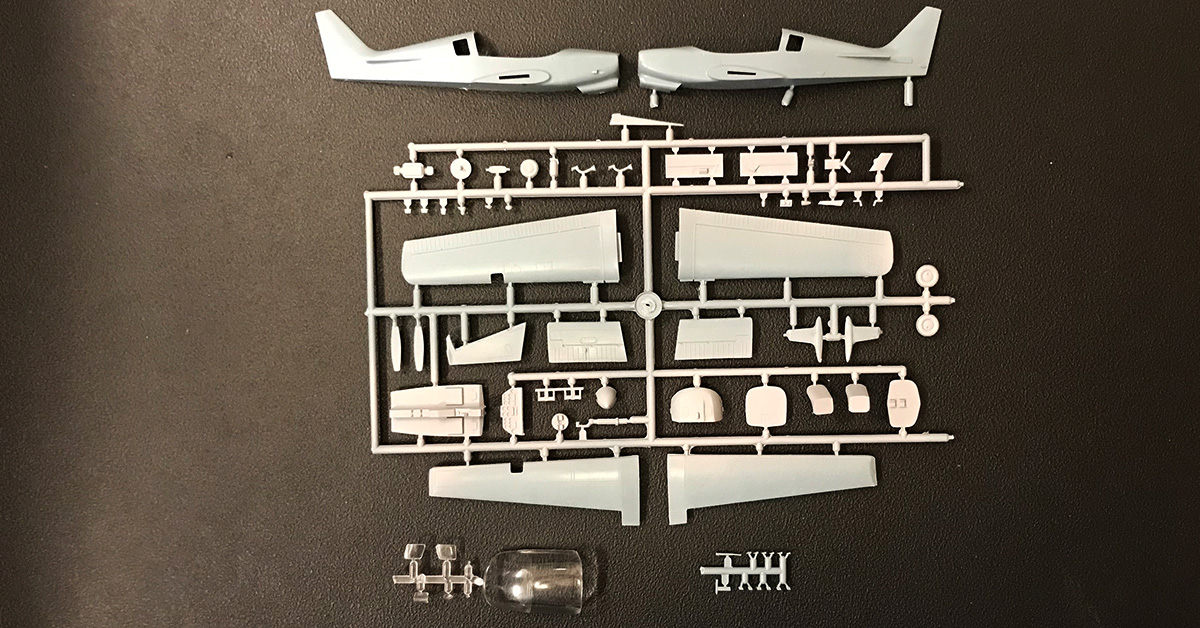
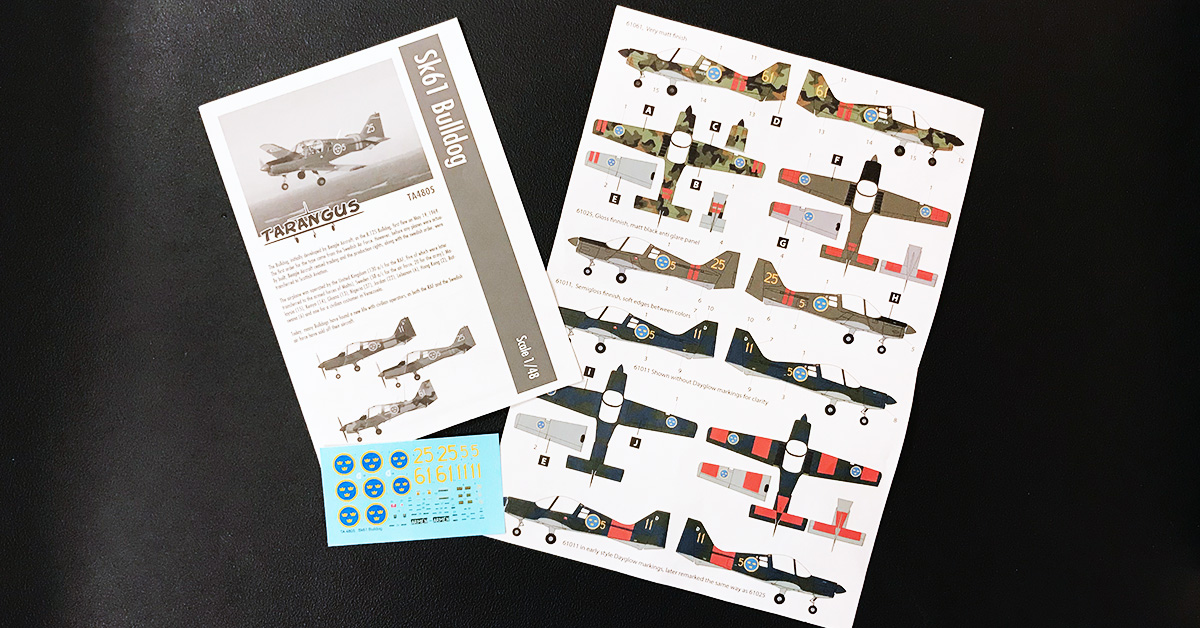
This kit was first released in 2016 in this version with Swedish markings, it has later been released in a box with RAF markings. It contains one grey sprue with the parts and an additional small sprue with the tiny parts on. The fuselage halves comes separate. One clear sprue contains the large canopy and some smaller details. The painting instructions are printed in colour.
The parts are reasonable well moulded with okay detailing. This is not a large aircraft in real life and some parts are really small. You'll need good eyes and a clean desk when you do this. The detailing inside is reasonable, and it needs to be as the big clear hood will leave it visible.
For being the only available kit in this scale it's not a bad kit. As it's quite small you'll need to handle small pieces.
The decal sheet has decals for three different markings:
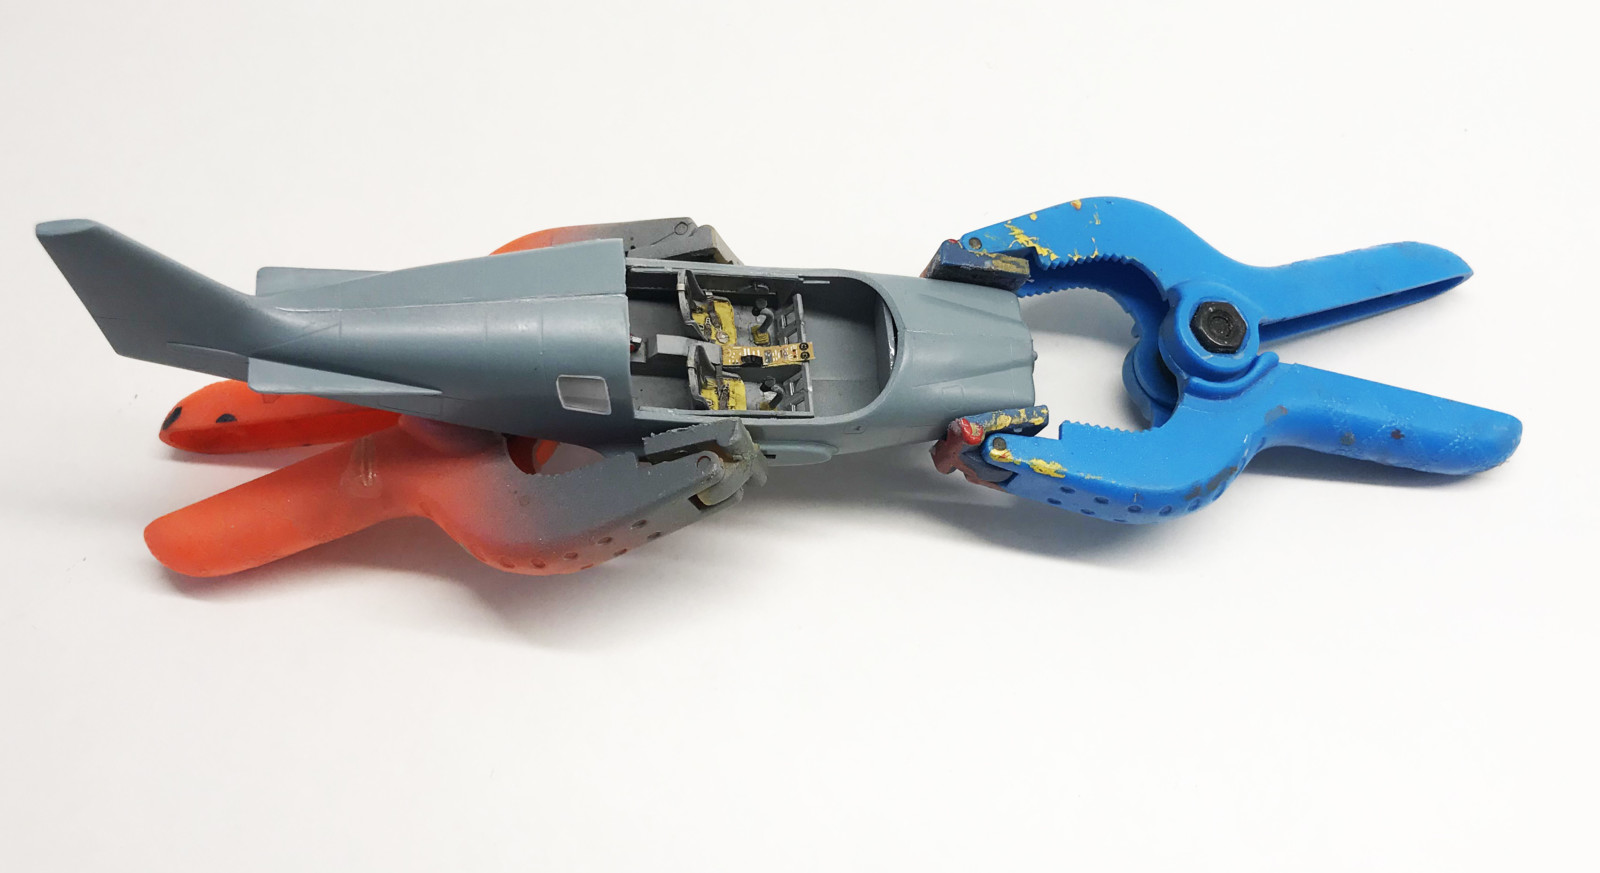
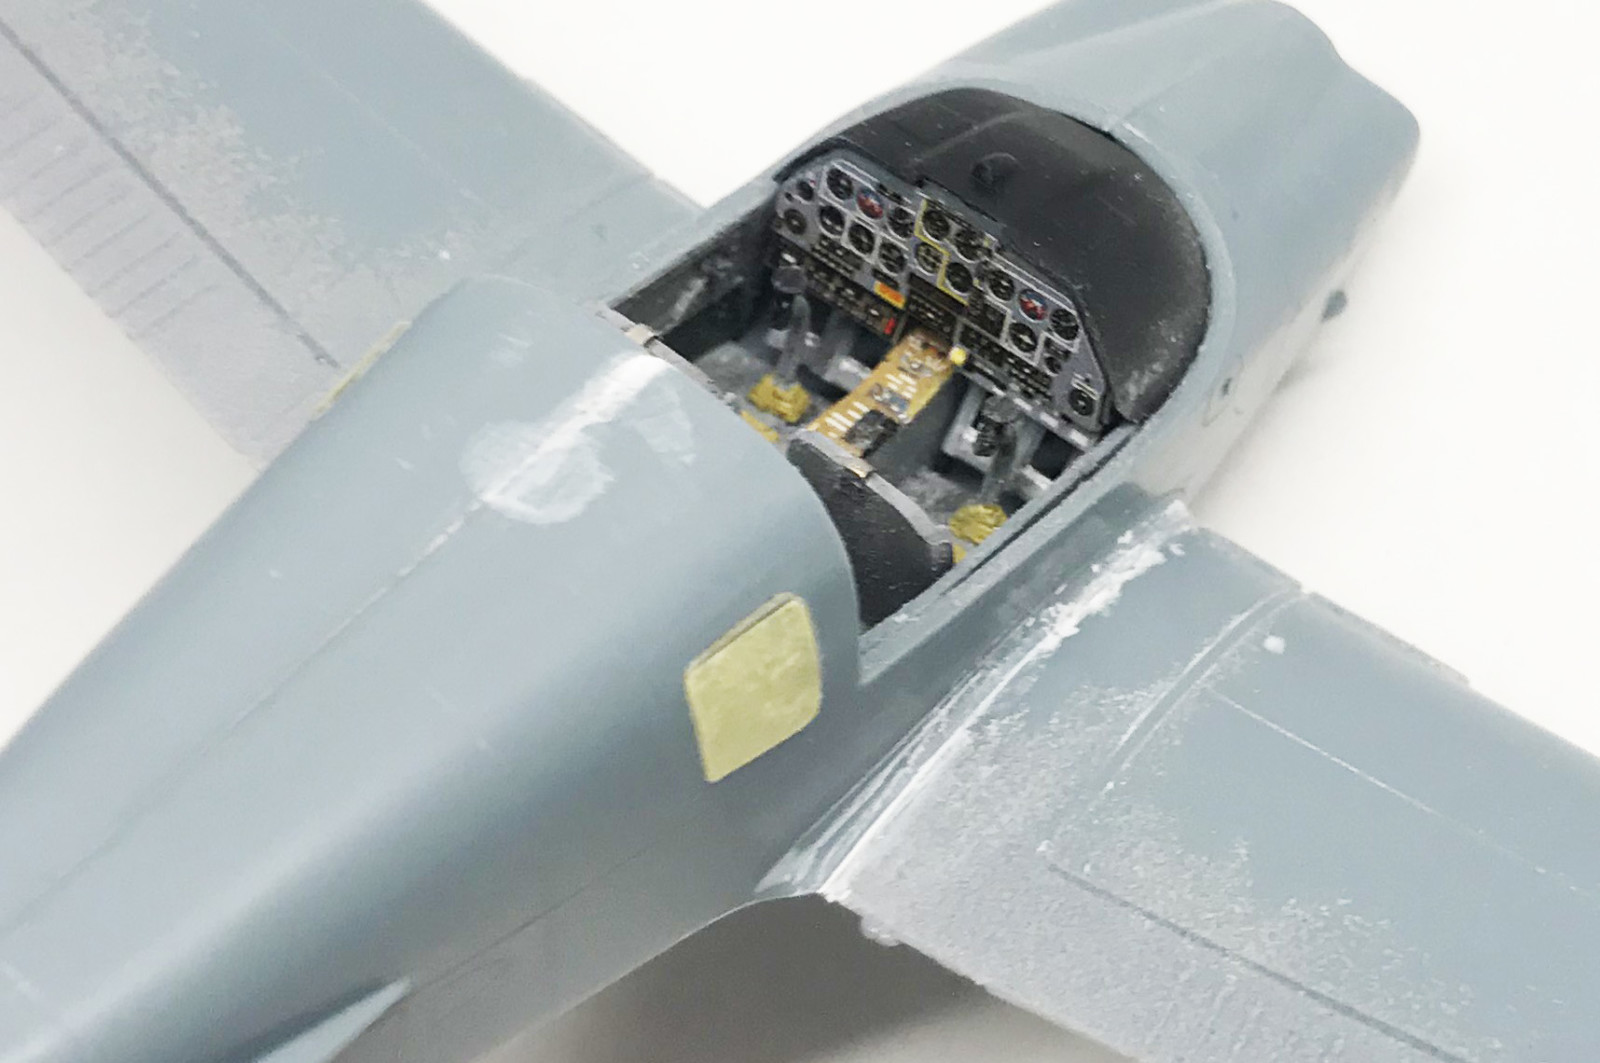
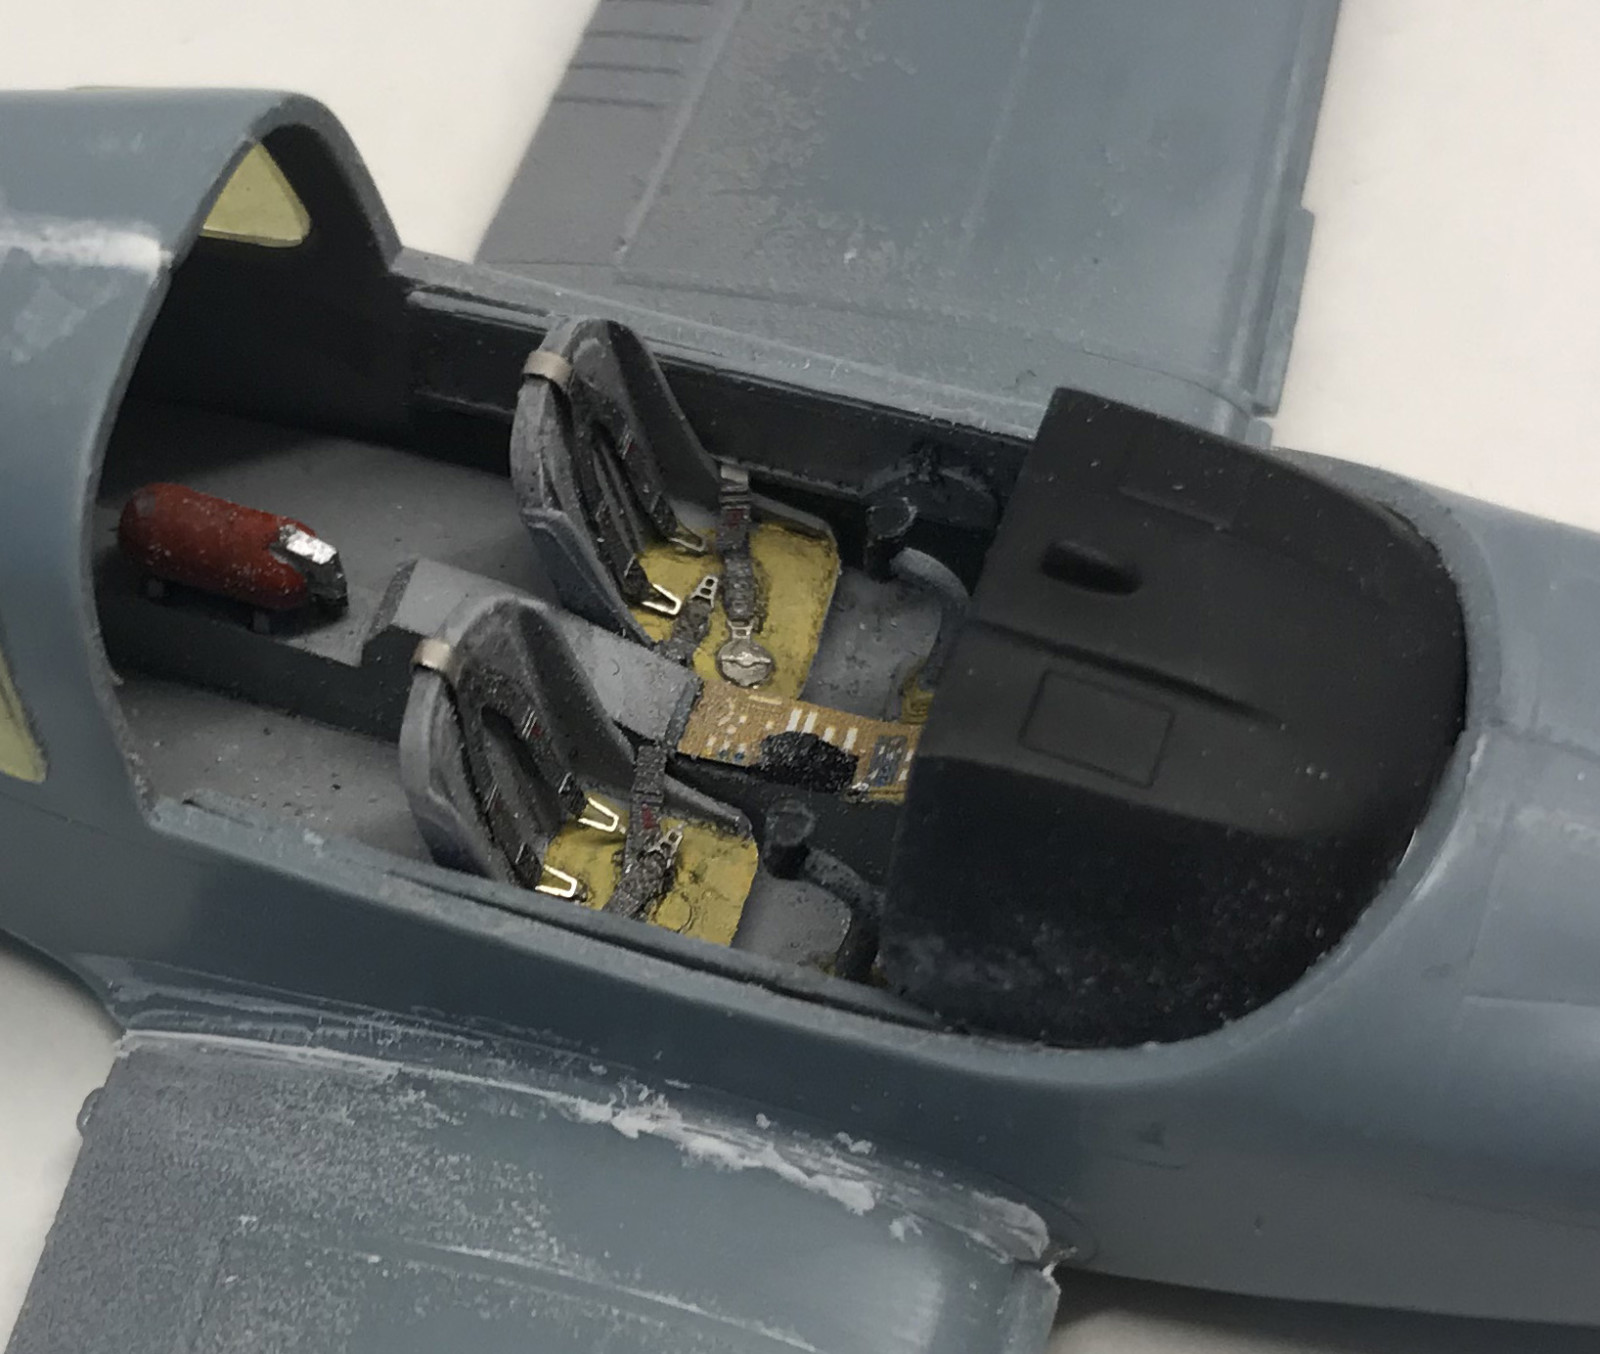
For this kit I bought some after market stuff, such as pre painted etched metal parts for the cockpit and a paint mask set. The cockpit detailing parts, such as the instrument panel, seat belts etc. is well worth it this time as the large canopy will leave the entire inside visible, even if it comes in one piece so you have to do it closed (if you're not into masochism). Otherwise the cockpit is quite simple, the reason being that it is in the real plane too.
The engine is just a front part. Not really exciting. Even if it's not really visible it would have been nice if there had been a whole engine. It is a bit hard to get in place. The good thing though is that this leaves place for some BB gun pellets in the front to keep the nose wheel down when you put it on display later. These are easy to insert after assembling the fuselage through the hole where the nose wheel goes in later. The weight is really needed as the main gear is placed forward of the middle. The The fuselage is hard to get around the interior and better done in stages starting with the tail and then using clamps and Tamiya's Extra Thin Cement.
The wings fits okay but some filling is needed, also some attention is needed to the angle of the wings. The two windows behind the canopy and the landing light glass is hard to fit. Again Tamiya's Extra Thin Cement comes to it's right. Masking the canopy with the mask tape and liquid mask. It goes on before painting as it will be closed.
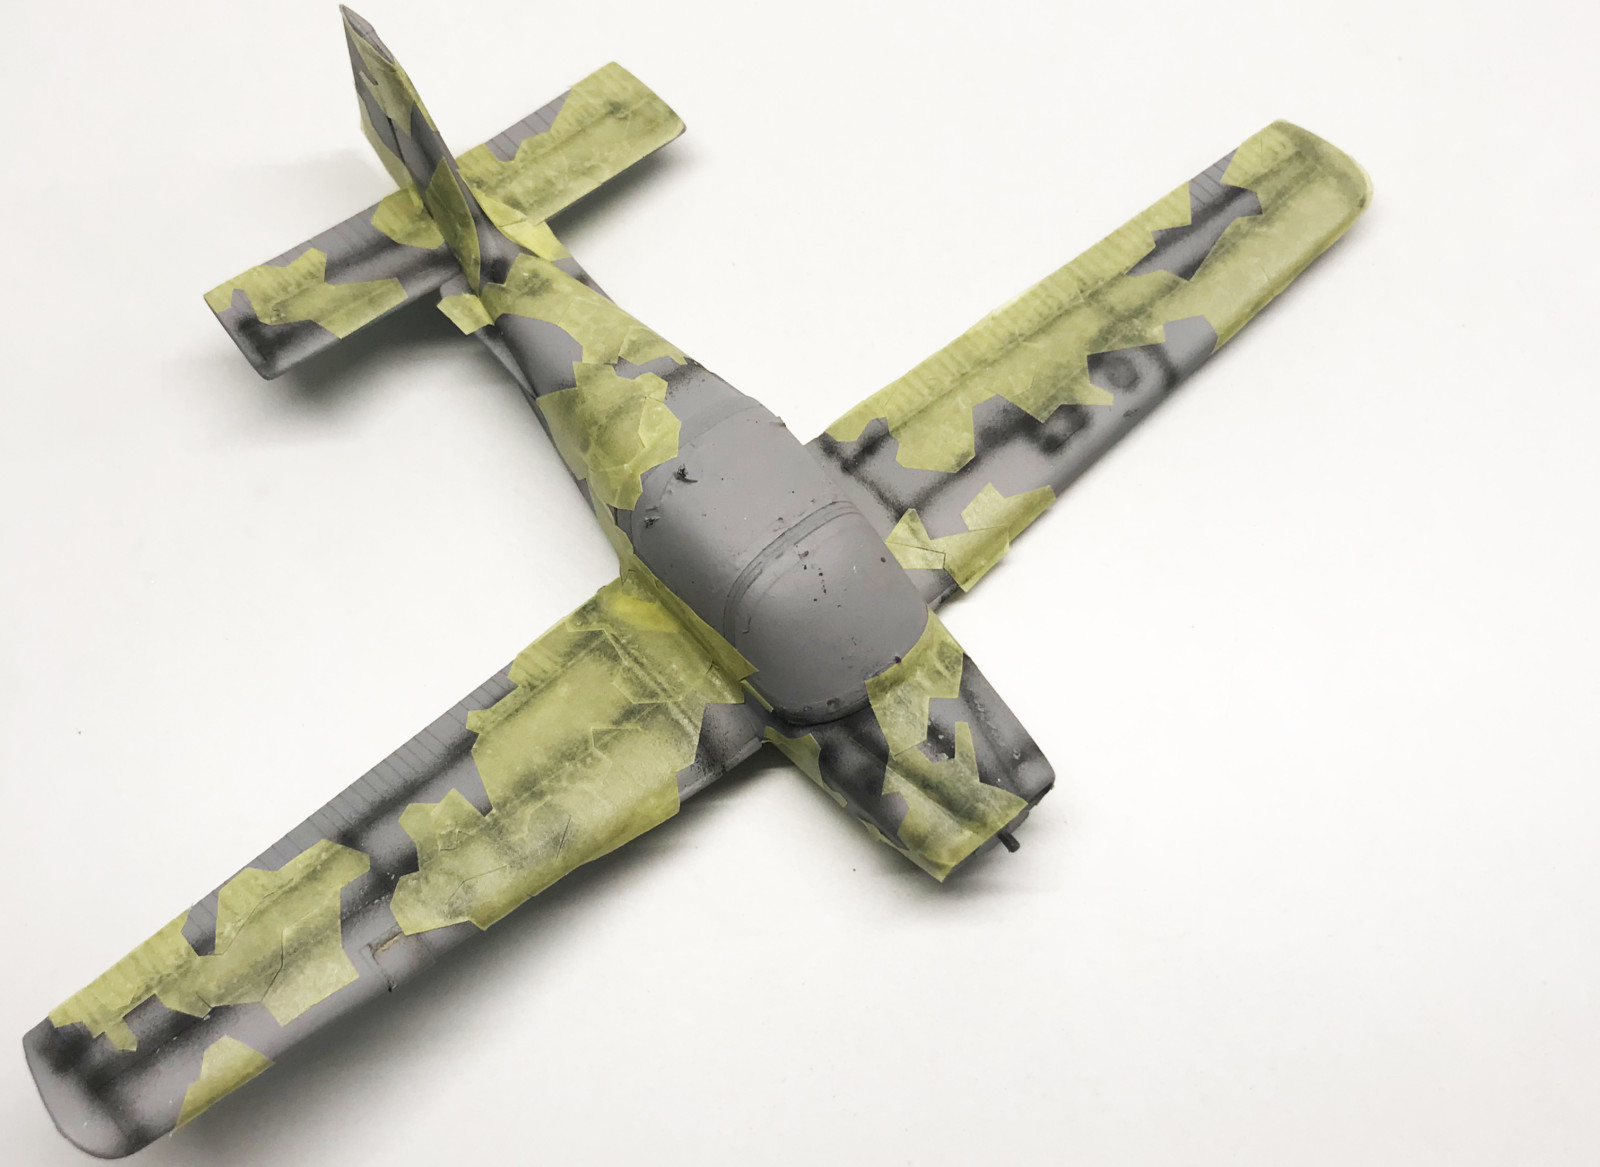
Now painting... I went for the tough one this time. The Swedish splinter camouflage. Choosing the colours was not easy. Ploughing through a lot of references on-line, cross referencing and stuff I finally landed the following Vallejo Model Air colours:
I thought I'd make it easy by buying a pre cut paint mask, but no. It obviously needs more skill than I had. Even if I tried to be meticulous removing and replacing the different patches it still came out with gaps between the different colours. And when I finally removed the whole mask I'd missed a couple of patches which gleaned with grey surface primer. So a lot of tape cutting and re doing a lot of patches. Half way through I also noted that the colour I first chose for dark green was completely the wrong shade so I had to redo all those (to 71.014). For the day-glow areas I first did a layer of white primer and then did them with 71.082 Fluorescent Red with a white coat of primer beforehand. This is a very thin colour and needs many layers to look decent. Next time I thing I'll paint it on an orange surface.
After that ordeal it was time for all the nitty-gritty details and propeller and the landing gears. Here is where the bad sides of the kit really shows their faces. The two of my wheels lacked the middle hole to attach the so I had to drill them. And the propeller is a horrible construction with blades that should be glued separately to the back part of the spinner. It takes some skill to get them in the right angle. Also the back part of the spinner also lacked the required hole so it was reverting to the drill again.
On one hand I appreciate that Tarangus produce rare kits like this one and the Saab 91 Safir, I only hope that they could learn a thing or two from Pilot Replicas.
This is the only kit available of the S. A. Bulldog in this scale so there you go. It leaves a bit to wish for by today's standard. The kit design feels a bit older than it's 2016 release date.
It's a plastic kit of the S. A. Bulldog.
Could have been more detailed and a better better mould.


