| Manufacturer | Hasegawa |
|---|---|
| Scale | 1/48 |
| Scale Mates model info | https://www.scalemates.com/kits/962752-hasegawa-19197-nakajima-e8n1-type-95 |
| Content in box | Instruction sheet, plastic kit and decals for two individuals (or more) |
The Nakajima E8N (designated Japanese Navy Type 95 Reconnaissance Seaplane Model 1) was a development of the E4N that flew in the Imperial Japanese Navy (IJN) in the 1930's. The first prototype of the E8N first flew in march 1934. It was ordered into production in October 1935. During the late 1930's it became the main stay reconnaissance plane aboard the IJN battleships, cruisers and tenders. It was used successfully in the Second Sino-Japanese War not only for reconnaissance, but also for dive-bombing and artillery spotting. The Germans purchased one plane which was deployed on the cruiser Orion. When the war in the Pacific broke out IJN had started to shift out the E8N in favour of newer E13A (see this review) but many was still in use as secondary planes. It was used for a small part in the Battle Of Midway.
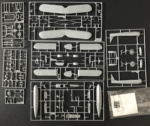
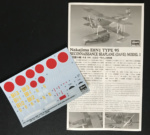
The kit is from 2015 and quite good. It has been released twice since, once as E8N2 and once with options for both E8N1 and E8N2. But the original release is the one that is still generally available. The box contain the plastic spruces, one clear, instructions and decals. There are two decal options, both from 1938, one of a plane from Battleship Kirishima and one from the tender Kamoi. The kit is well moulded and detailed. Still I completed it with some after market parts, mostly cockpit enhancement but a few notable external details. This is the kit I used:
 |
 |
Unfortunately I mostly missed out on photo documenting the build as I was so concentrated. Because this is a kit that needs concentration. Well to begin with it's a double decker, and I always find them daunting. On top of that it has pontoons, one large and two smaller, also attached with struts. Well but I'm getting ahead of myself.
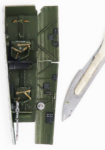
As most kits we start of with the cockpit. This is detailed out of the box and as most of it won't be visible when the fuselage is closed that's just fine. Still I used the metal etched parts from Eduard. And here it is:
 |
 |
Lacking pictures I will now try do be as descriptive as I can. Usually I do the kit with the exception of landing gears, propeller (if there is one) and any ordnance before I paint it. Doing a double decker it gets a bit more complicated. First I did the fuselage with the lower wings and tail. They went together quite well. Hasegawa has put some effort into getting the joints to go along the natural structure.
The parts go together well and the need for filling and sanding are virtually non existing. This goes for the upper wing and the pontoons too. I put some extra weight in the front part of the main pontoon. The kit comes with a trolley to place the model on but also a bore to support the back part of the pontoon as the model is tail heavy. But I wanted the kit to rest on the trolley alone.
Now, at least if you're using airbrush, this is the time to stop and think. If you continue with the upper wing and the pontoons you will have trouble with the painting. My limited experience with double deckers also told me that trying to do the struts at both end simultaneously is a doomed project. I decided to glue the struts to the underside of the upper wing, taking care that they set at the right angles by dry fitting them to the lower parts. I also glued the struts for the main pontoon to the fuselage, dry fitting to the pontoon. This is also good as the struts should have the same colour as the lower parts. I also left the engine off as its open in both ends.
Choosing the colours this time I went straight with Vallejo's recommendations as I had a set of Imperial Japanese Navy (IJN) Colors from them and one of their examples was an E8N. These are the Vallejo Model Air colours I used:
Having done the colours it was time to start thinking about the rigging. Now here's my biggest issue with this kit. Hasegawa is pretending like there was no rigging. Nowhere in the instructions are there any hints about it. I can understand if some are fine with this (I would have been in an earlier modelling life) but I feel that the instructions should at least show where it should go if you wanted to do it. I had to do some internet searching to find references on what to do. Rigging is a slow work involving (in my case) sewing thread and CA-glue. Now if you're new to this I recommend you find a couple of YouTube films on the subject. For now lets just say that the rigging took as long as the rest of the kit.
Doing the rigging also involved attaching the upper wing and the pontoons. After this it was just a question about attaching the engine and the last small details.
This is a very good kit. But the subject is a double decker with pontoons on struts making it inherently complicated. If you want to do the Nakajima E8N in scale 1/48 this is the kit for you.
| Difficulty* | 5 |
|---|---|
| The good | It's a very good kit that is quite well thought thru. |
| The bad | There are no mention about the rigging, and certainly no pictures, that should go with this kit. |
*) On a scale 1-5 where 1 is easy and 5 is really hard.
